Your User Profile
In Yapi Leap, your Profile contains basic information about you - including your name and the email you use to log in - as well as other personalized settings. What you're able to view and edit on your Profile depends on whether you're a User or an Admin.
Tip
Not sure if your an Admin or a User? Click Settings in the left-hand menu. If you see "Profile," you're a User. If you see "Users," you're an Admin. 😊
Parts of the Non-Admin User Profile Page in Leap
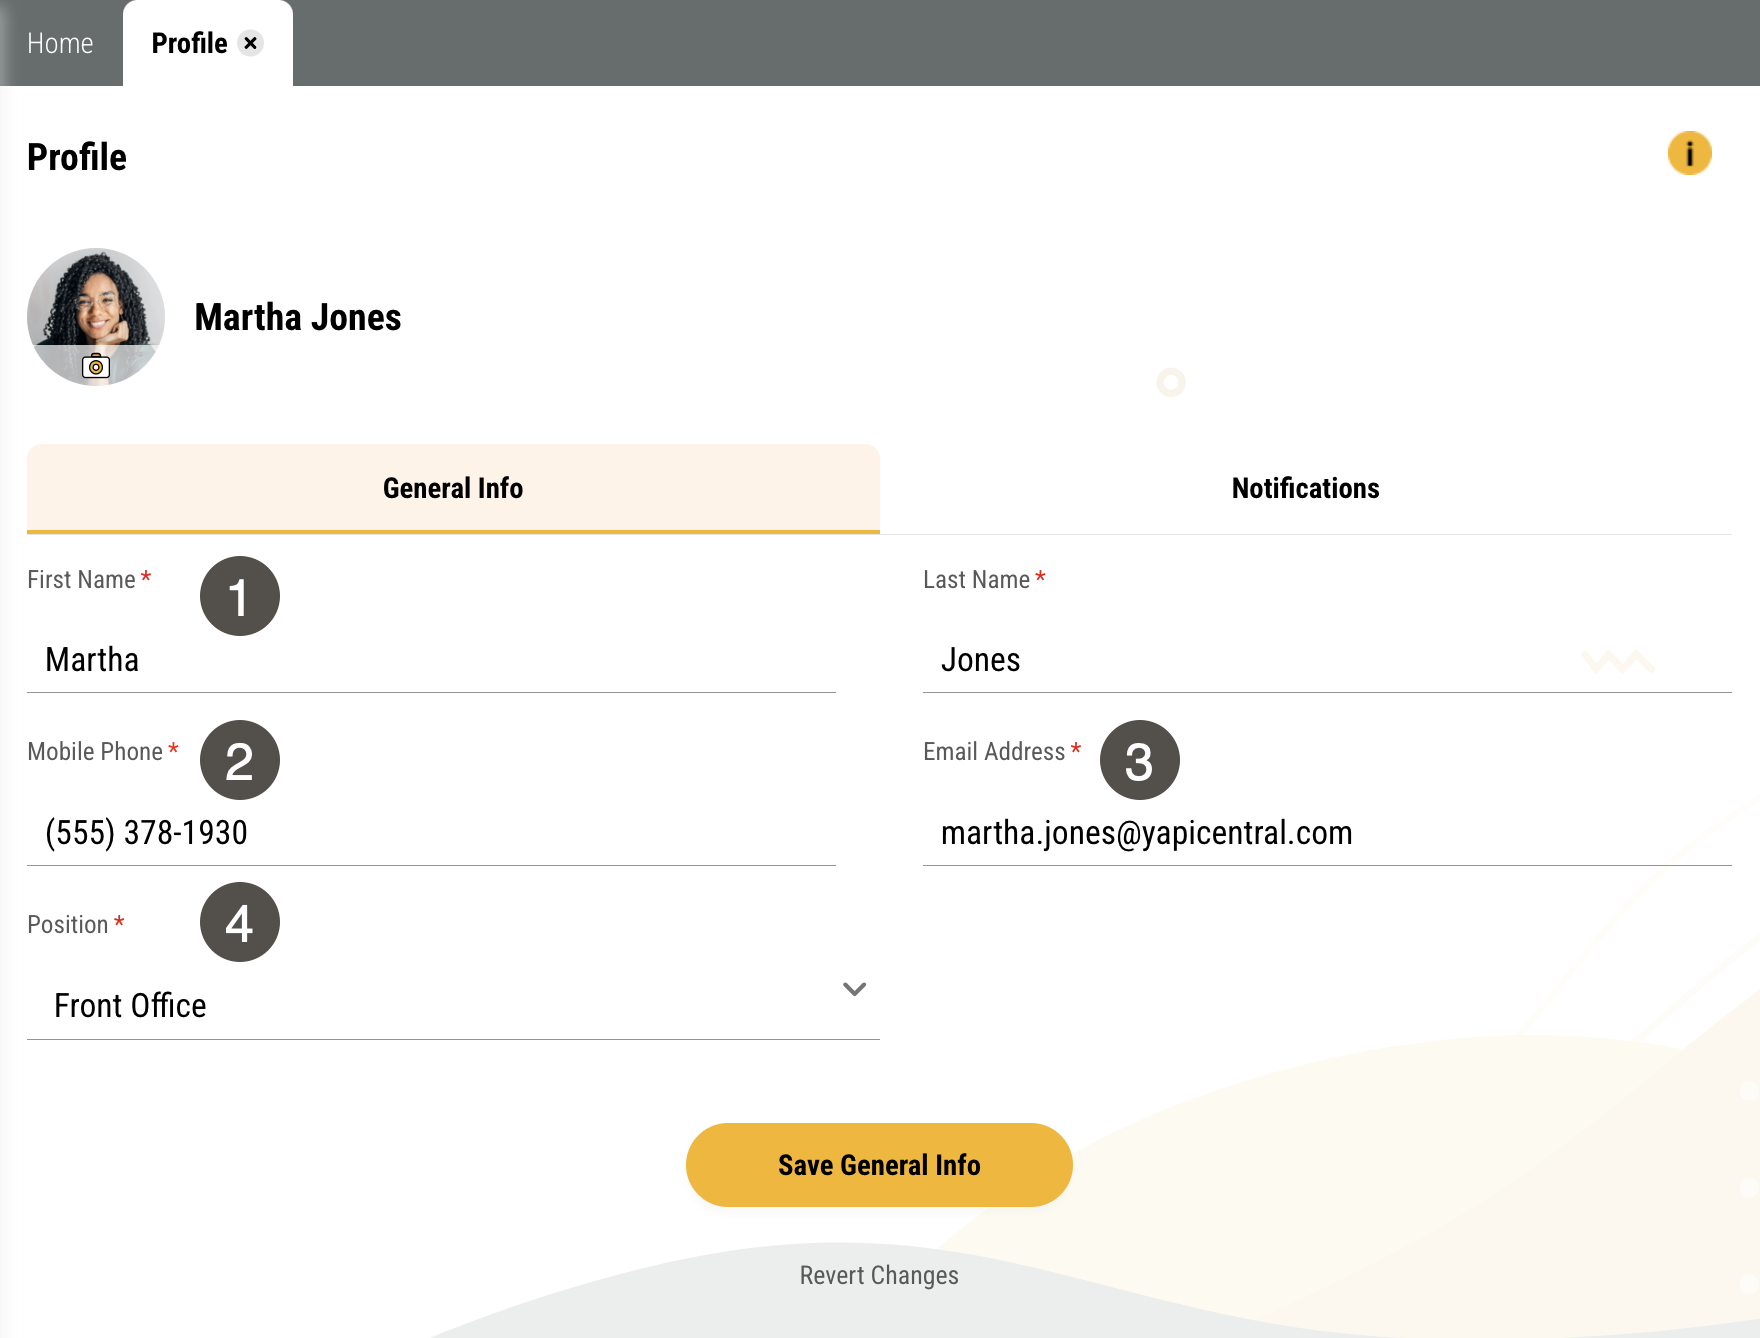
To get to your Profile page, click Settings > Profile.
To get to the General Info tab of your Profile, click Settings > Profile. The General Info tab shows by default.
|
| |||||||||||||||||


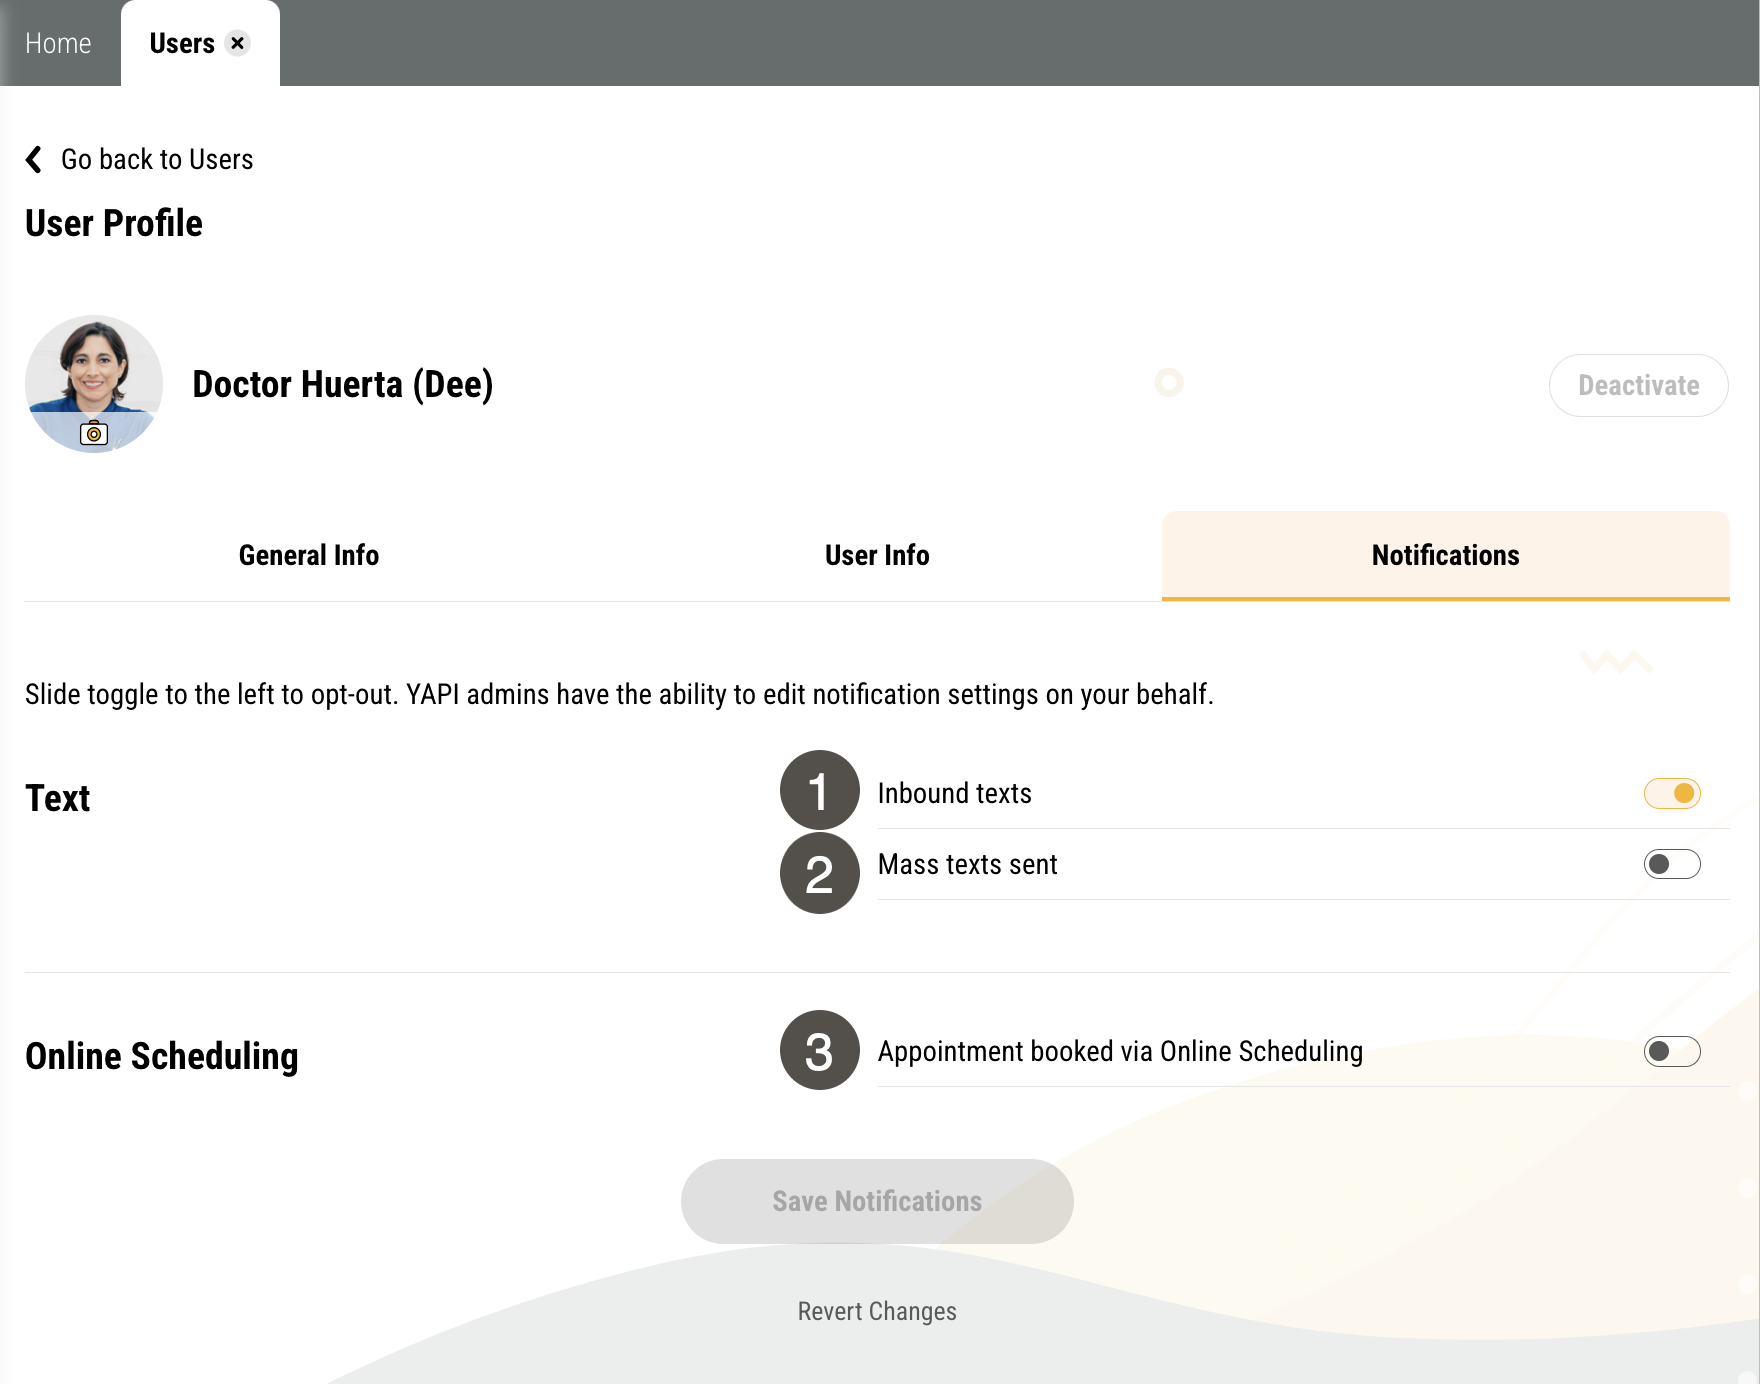
To get to the Notifications tab of your Profile, click Settings > Profile > Notifications.
|
| |||||||||||||

Parts of the Admin User Profile Page in Leap
To get to your Profile page, click Settings > Users and click your name in the list.
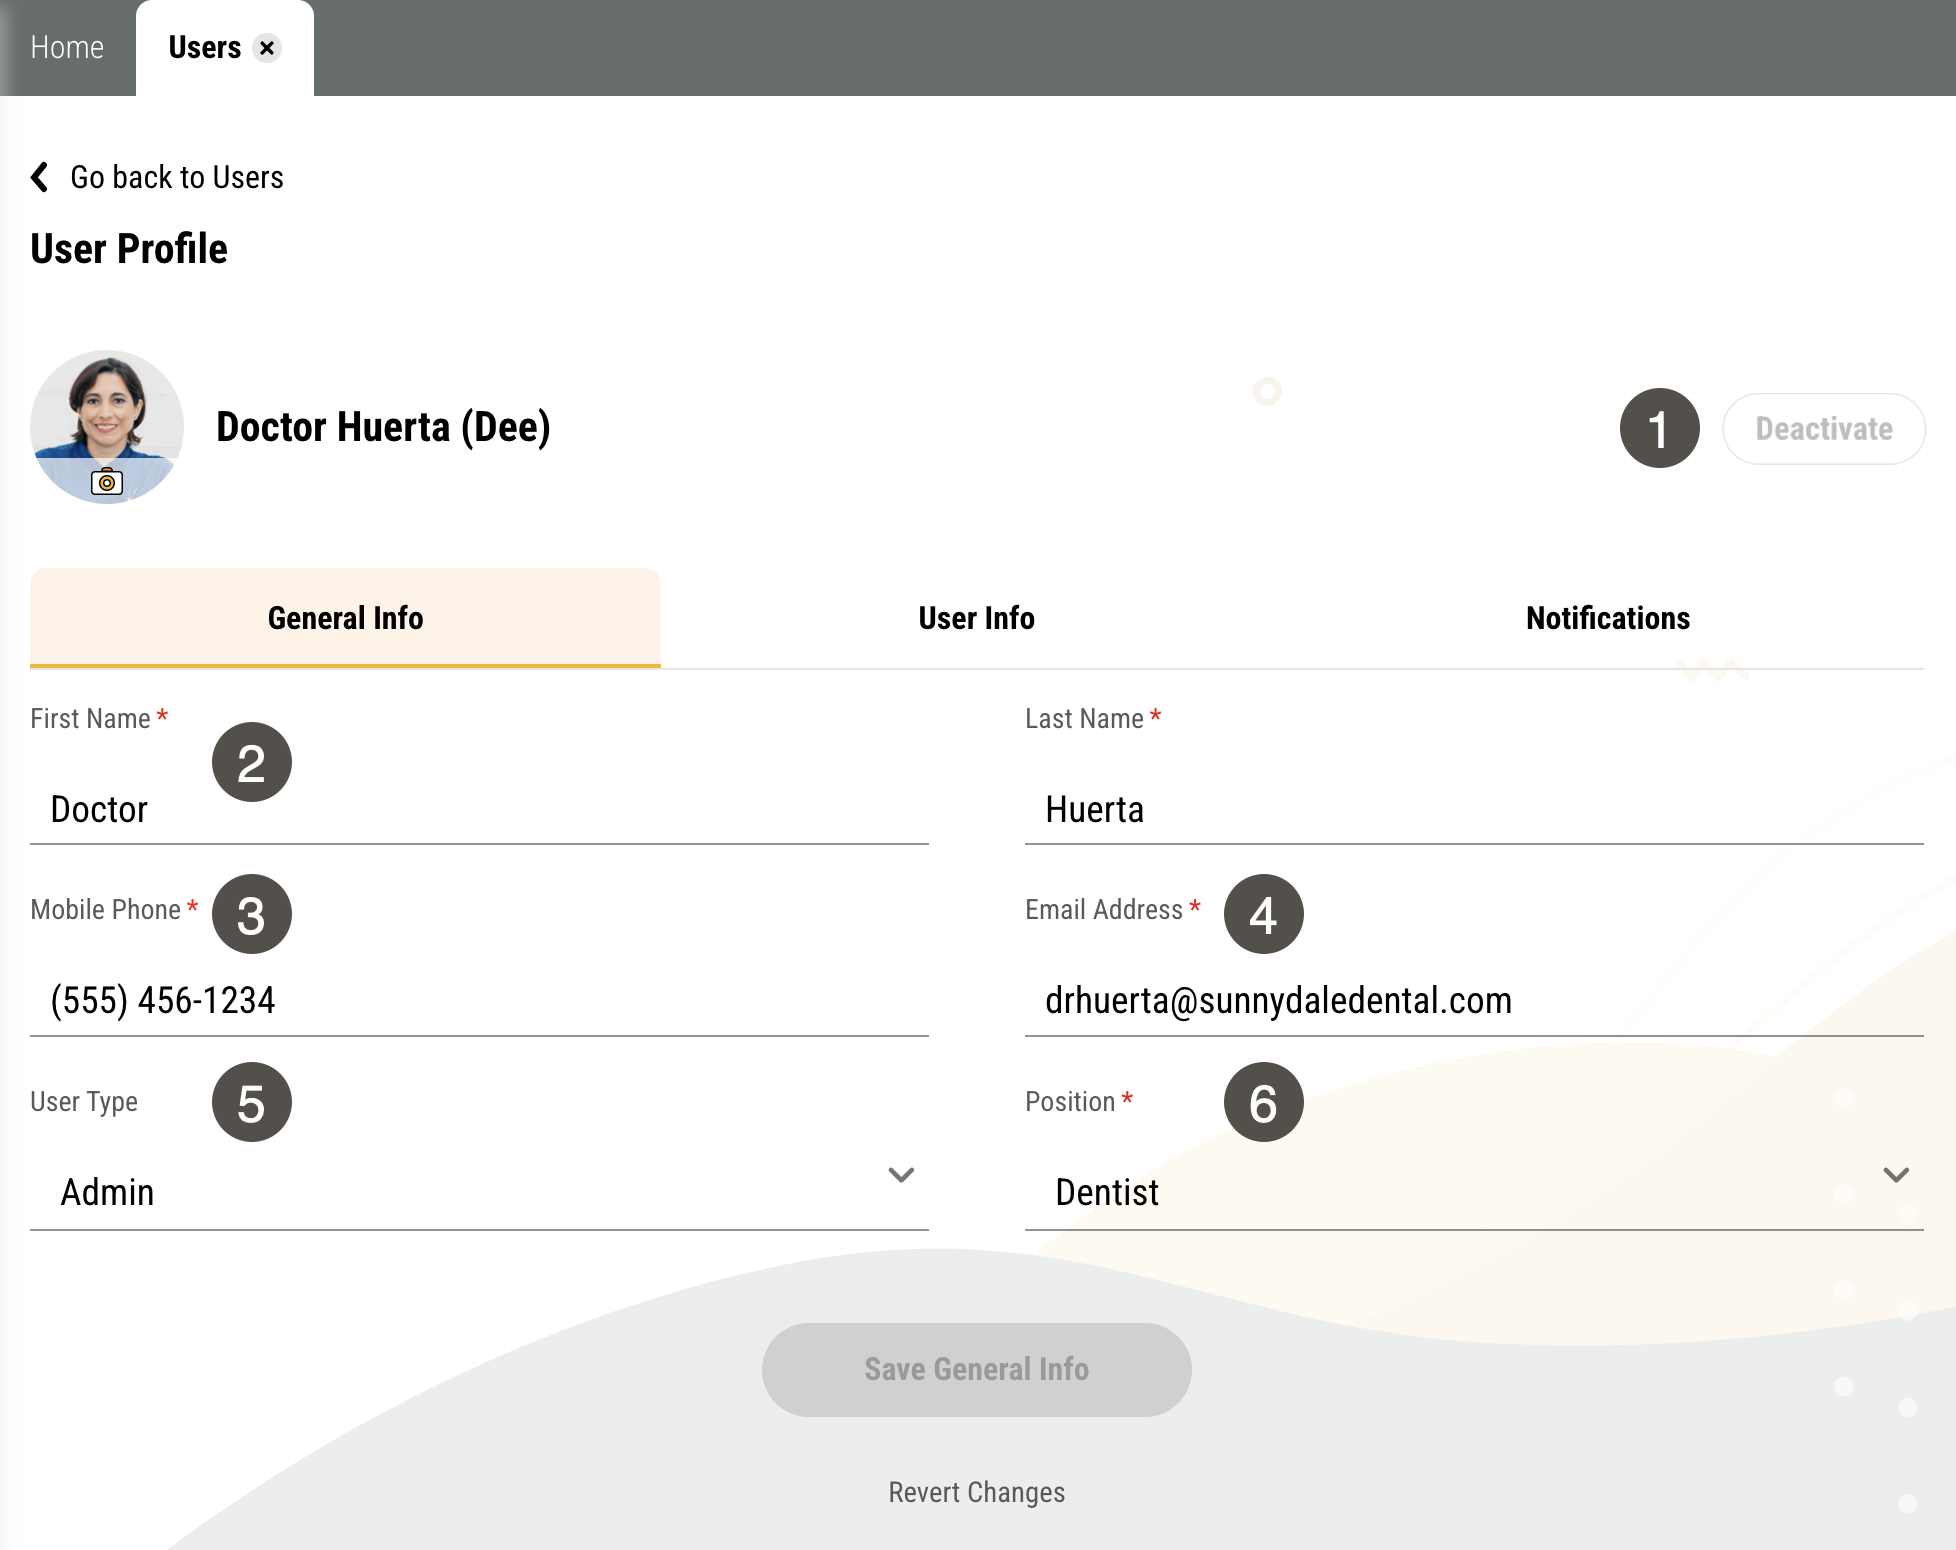
To get to the General Info tab of your Profile, click Settings > Users and click your name in the list. The General Info tab shows by default.
|
| |||||||||||||||||||||

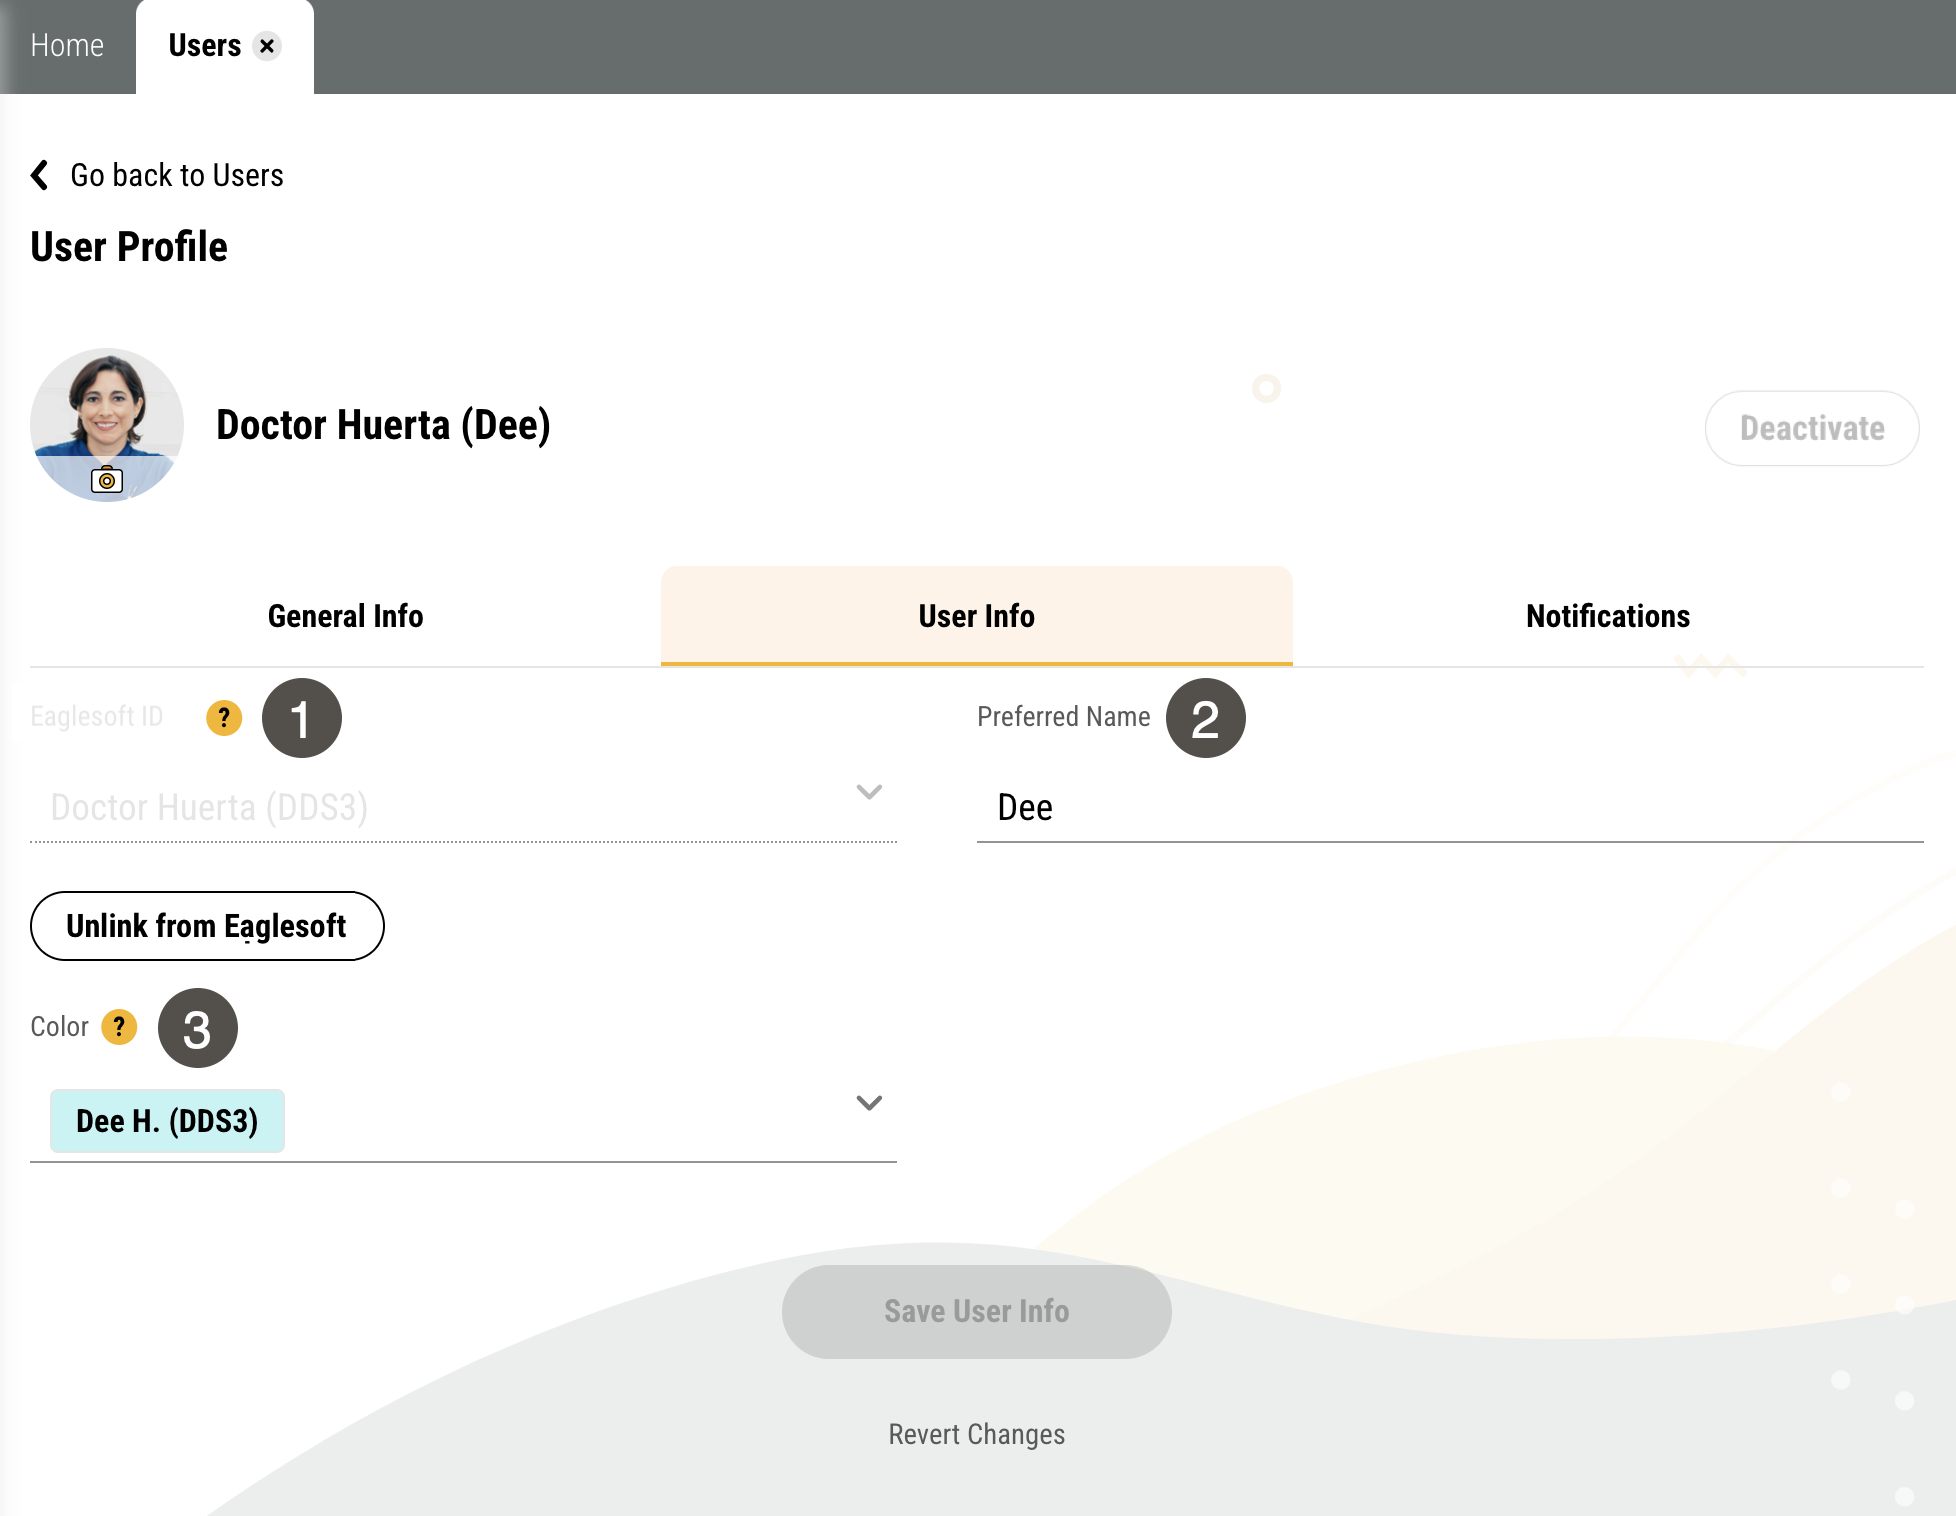
To get to the General Info tab of your Profile, click Settings > Users and click the your name in the list. Then click User Info.
|
| |||||||||||||
To get to the General Info tab of your Profile, click Settings > Users and click your name in the list. Then click Notifications.
|
| |||||||||||||