Patient Profile
In Yapi Leap, each patient has a Profile page, organized into tabs. Here, you can:
View a patient's basic information without having to look it up in Eaglesoft.
Communicate with a patient by email or text.
View a your team's email and text history with the patient through Leap.
Adjust a patient's scheduling and communication preferences.
Check a patient's insurance eligibility if you have Insurance Verification on your plan.
Download completed patient forms from previous or upcoming appointments.
Note
To learn more about what information Leap pulls from Eaglesoft, check out How Patient Profiles Integrate with Eaglesoft.
Parts of the Patient Profile Page in Leap
To get to a patient's Profile page, search for them in the Patient Finder and click their name in your search results.
To get to the Summary tab of a patient's Profile, search for them in the Patient Finder and click their name in your search results. The Summary tab shows by default.
|
| |||||||||||||||||||||||||||||


To get to the Appointments tab of a patient's Profile, search for them in the Patient Finder, click their name in your search results, and click Appointments.
|
| |||||||||||||||||||||
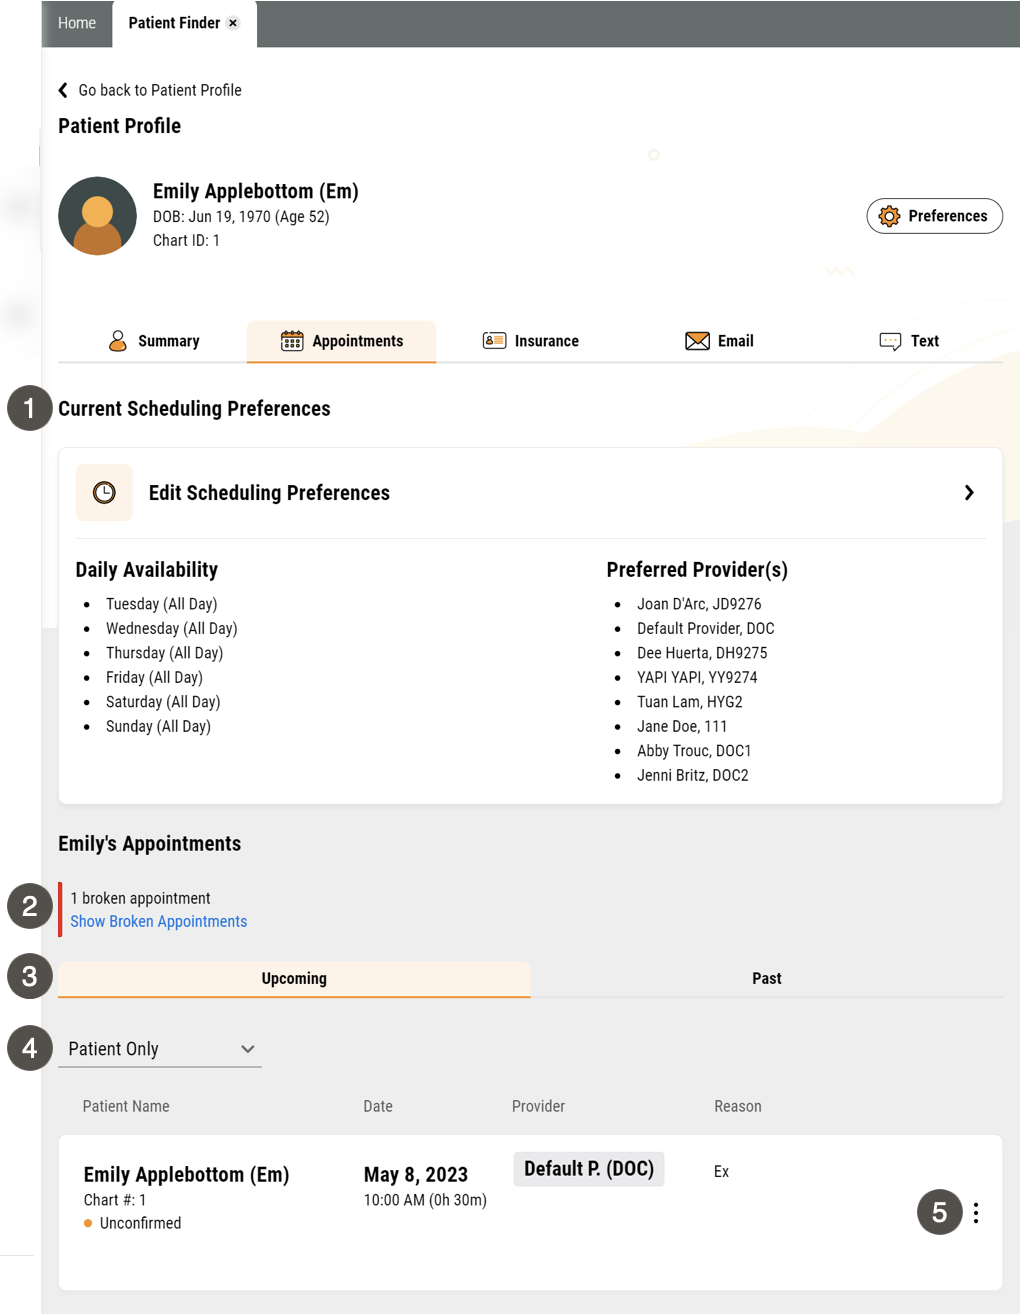
Note
Broken Appointments: Leap considers an appointment broken if you've deleted it and added it to your QuickFill List in Eaglesoft. If a patient rescheduled their appointment or someone at your office simply deleted an appointment from the schedule, these aren’t counted as broken appointments.
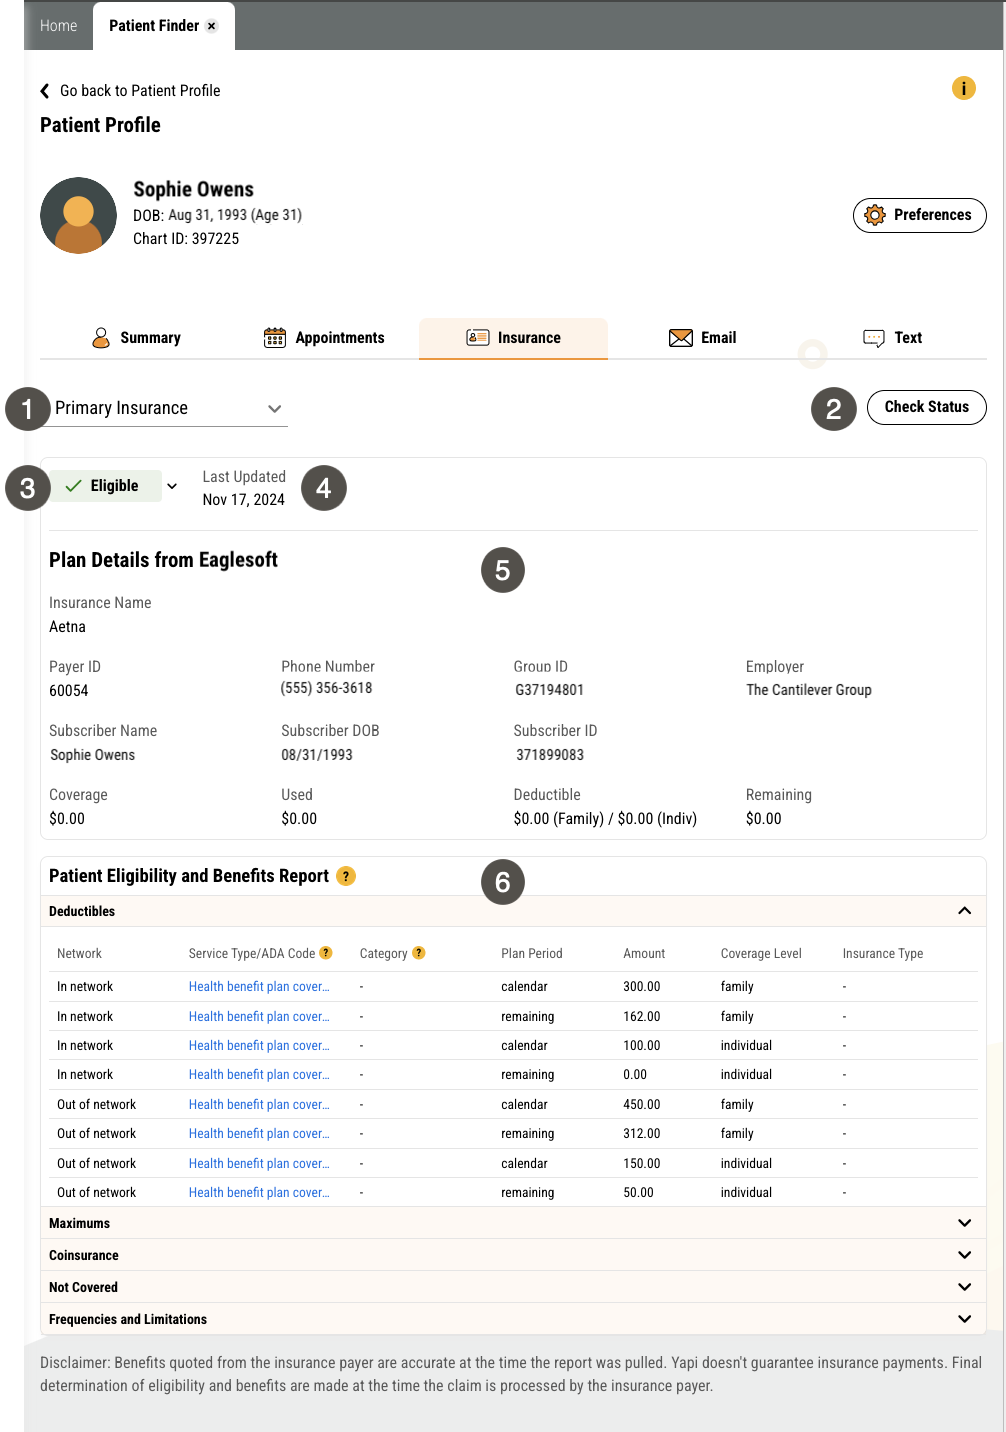
To get to the Insurance tab of a patient's Profile, search for them in the Patient Finder, click their name in your search results, and click Insurance.
|
| |||||||||||||||||||||
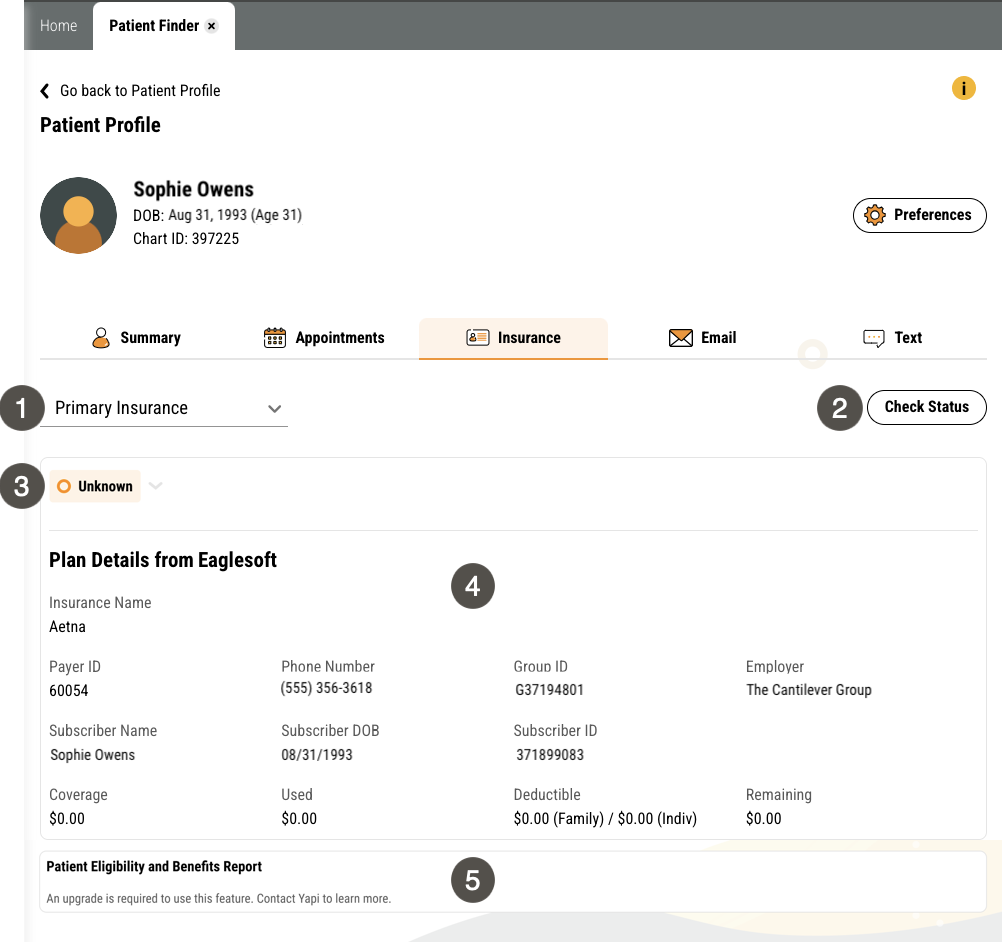

Important
This view of the Insurance tab only displays if you have Insurance Verification on your Yapi plan.
|
| |||||||||||||||||||||||||
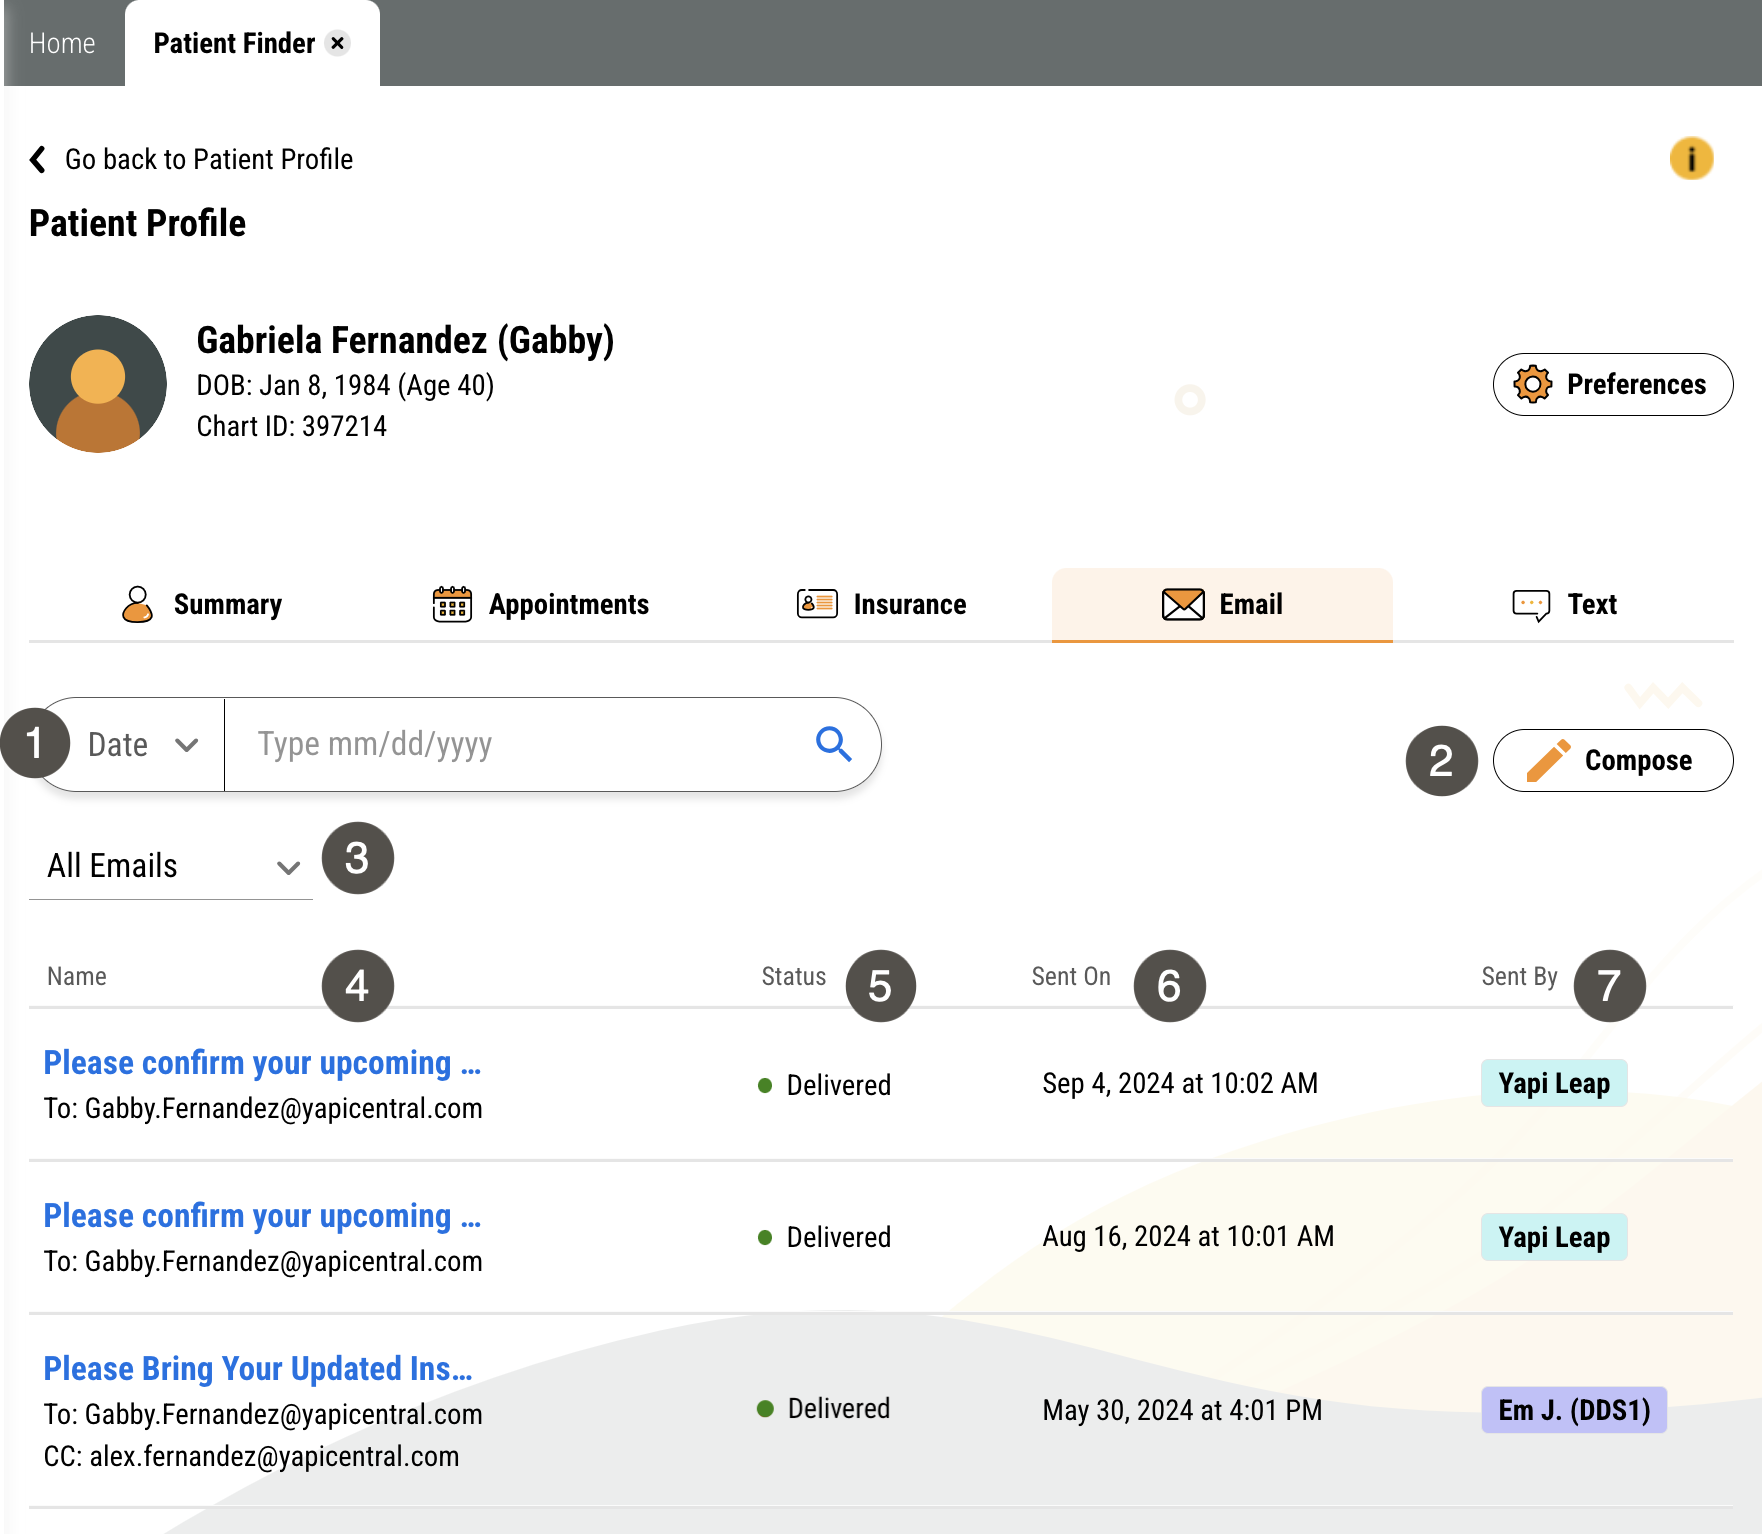
To get to the Email tab of a patient's Profile, search for them in the Patient Finder, click their name in your search results, and click Email.
|
| |||||||||||||||||||||||||
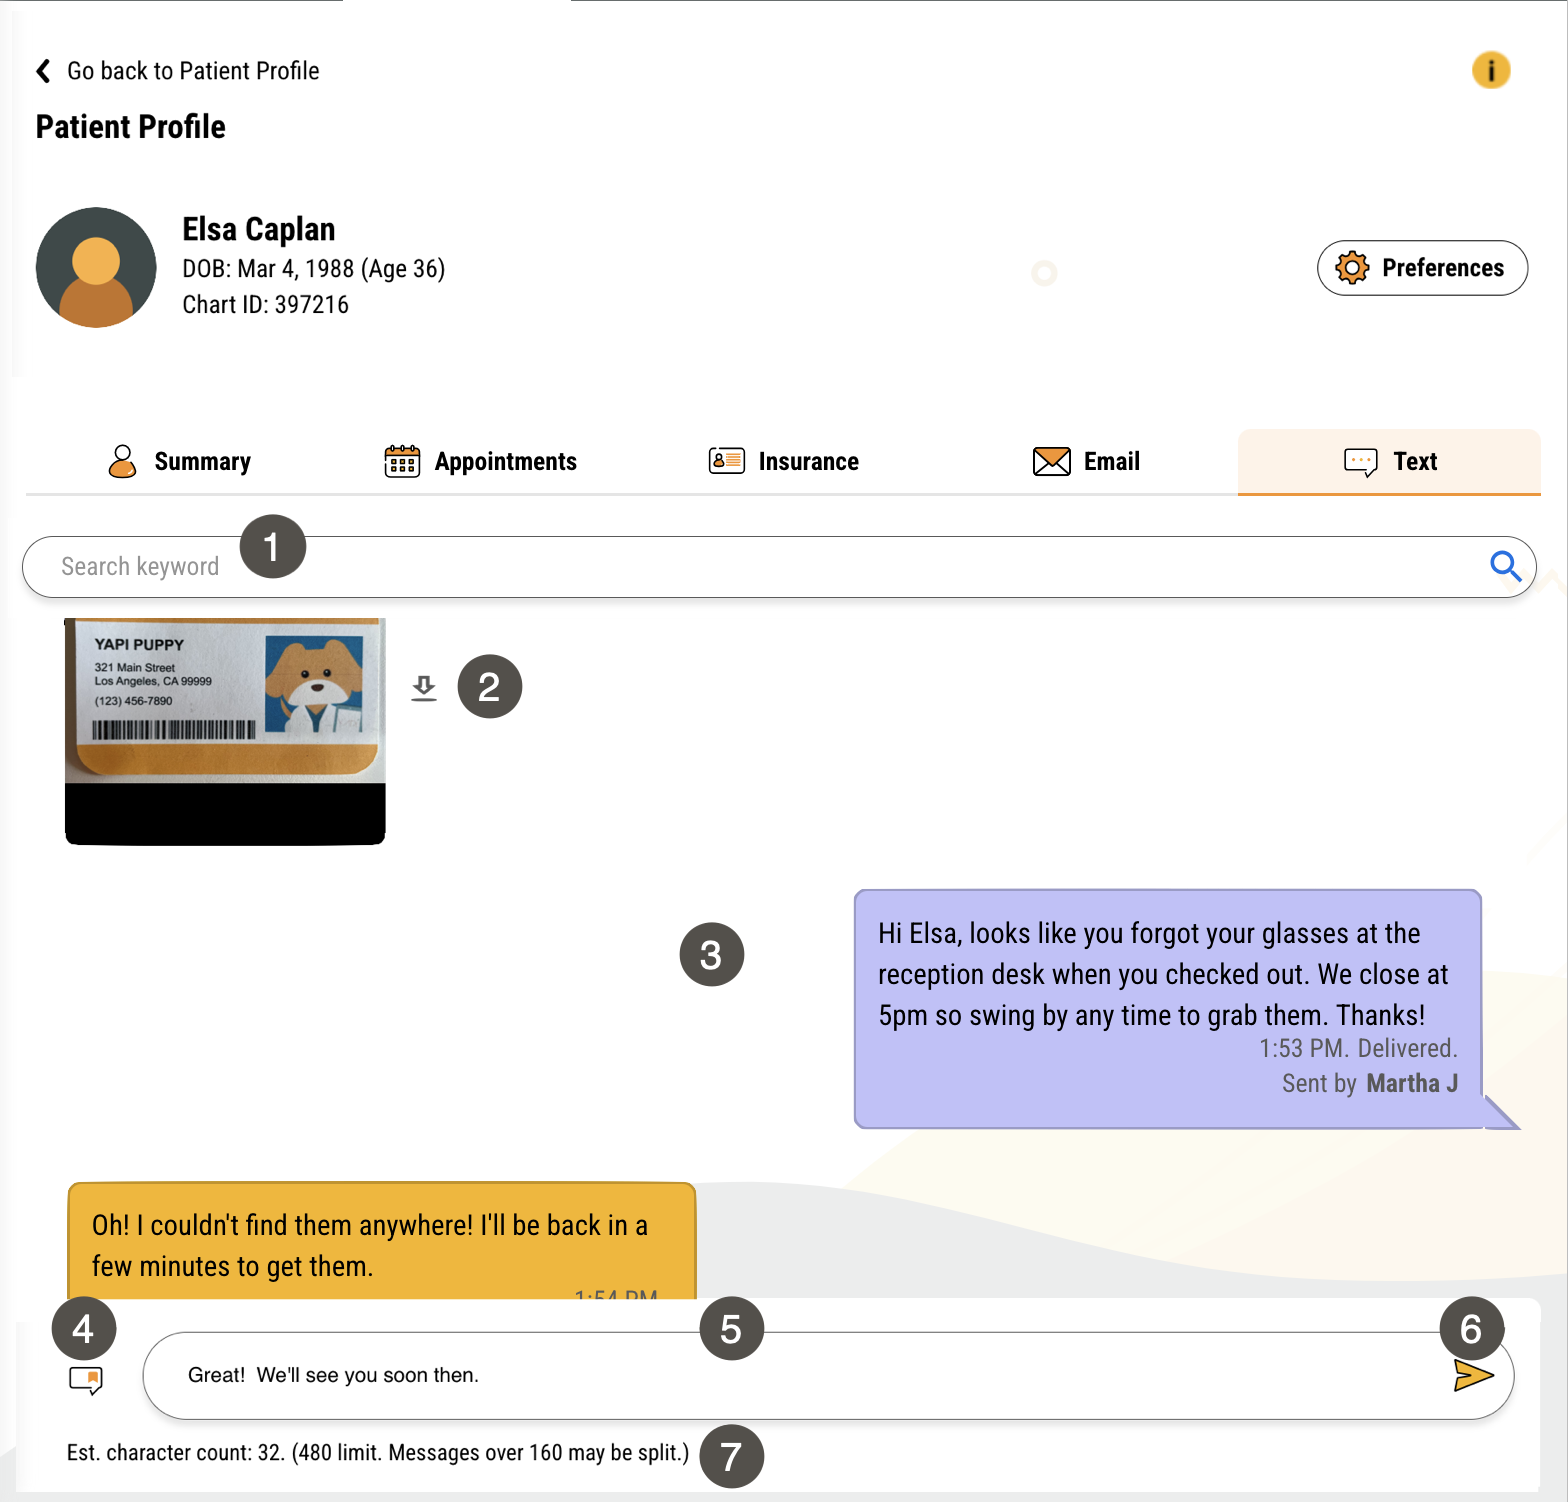
To get to the Text tab of a patient's Profile, search for them in the Patient Finder, click their name in your search results, and click Text.
|
| |||||||||||||||||||||||||||||
To get to a patient's Preferences, search for them in the Patient Finder, click their name in your search results, and click the Preferences button.
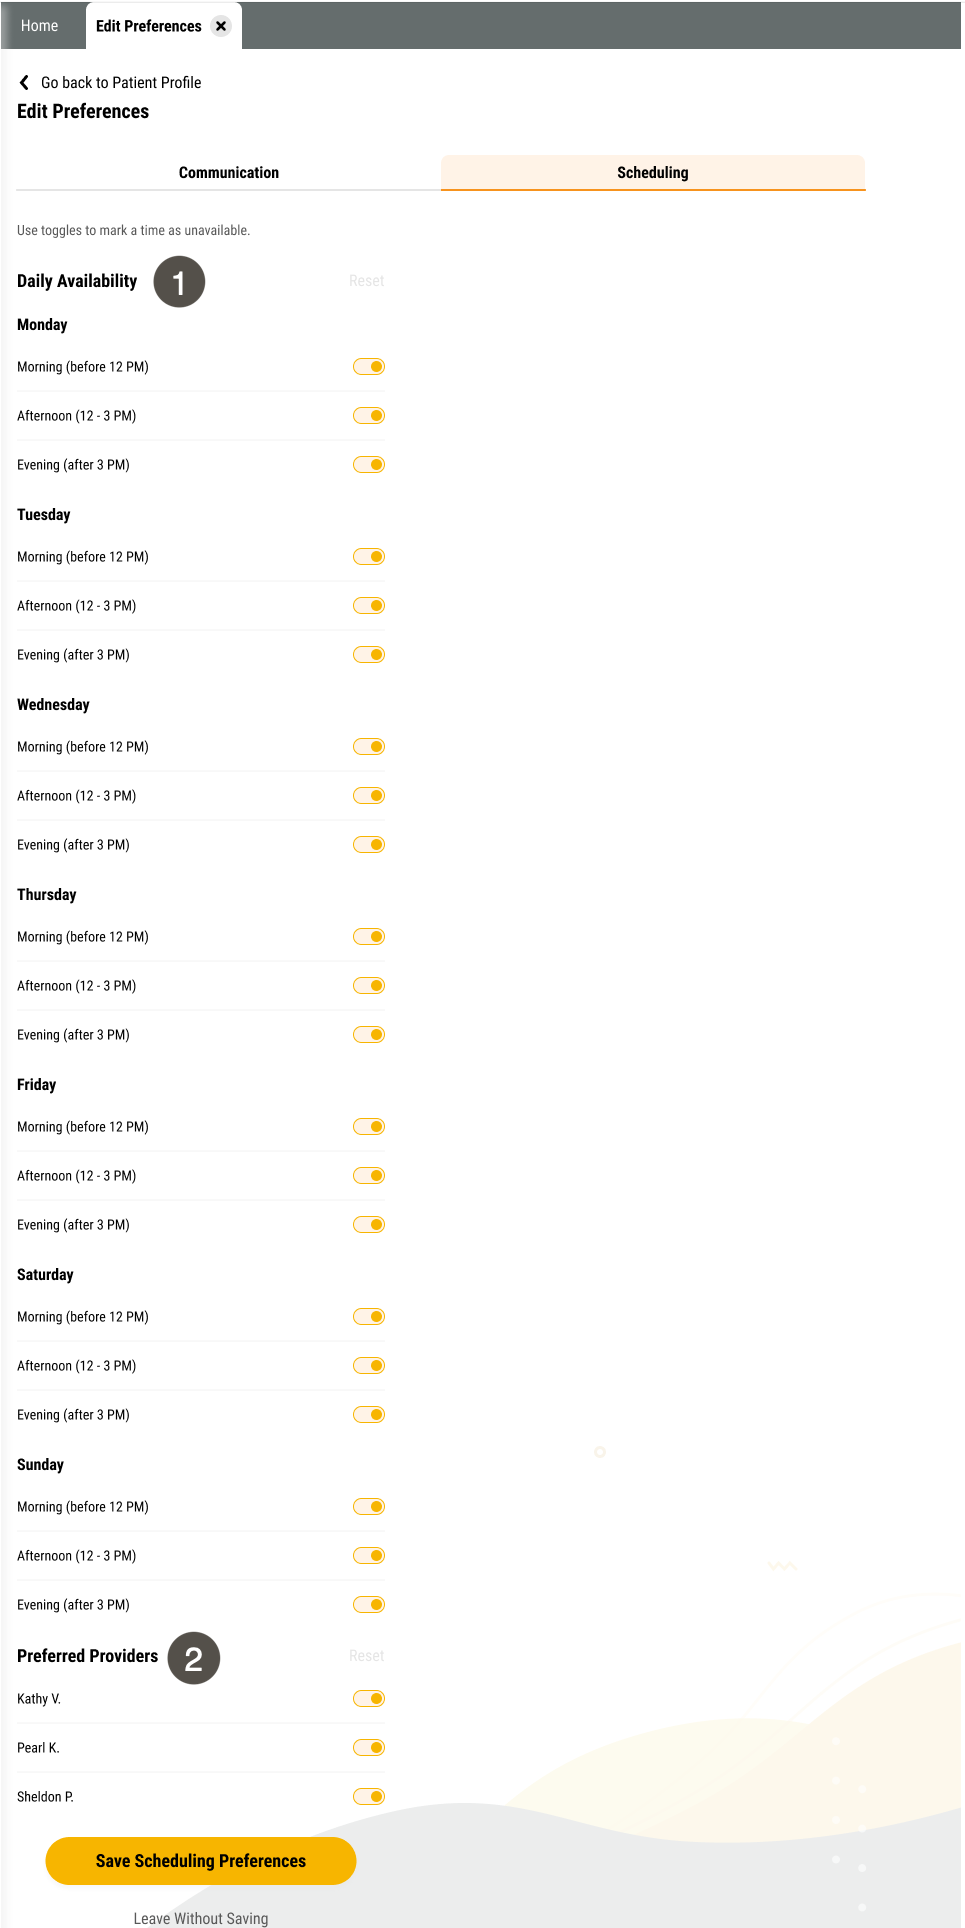
To get to a patient's scheduling preferences, search for them in the Patient Finder, click their name in your search results, and click the Preferences button. The Scheduling tab shows by default.
|
| |||||||||
Note
Updating a patient's scheduling preferences only impacts Yapi Leap and doesn't save this information to Eaglesoft.
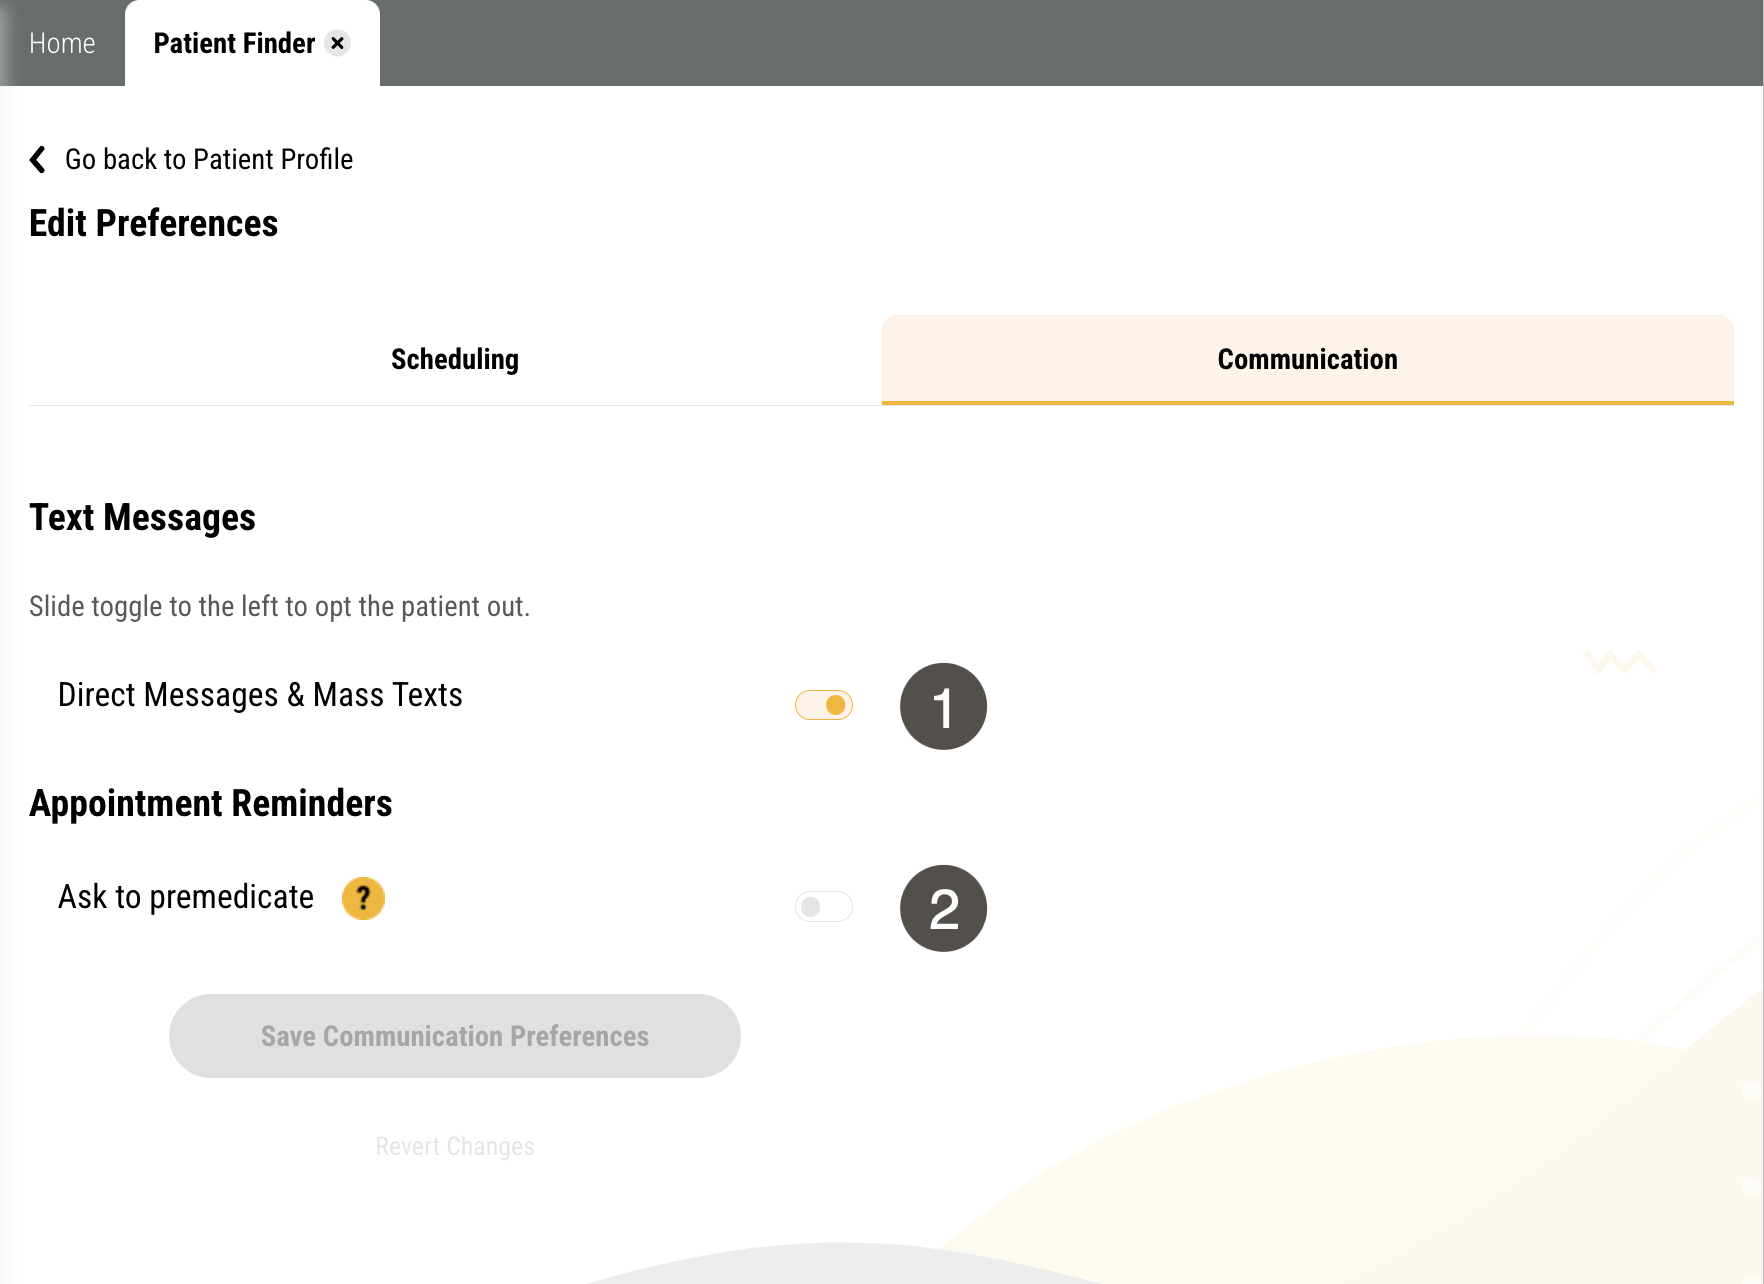
To get to a patient's communication preferences, search for them in the Patient Finder. Then click their name in your search > Preferences > Communication.
|
| |||||||||
Important
This only edits a patient's communication preferences in Yapi Leap and doesn't update communication preferences in Eaglesoft or features outside of Leap like the Yapi Classic Dashboard and Yapi Classic appointment reminders.