Online Scheduling - Patient View
Yapi Leap's Online Scheduling feature helps make your practice look like a tech-savvy rockstar! Once you've configured online scheduling settings, patients can click a link from your practice's website to schedule an appointment without ever having to pick up the phone to call you! Click on a link below to see an example of what a patient sees when they're booking an appointment online.
Note
Images in below are for illustrative purposes only. Your patients may see something slightly different based on your practice's online scheduling settings and the device the patient is using.
How Patients See Online Scheduling
This section shows a new patient's point of view when using Online Scheduling to book an appointment online.
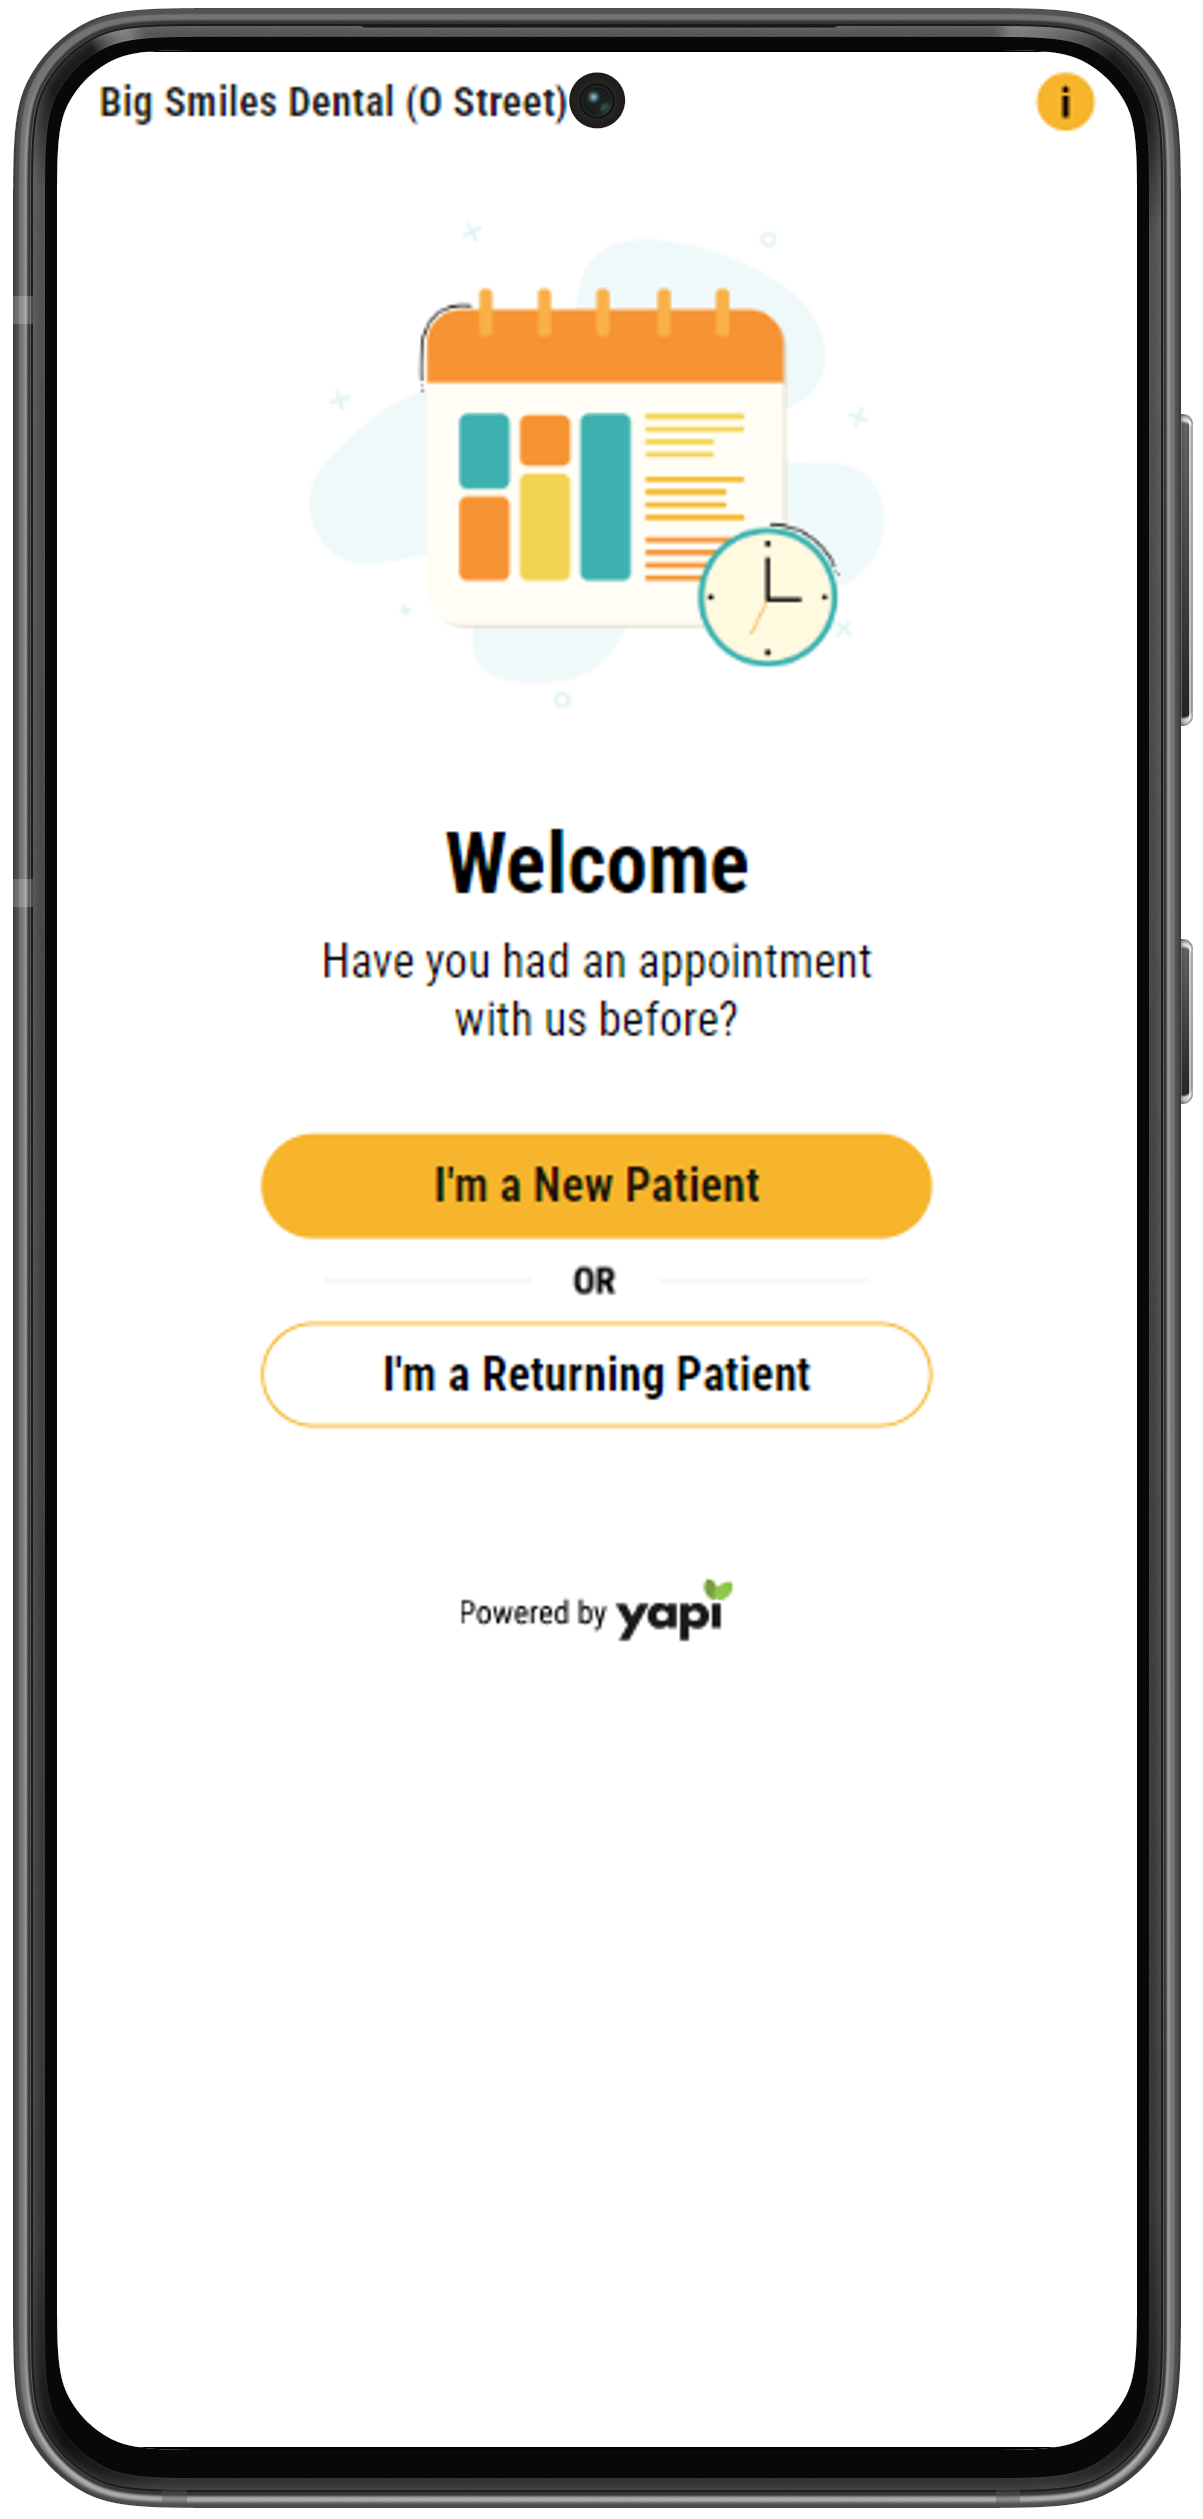
The first screen a patient sees when clicking on a Online Scheduling link is a welcome message, asking them whether they are a new or existing patient:
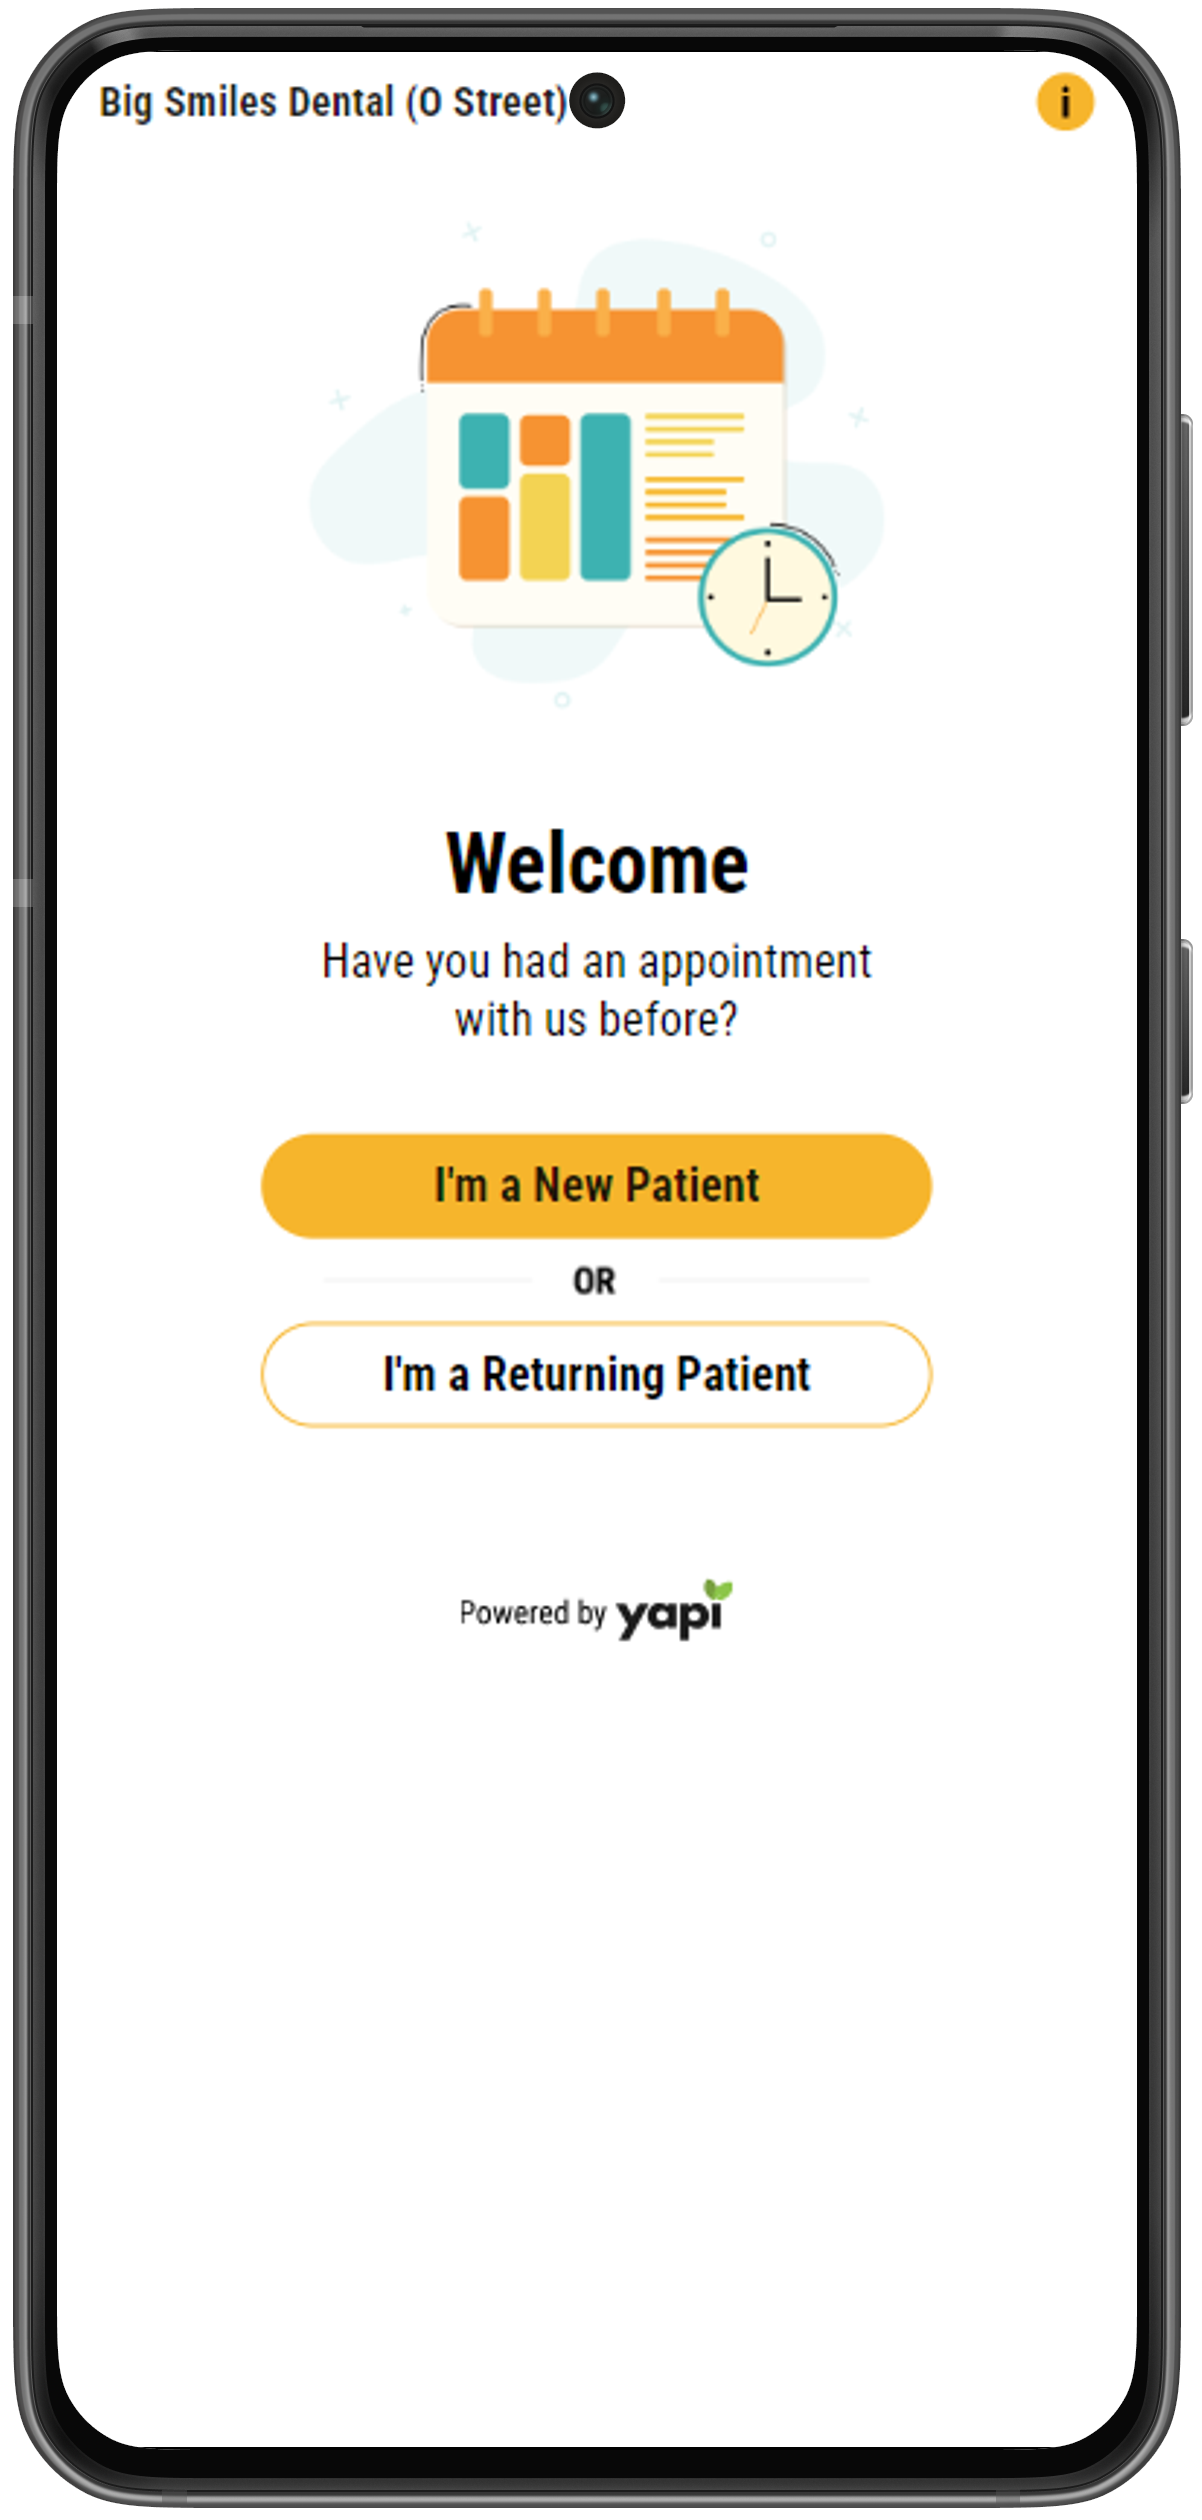 |
If they select "I'm a New Patient," they're taken to the next screen: Select Reason for Visit.
Note
If the patient is a returning patient, refer to Online Scheduling - Existing Patient Walkthrough to see an example of what their experience will look like.
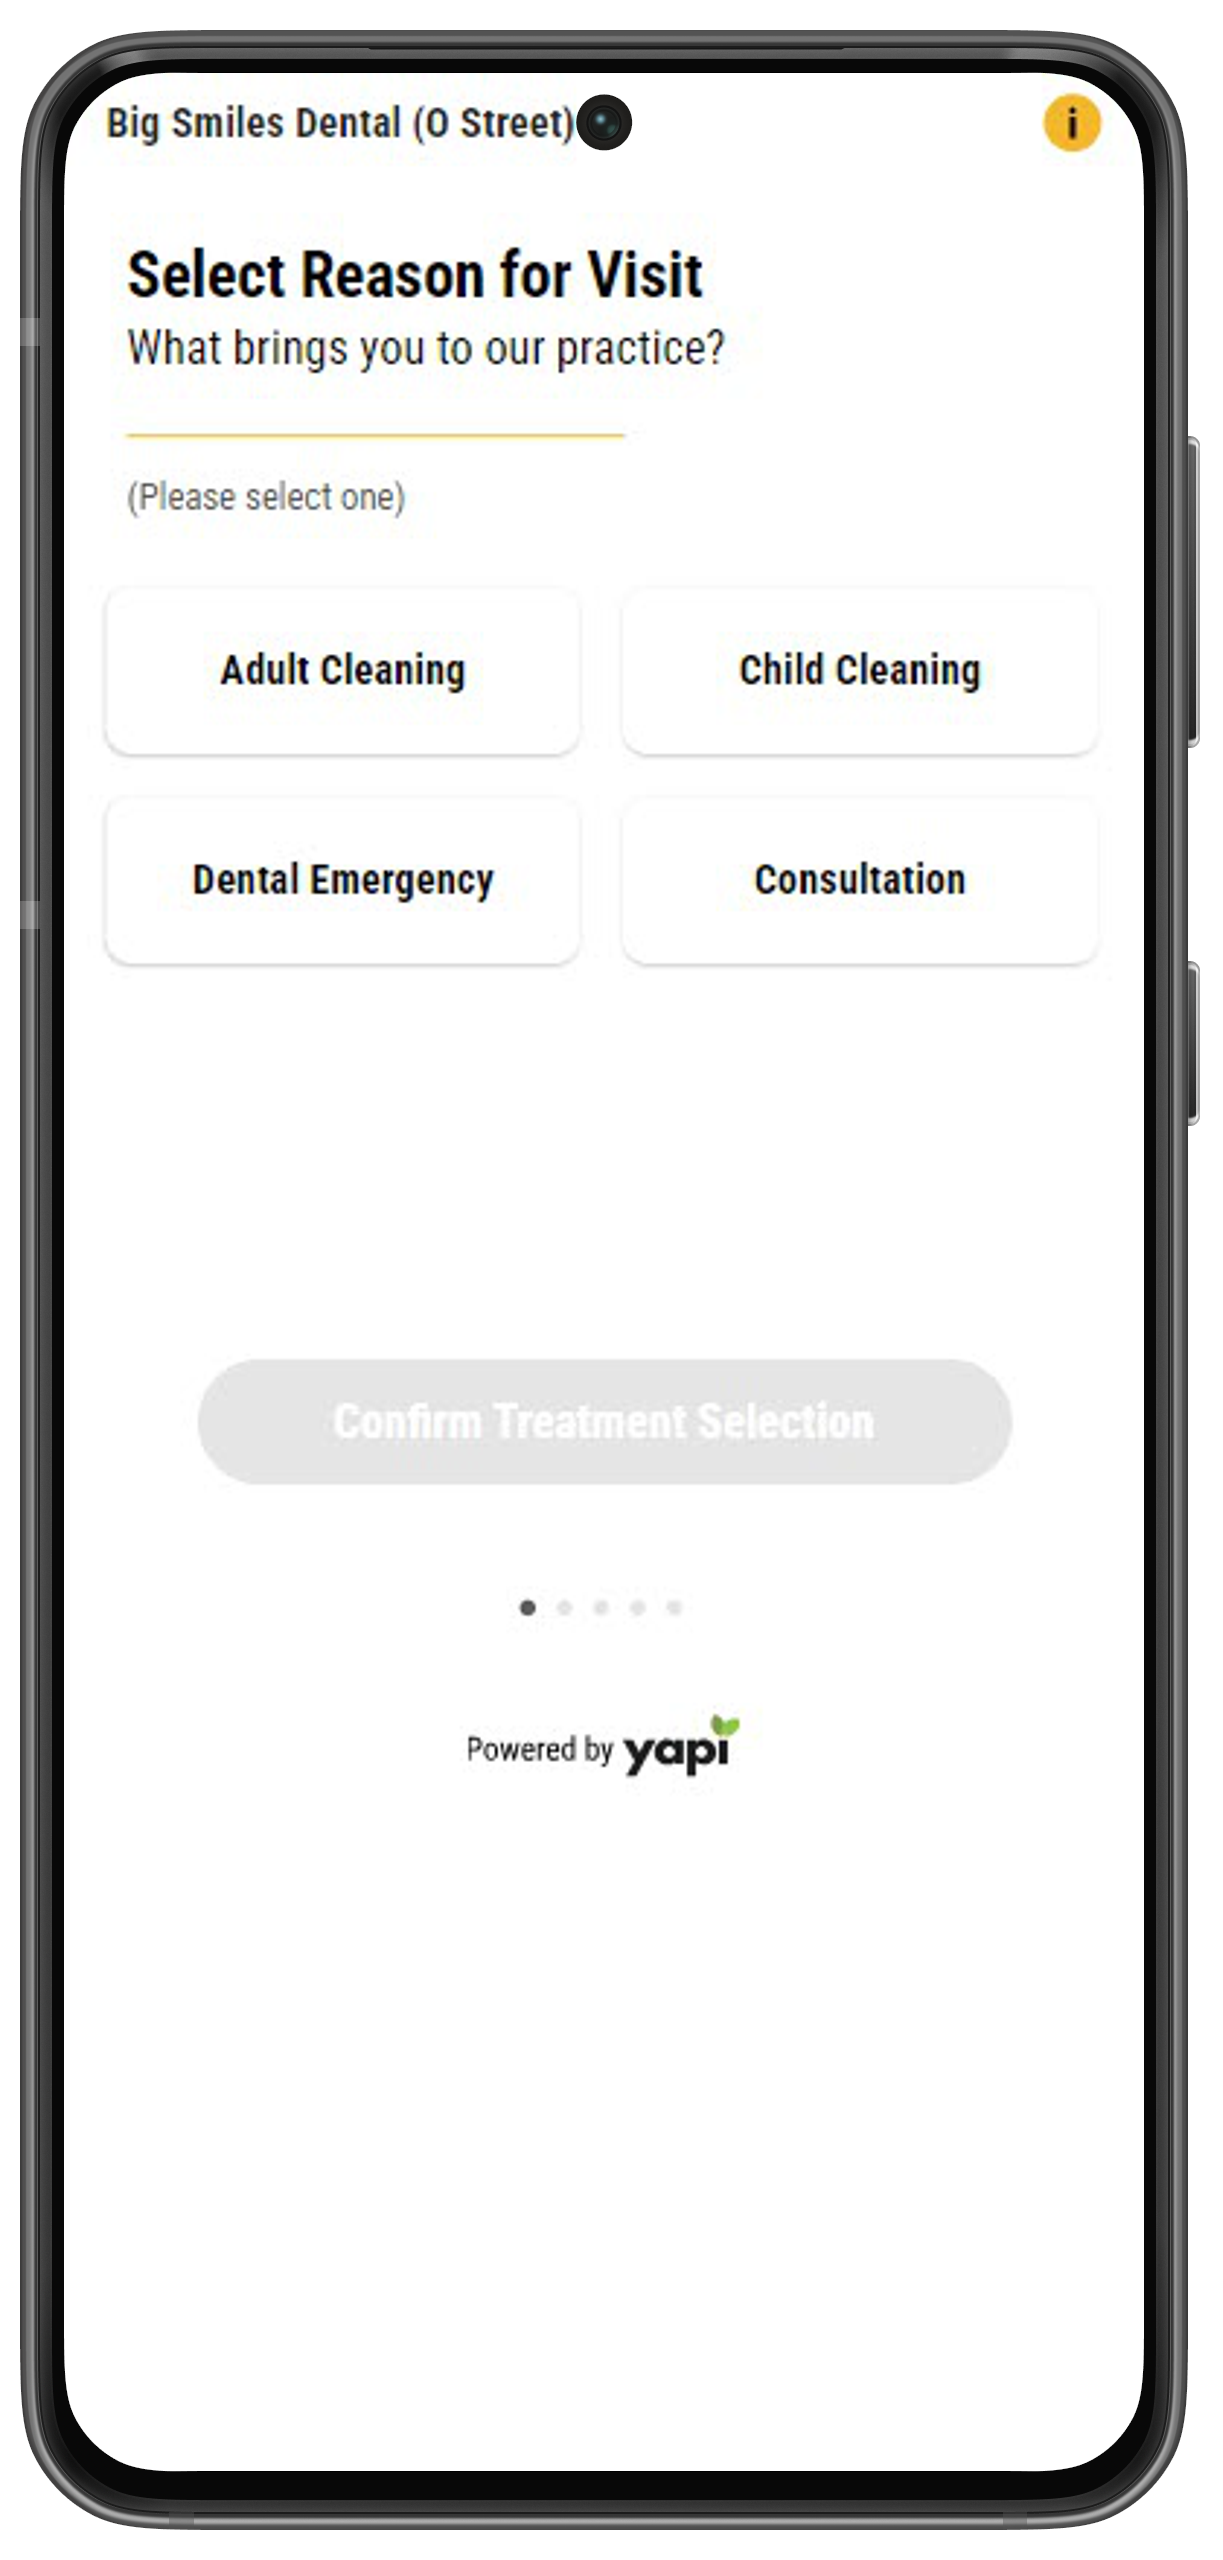
Next, the patient is asked What brings you to our practice? to determine what treatment they need to schedule. This lists all the treatments you've set up for new patients in your Online Scheduling settings.
 |
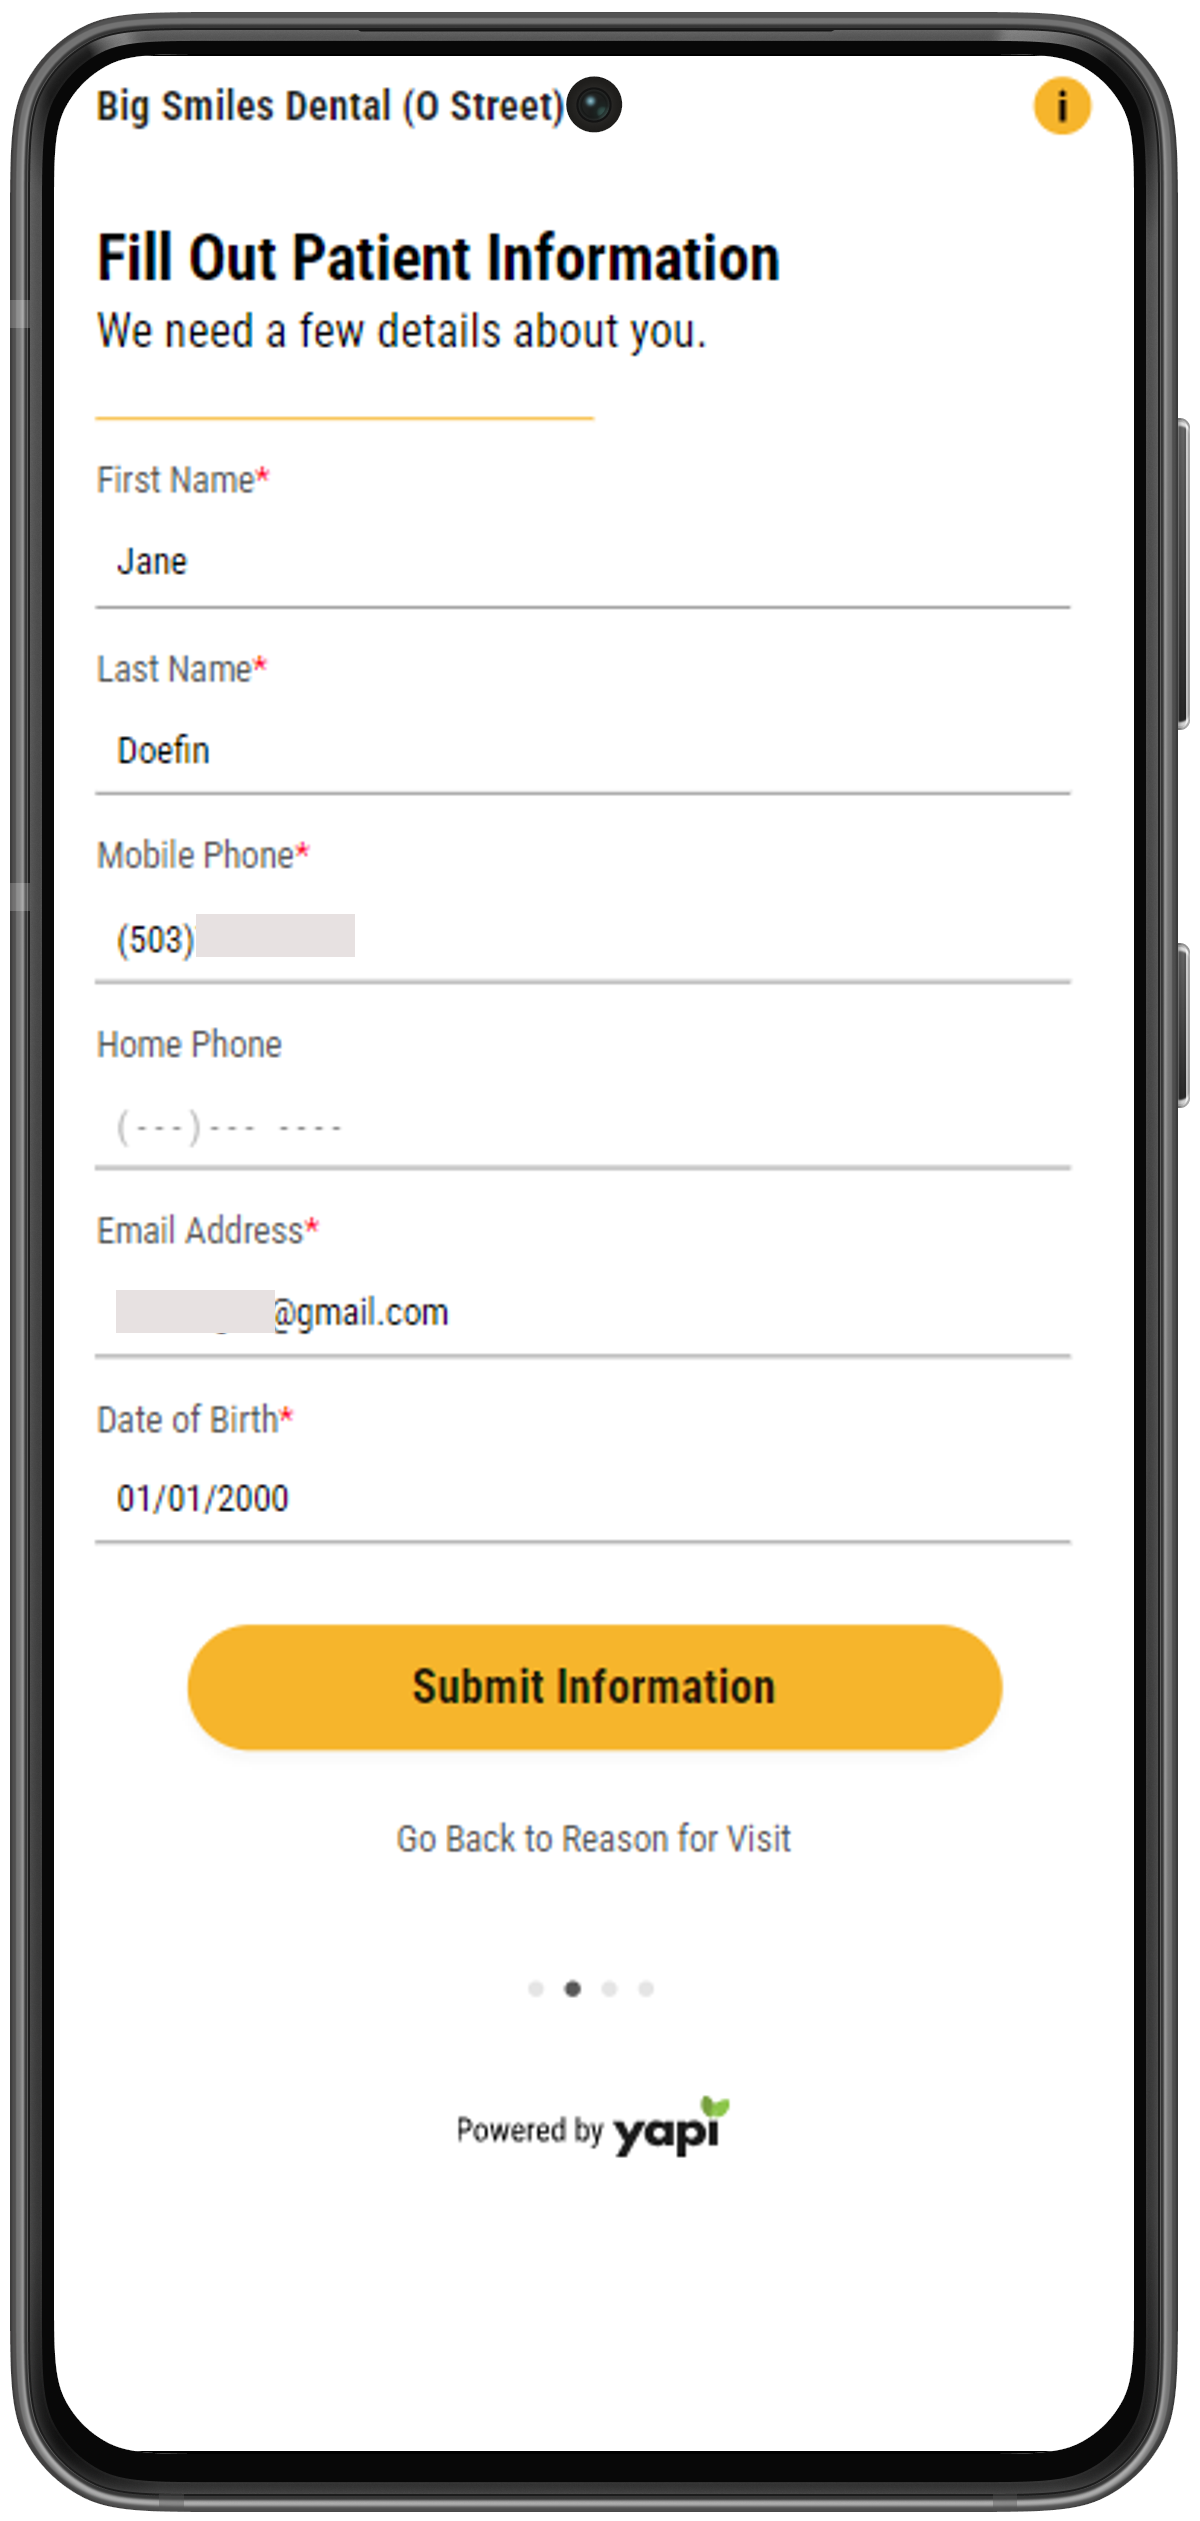
This page gathers patient details like contact information and date of birth.
 |
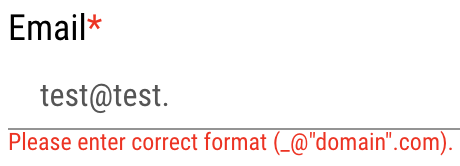
If your practice has email verification turned on in your Online Scheduling General Settings, the system will verify that the email the patient entered is in a valid email format. If it isn't, the page will display an error message:
 |
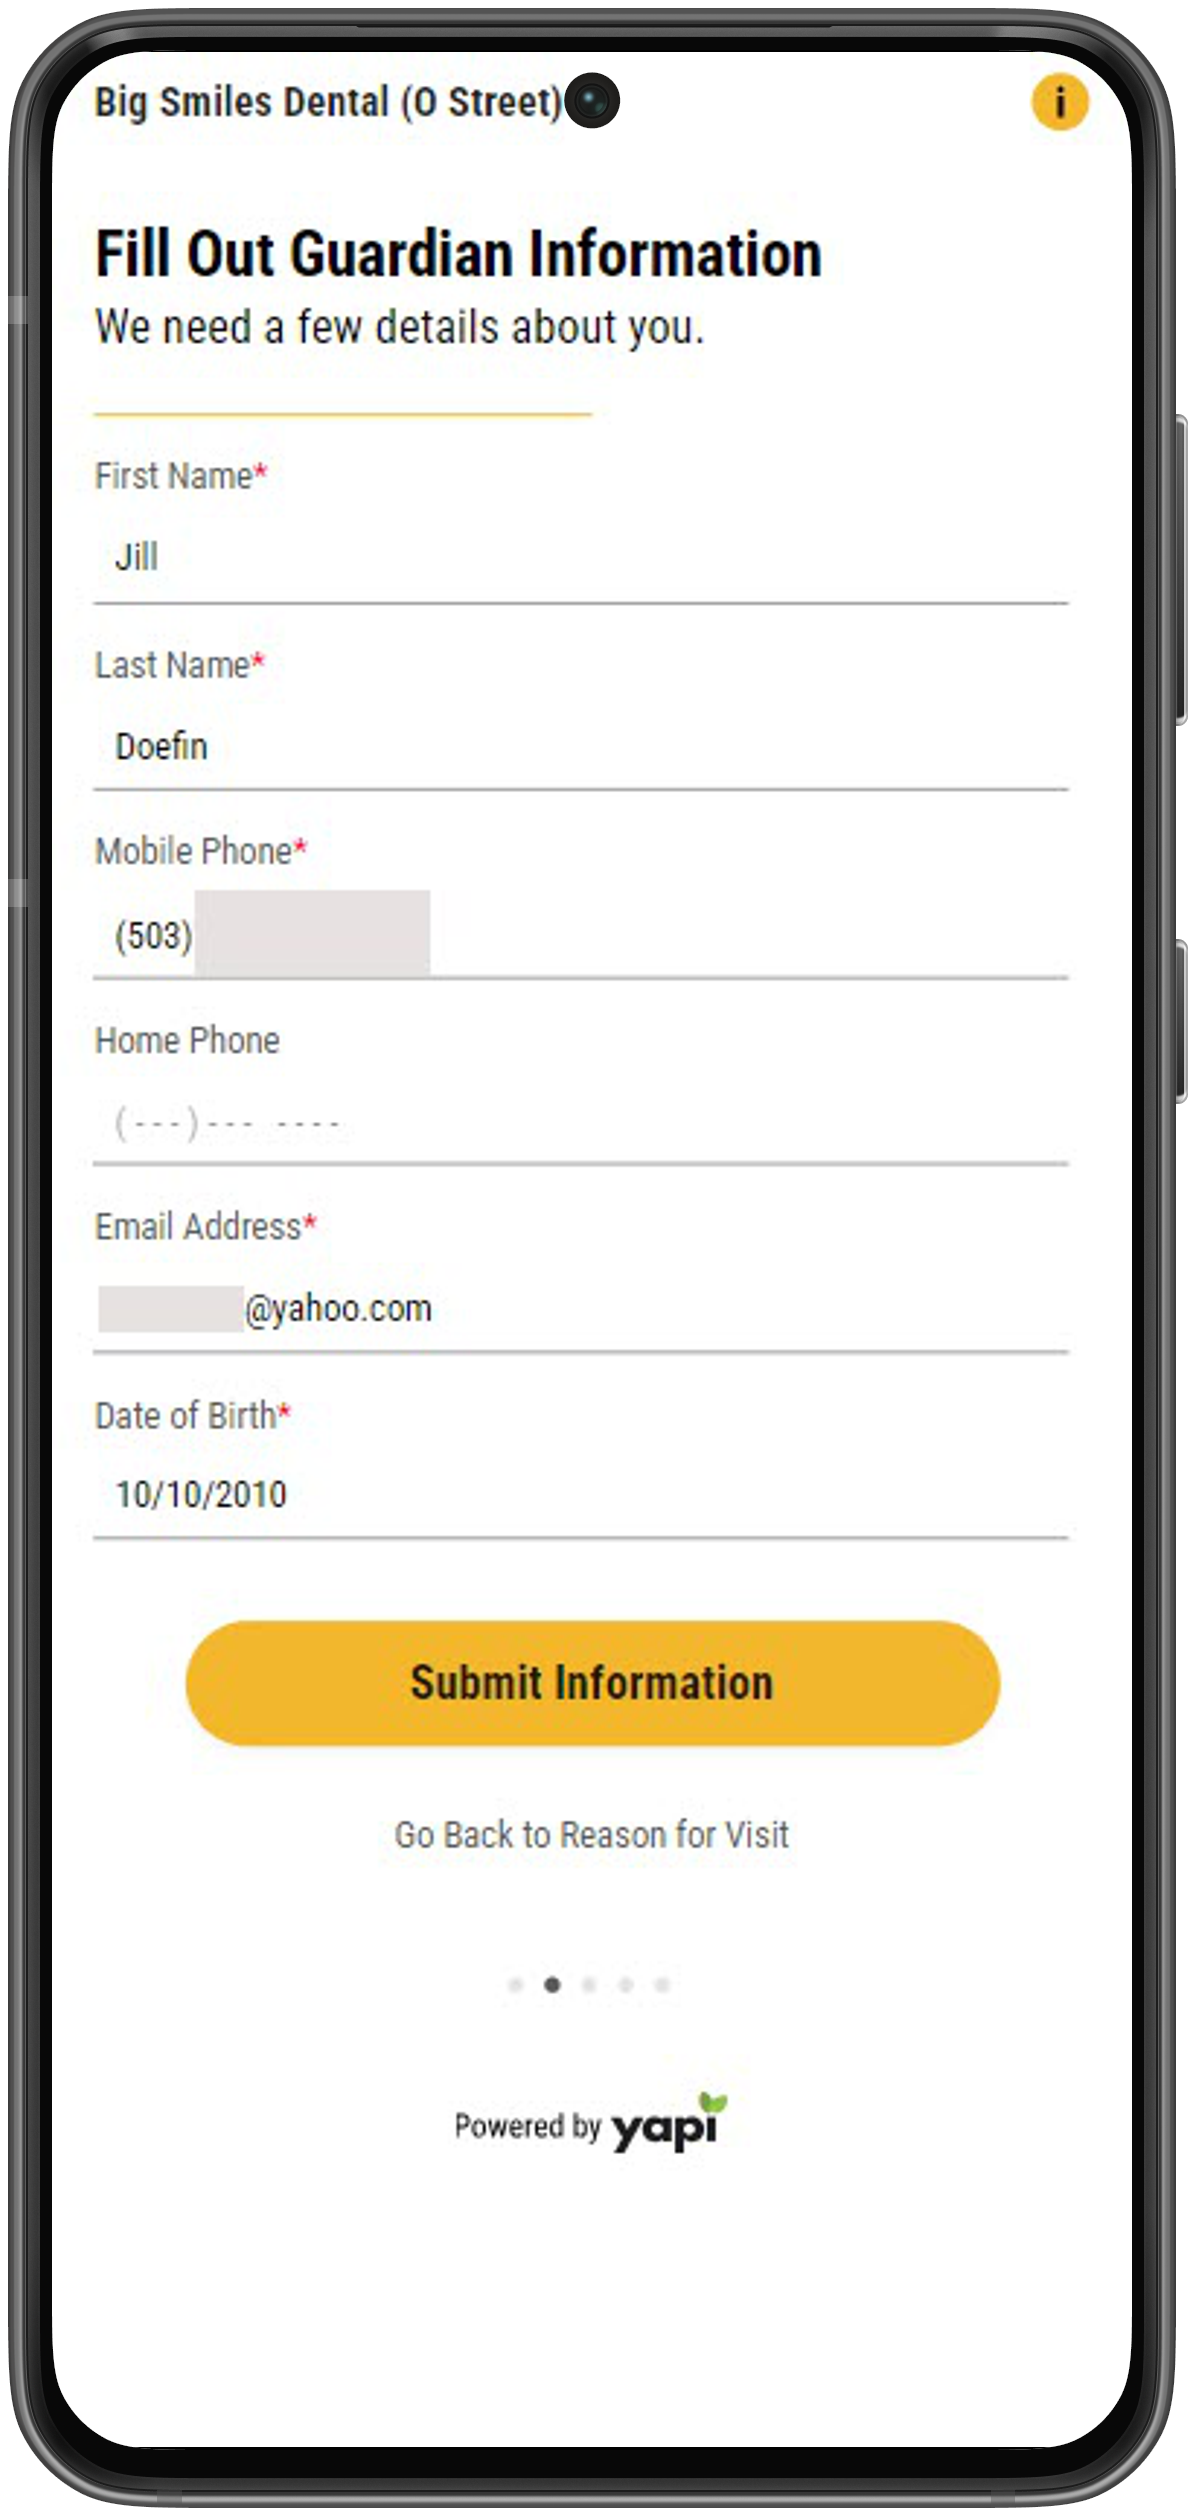
If Leap determines the patient is a child (based on their date of birth and the Child Age Limit you've set in Online Scheduling), they'll see an additional page to Fill Out Guardian Information. Otherwise, they'll go straight to the Select Payment Method page.
Fill Out Guardian Information (Minor Patients Only)
This page collects guardian information if a patient is a child (based on the Child Age Limit in your Online Scheduling settings). Like the previous page, the system verifies the entered email if you have email verification turned on in your Online Scheduling Settings.
 |
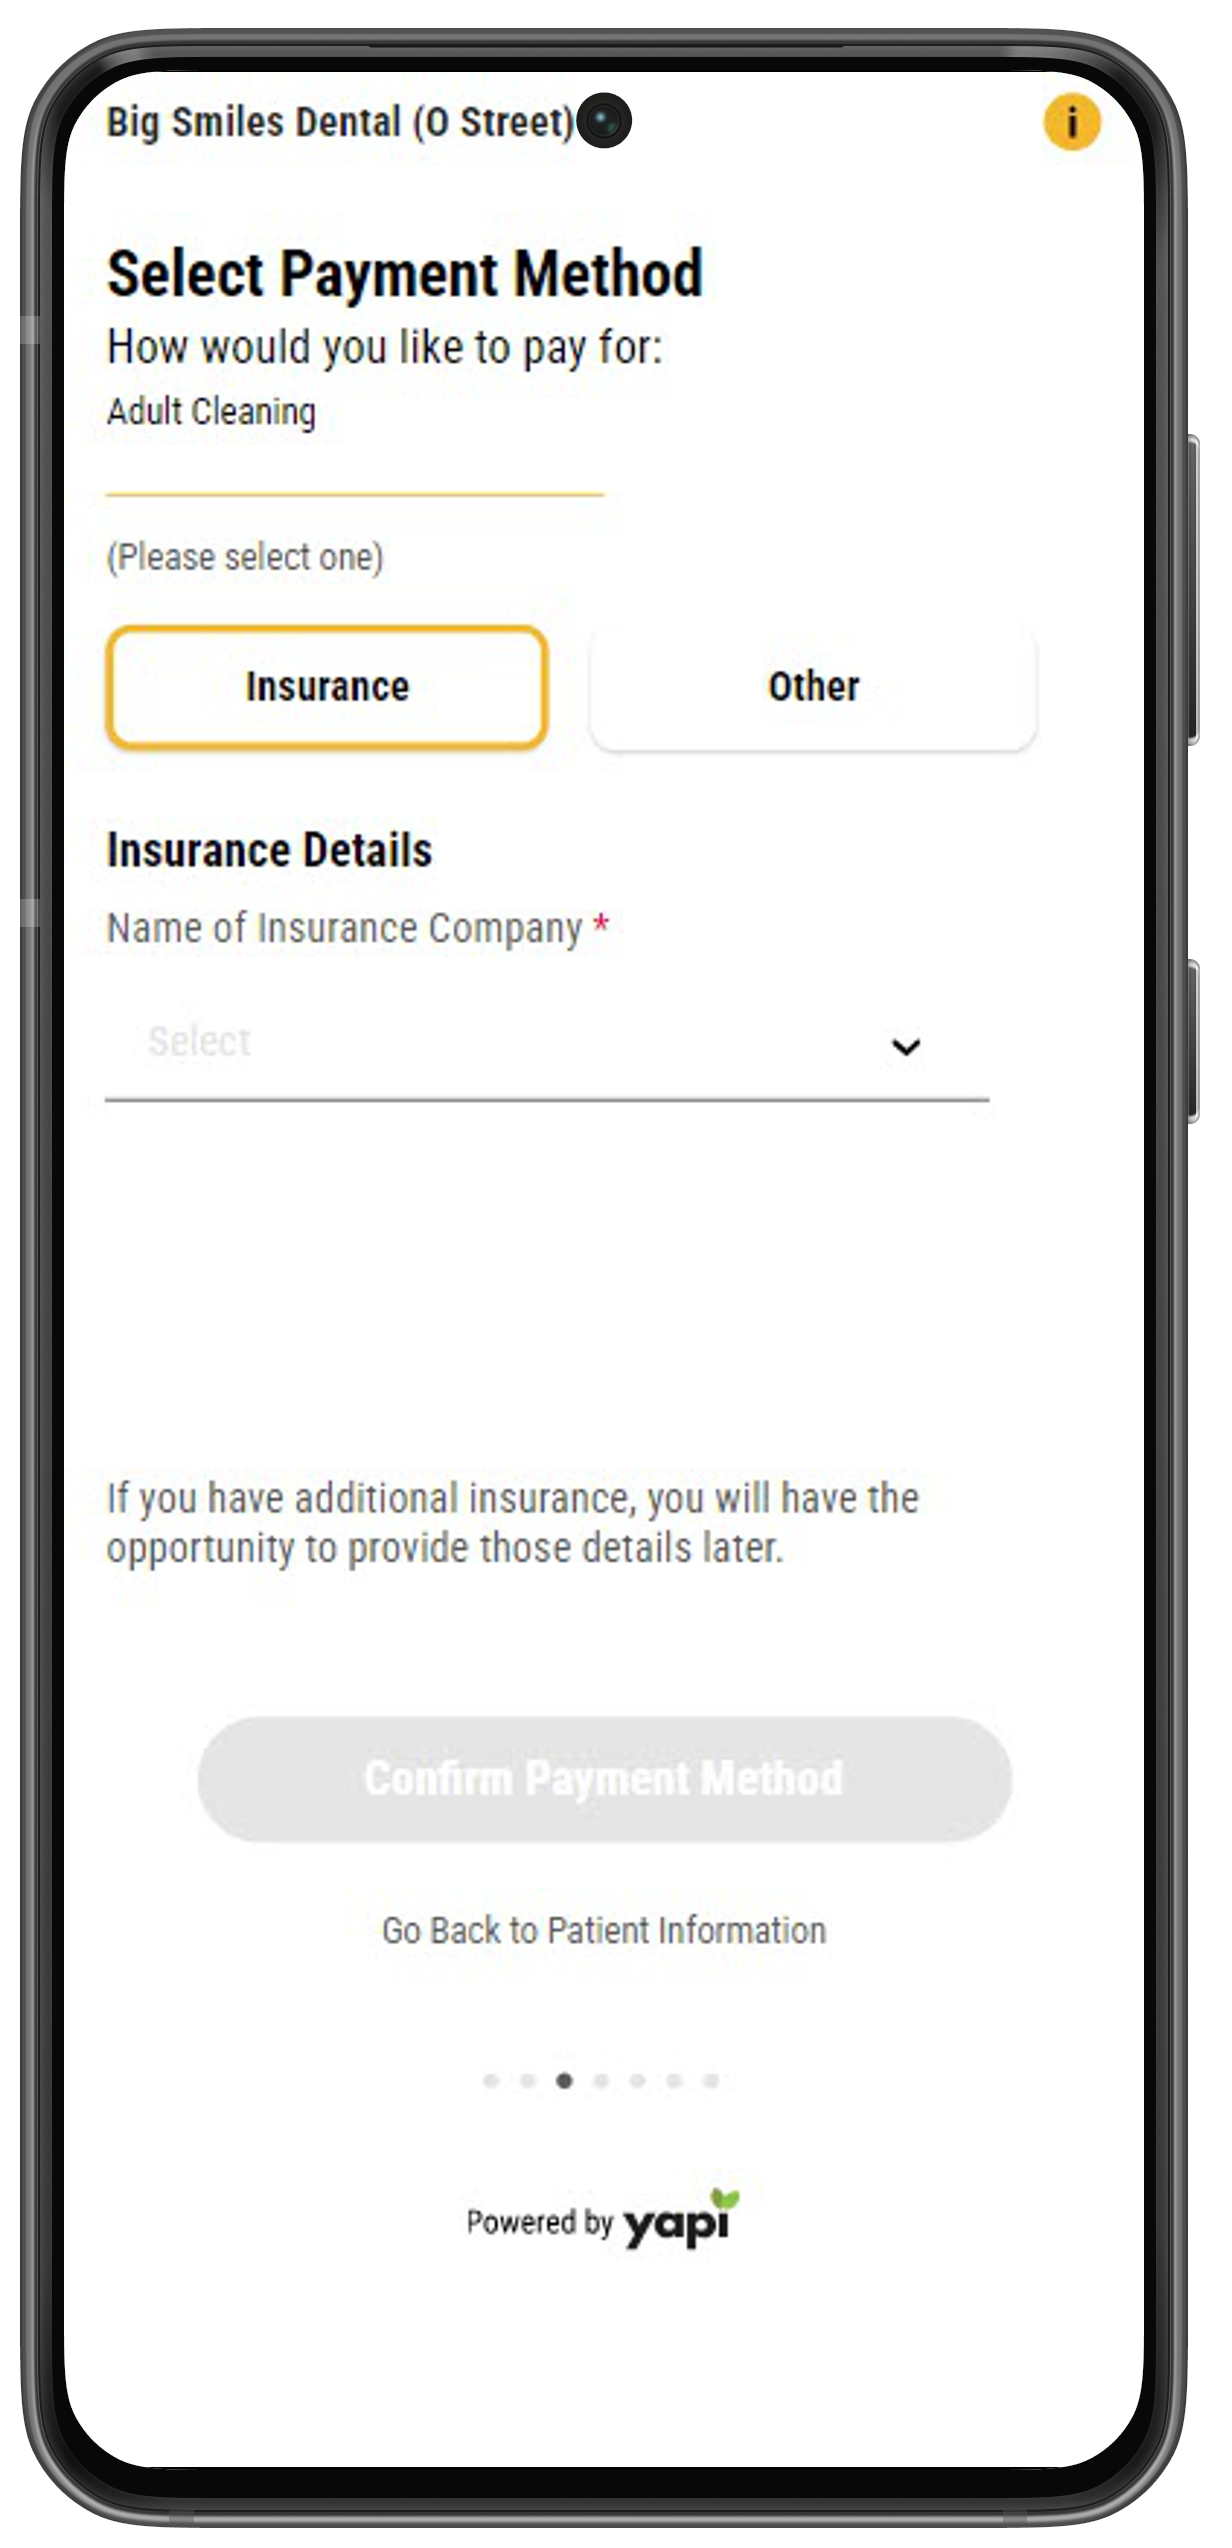
Next, the Payment Method screen asks patients to select a payment method for their visit: either Insurance or Other. If the patient selects Insurance, they'll see additional fields to select their Insurance Company and Insurance Type. If you've made insurance required in your Online Scheduling Settings, the Name of Insurance Company question will have a red asterisk next to it, indicating the question is required to continue.
 |
Insurance Company
If a patient selects Insurance as their payment method, they'll see the list of insurances your practice has enabled in your Online Scheduling settings once they tap on the Name of Insurance Company dropdown menu:
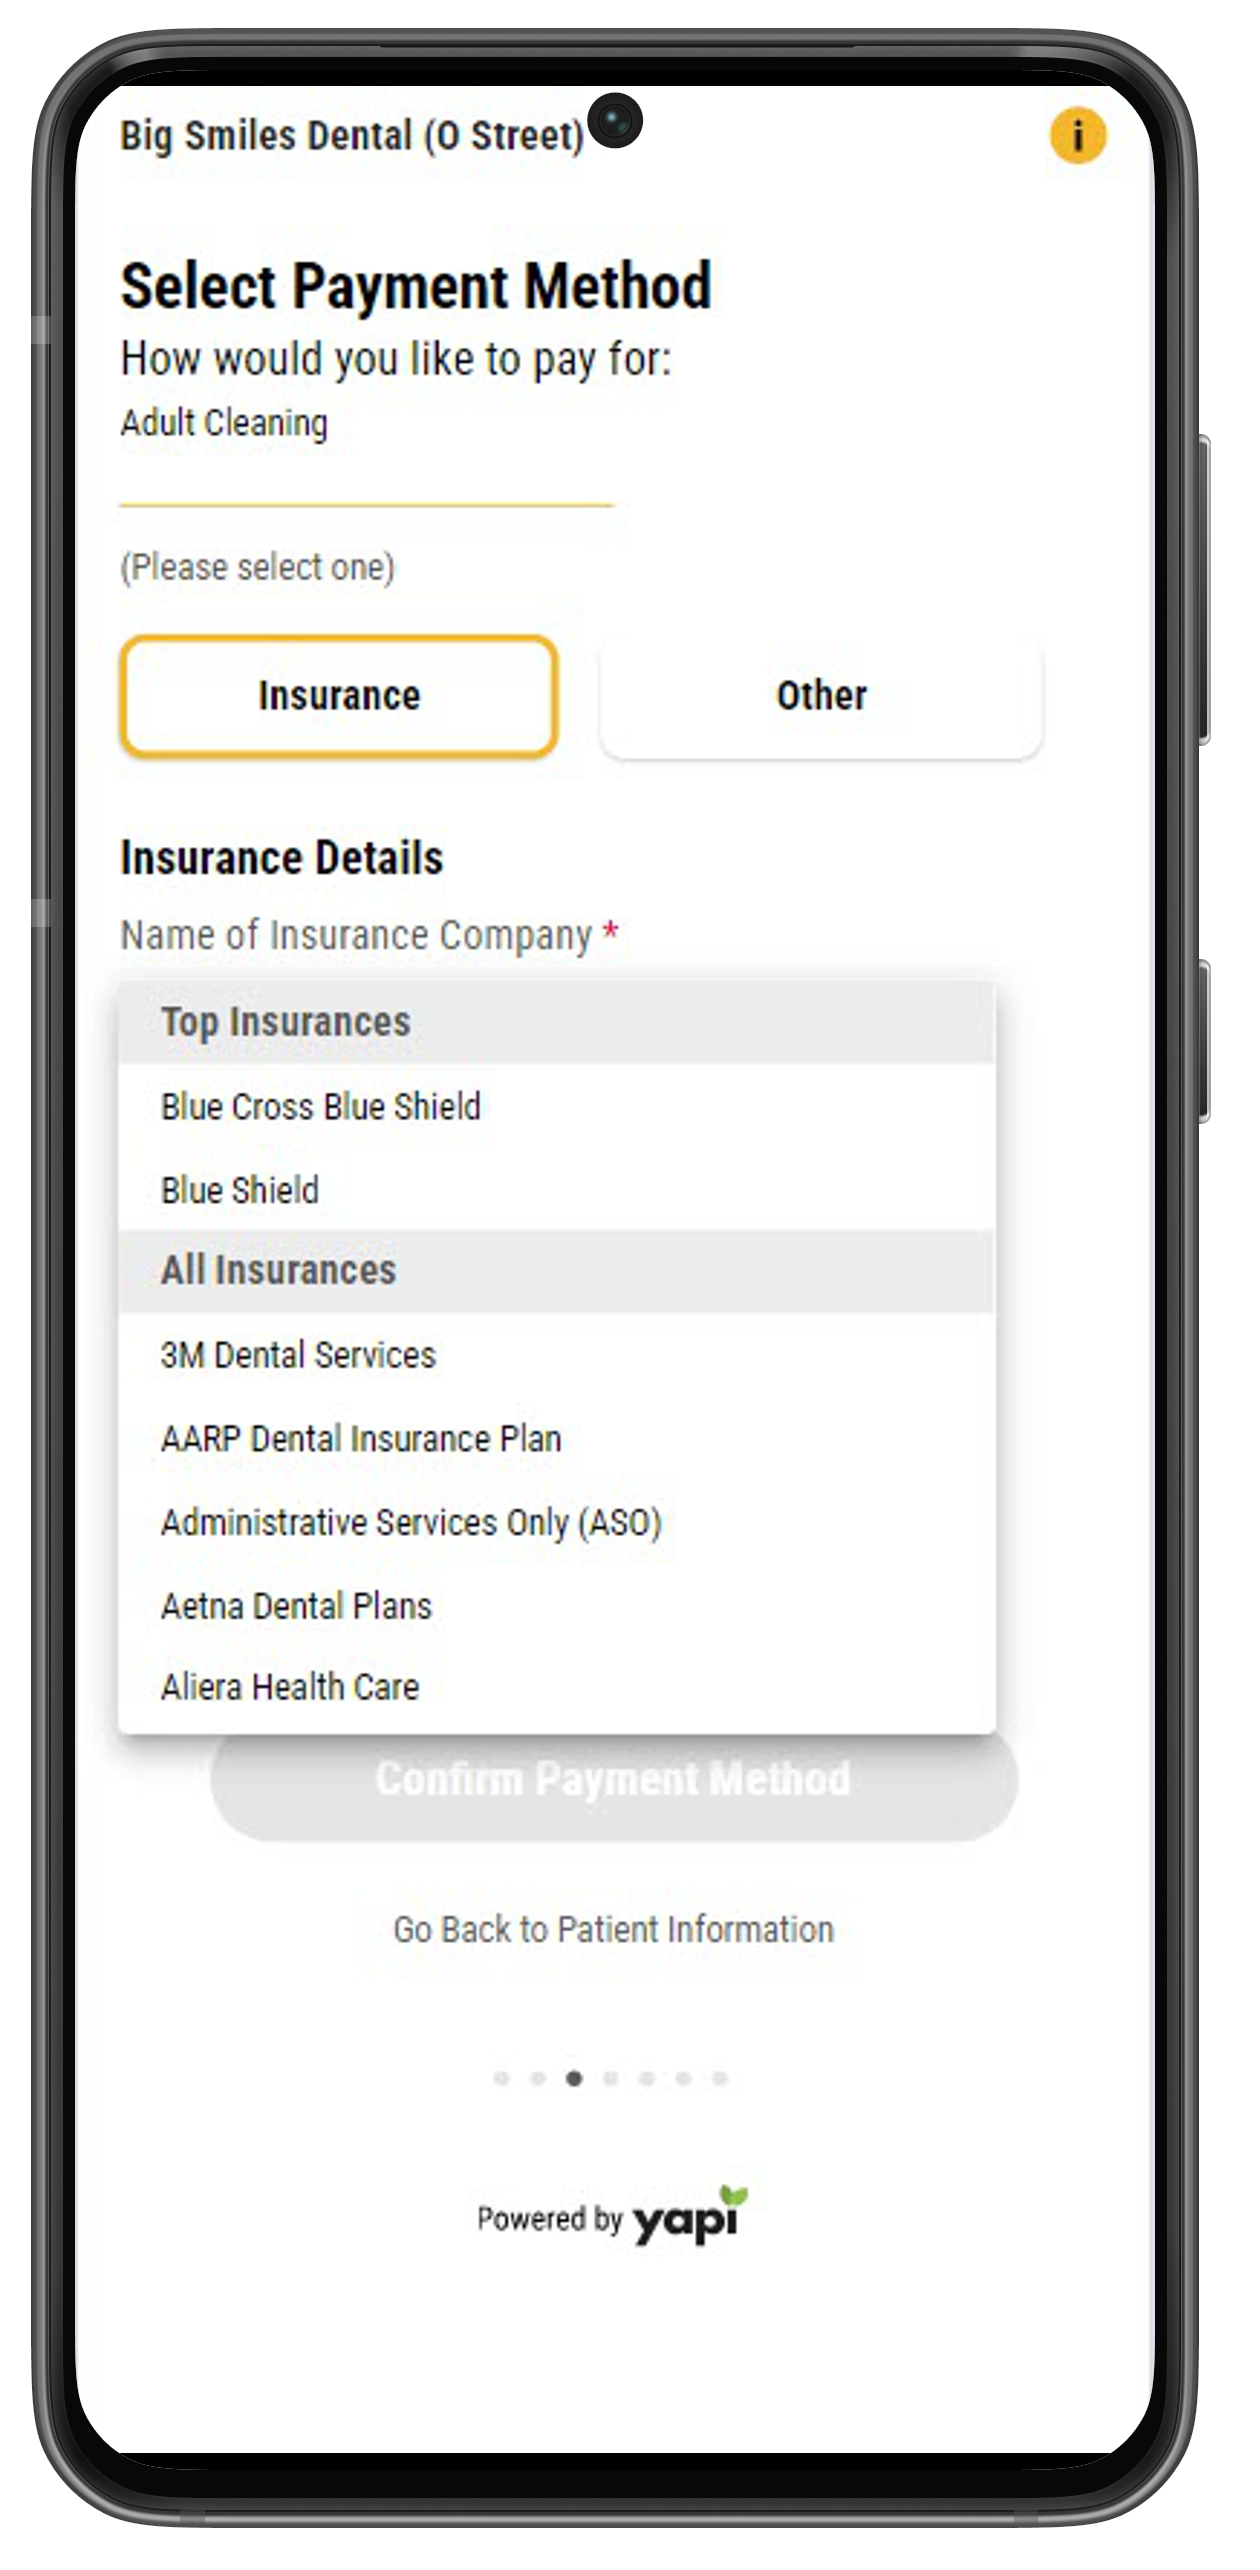 |
This list separates insurances under two headings:
Top Insurances: These are insurances that you've marked as "popular" in your Online Scheduling settings. This allows patients to select their insurance faster if it's a popular one.
All Insurances: This list includes all insurances you accept at your practice including the ones marked as popular. (Popular insurances show up twice in this list; once under Top Insurances and once under All Insurances.)
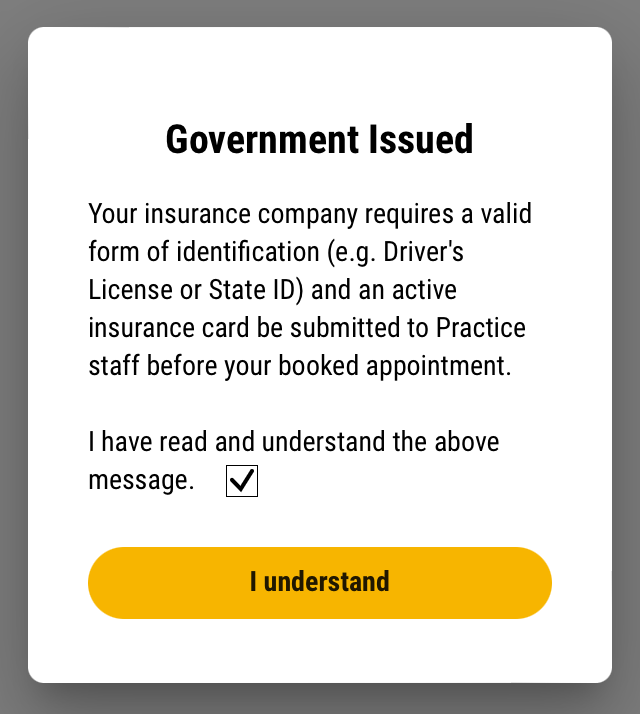
Government-Issued Insurances: If the insurance a patient selects is one you've indicated is government-issued, the patient will see a pop-up indicating they need to bring a valid form of ID and an active insurance card to their appointment.
 |
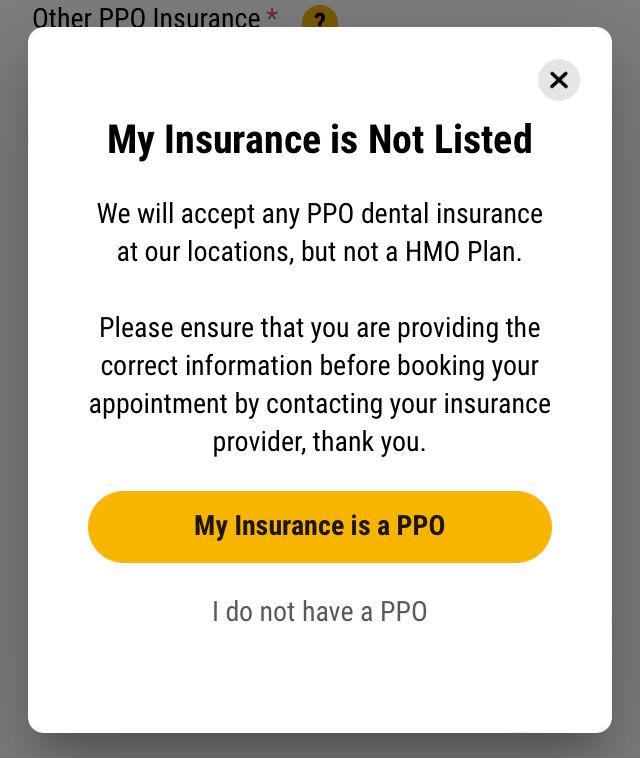
Insurances Not Listed: If you've indicated in your Online Scheduling settings that your practice accepts all PPOs, a patient can select My insurance is not listed. They'll see a pop-up explaining that your practice accepts PPO plans but not HMO plans for insurances that aren't listed.
If they select "My insurance is a PPO": The pop-up will close and a new field will appear to fill in the insurance name.
If they select "I do not have a PPO": They'll be taken to a Contact Us screen directing them to reach out to your practice.
 |
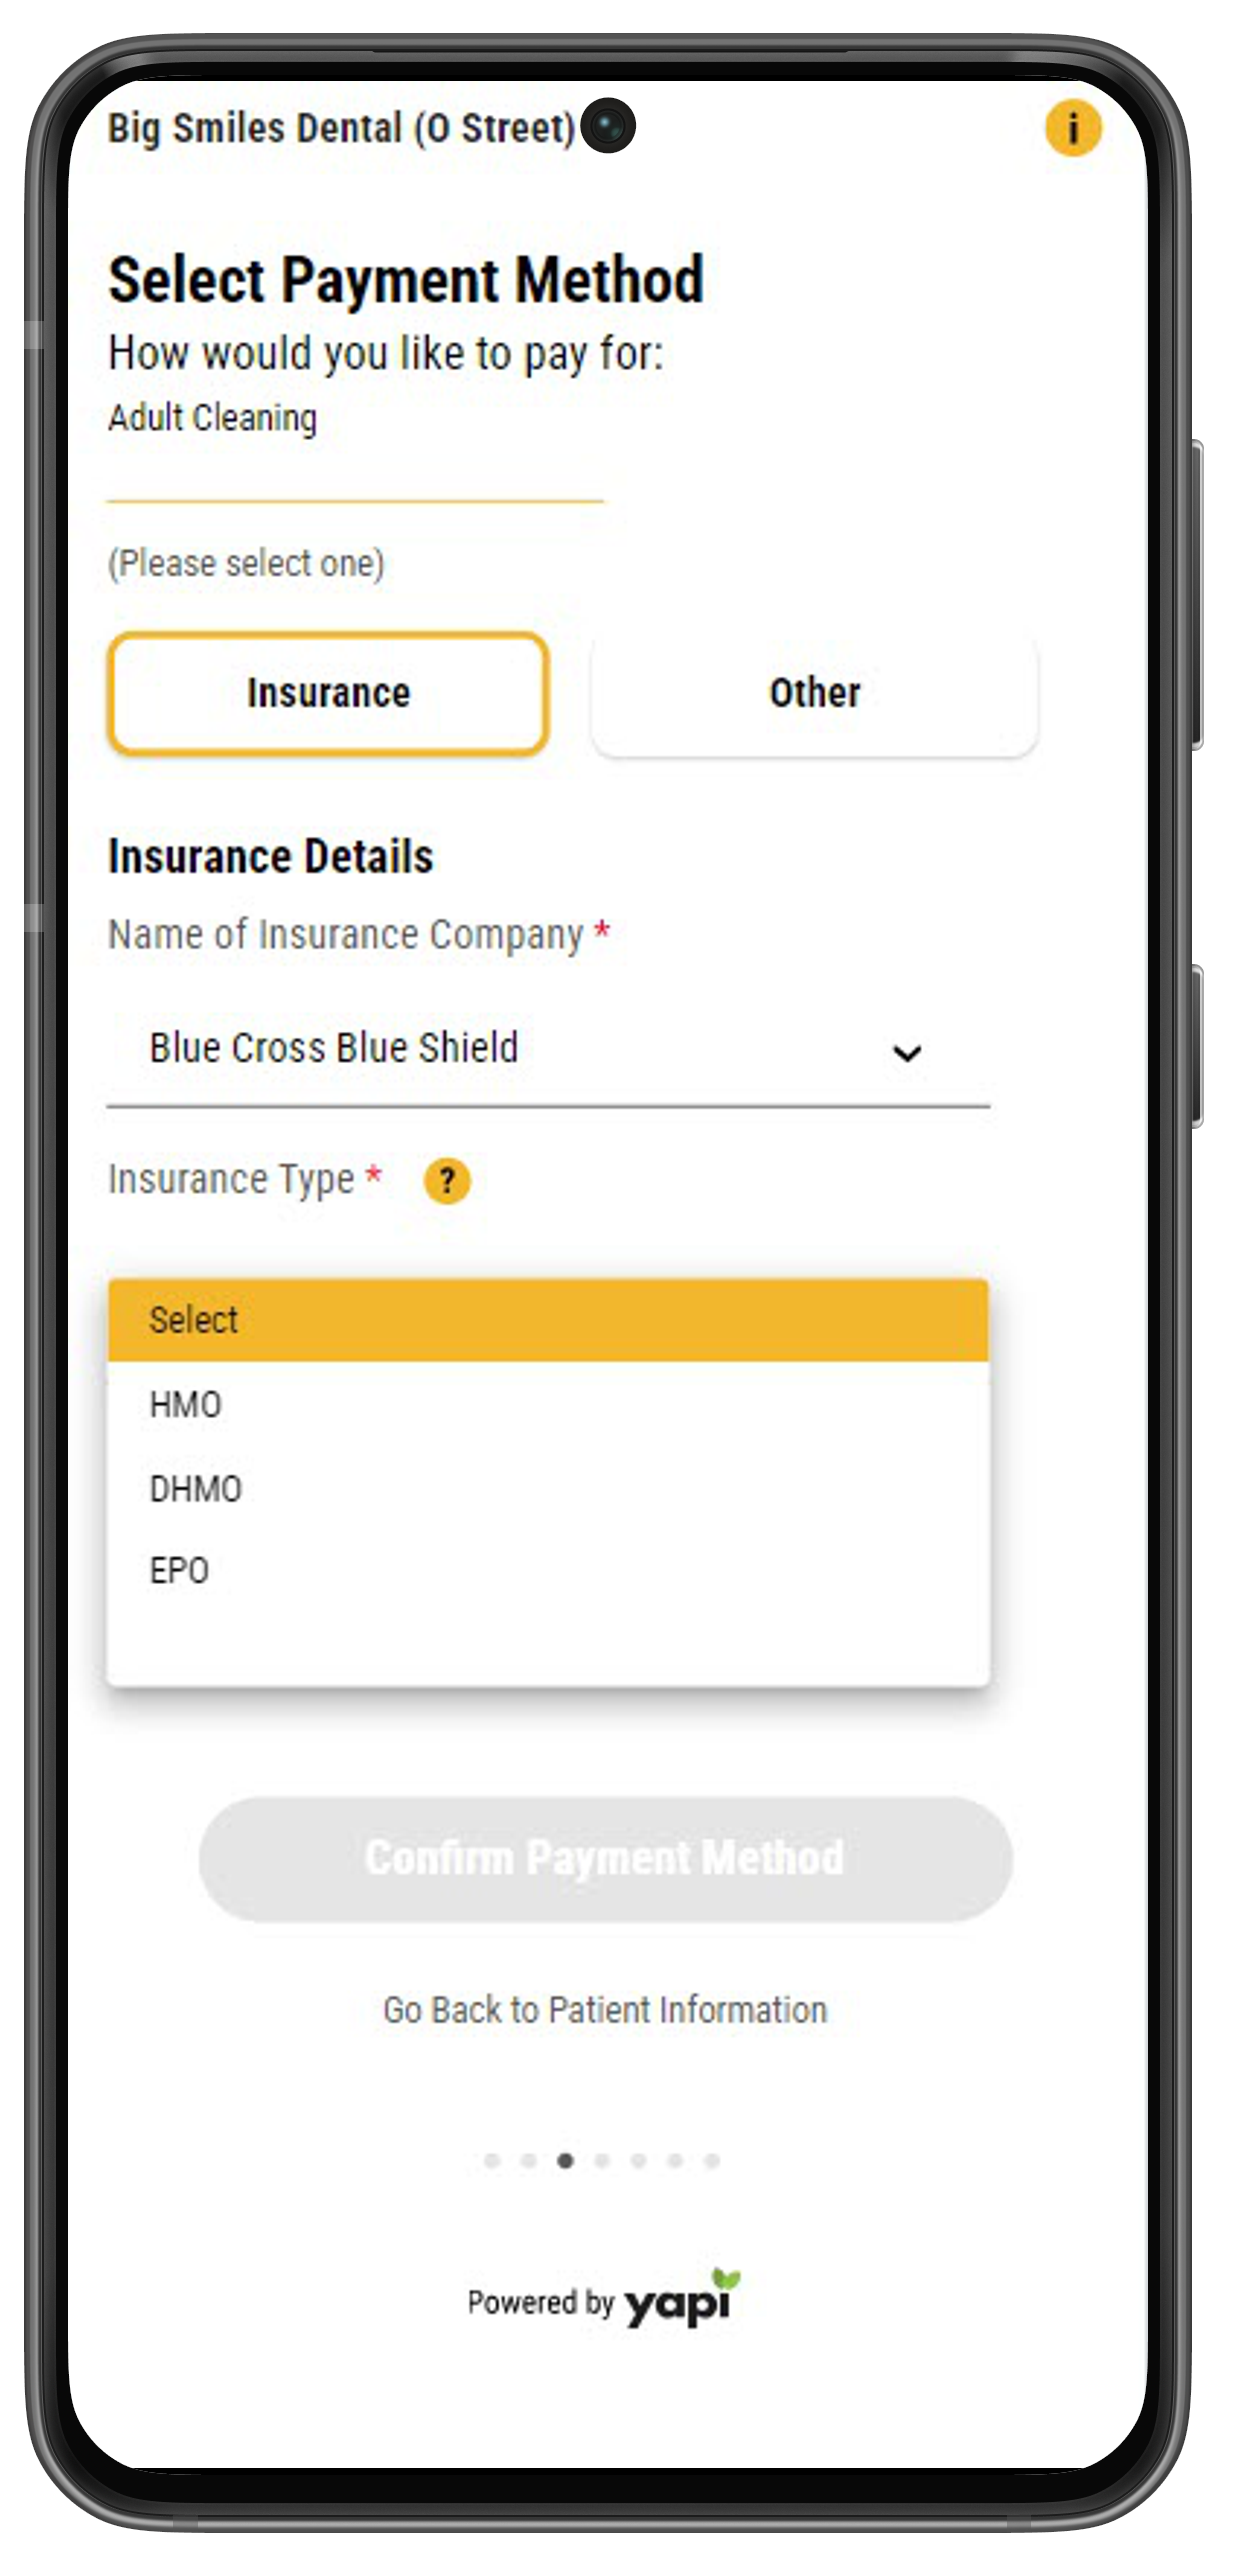
Insurance Type
Once a patient has selected their insurance, they much choose an Insurance Type. The dropdown list shows the types of insurance your practice accepts (HMO, DHMO, PPO, and/or EPO) from their selected insurance company .
Note
If the Insurance they've selected is government-issued, they don't need to choose an Insurance Type and won't see this field.
 |
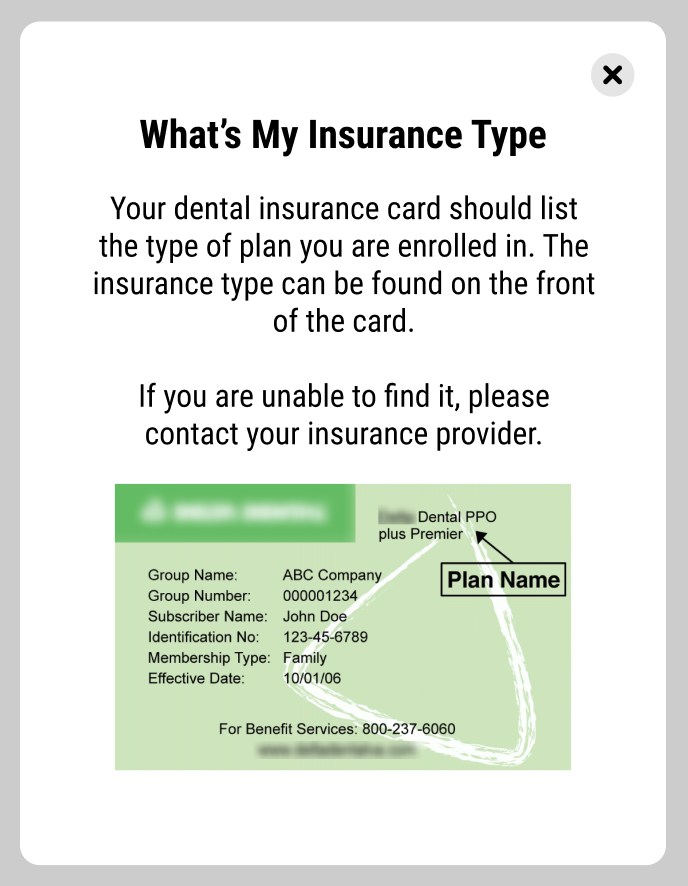
Tip
If patients are unsure what type of insurance they have, they can click on the question mark icon  next to this field. A pop-up will show them where they can find this information on their insurance card:
 |
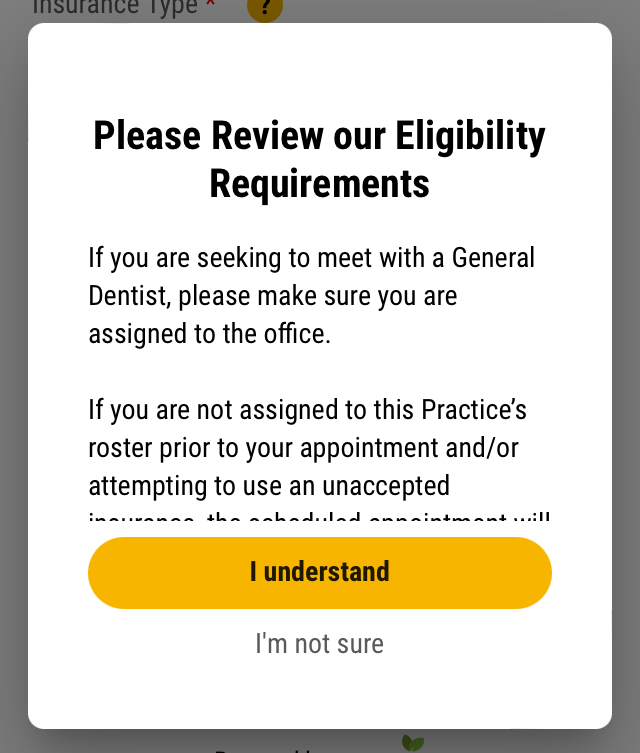
HMOs & DHMOs: If a patient selects HMO or DHMO as an insurance type, they'll see a pop-up asking them to confirm that they've been assigned to your practice within their HMO or DHMO. If the patient checks the box to confirm they've read the message and clicks I understand, the pop-up closes and the patient can continue forward. If the patient clicks I'm Not Sure they'll be prompted to contact your practice.
PPOs: If a patient selects a PPO insurance that you've set as Out-of-Network in your Online Scheduling Settings, patients will see an Out of Network Insurance message indicating that you take their insurance but their fees may differ from an in-network provider.
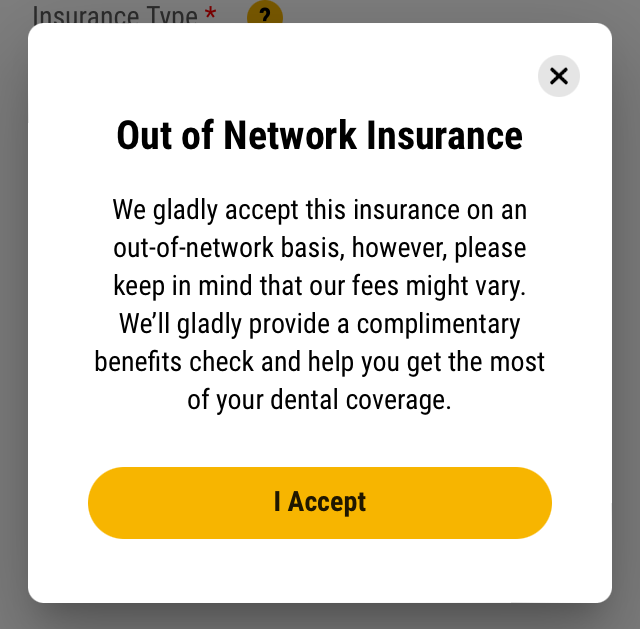 |
Fill Out Insurance Details
In your Online Scheduling Settings, your practice can select whether you want to require insurance information and whether you want to require that they type in their insurance details, provide a photo of the patient's insurance card, or both.
Once a patient has confirmed their payment method, if they've chosen Insurance and you've required that patients type in their insurance details, they'll see fields to enter their Group ID and Subscriber ID:
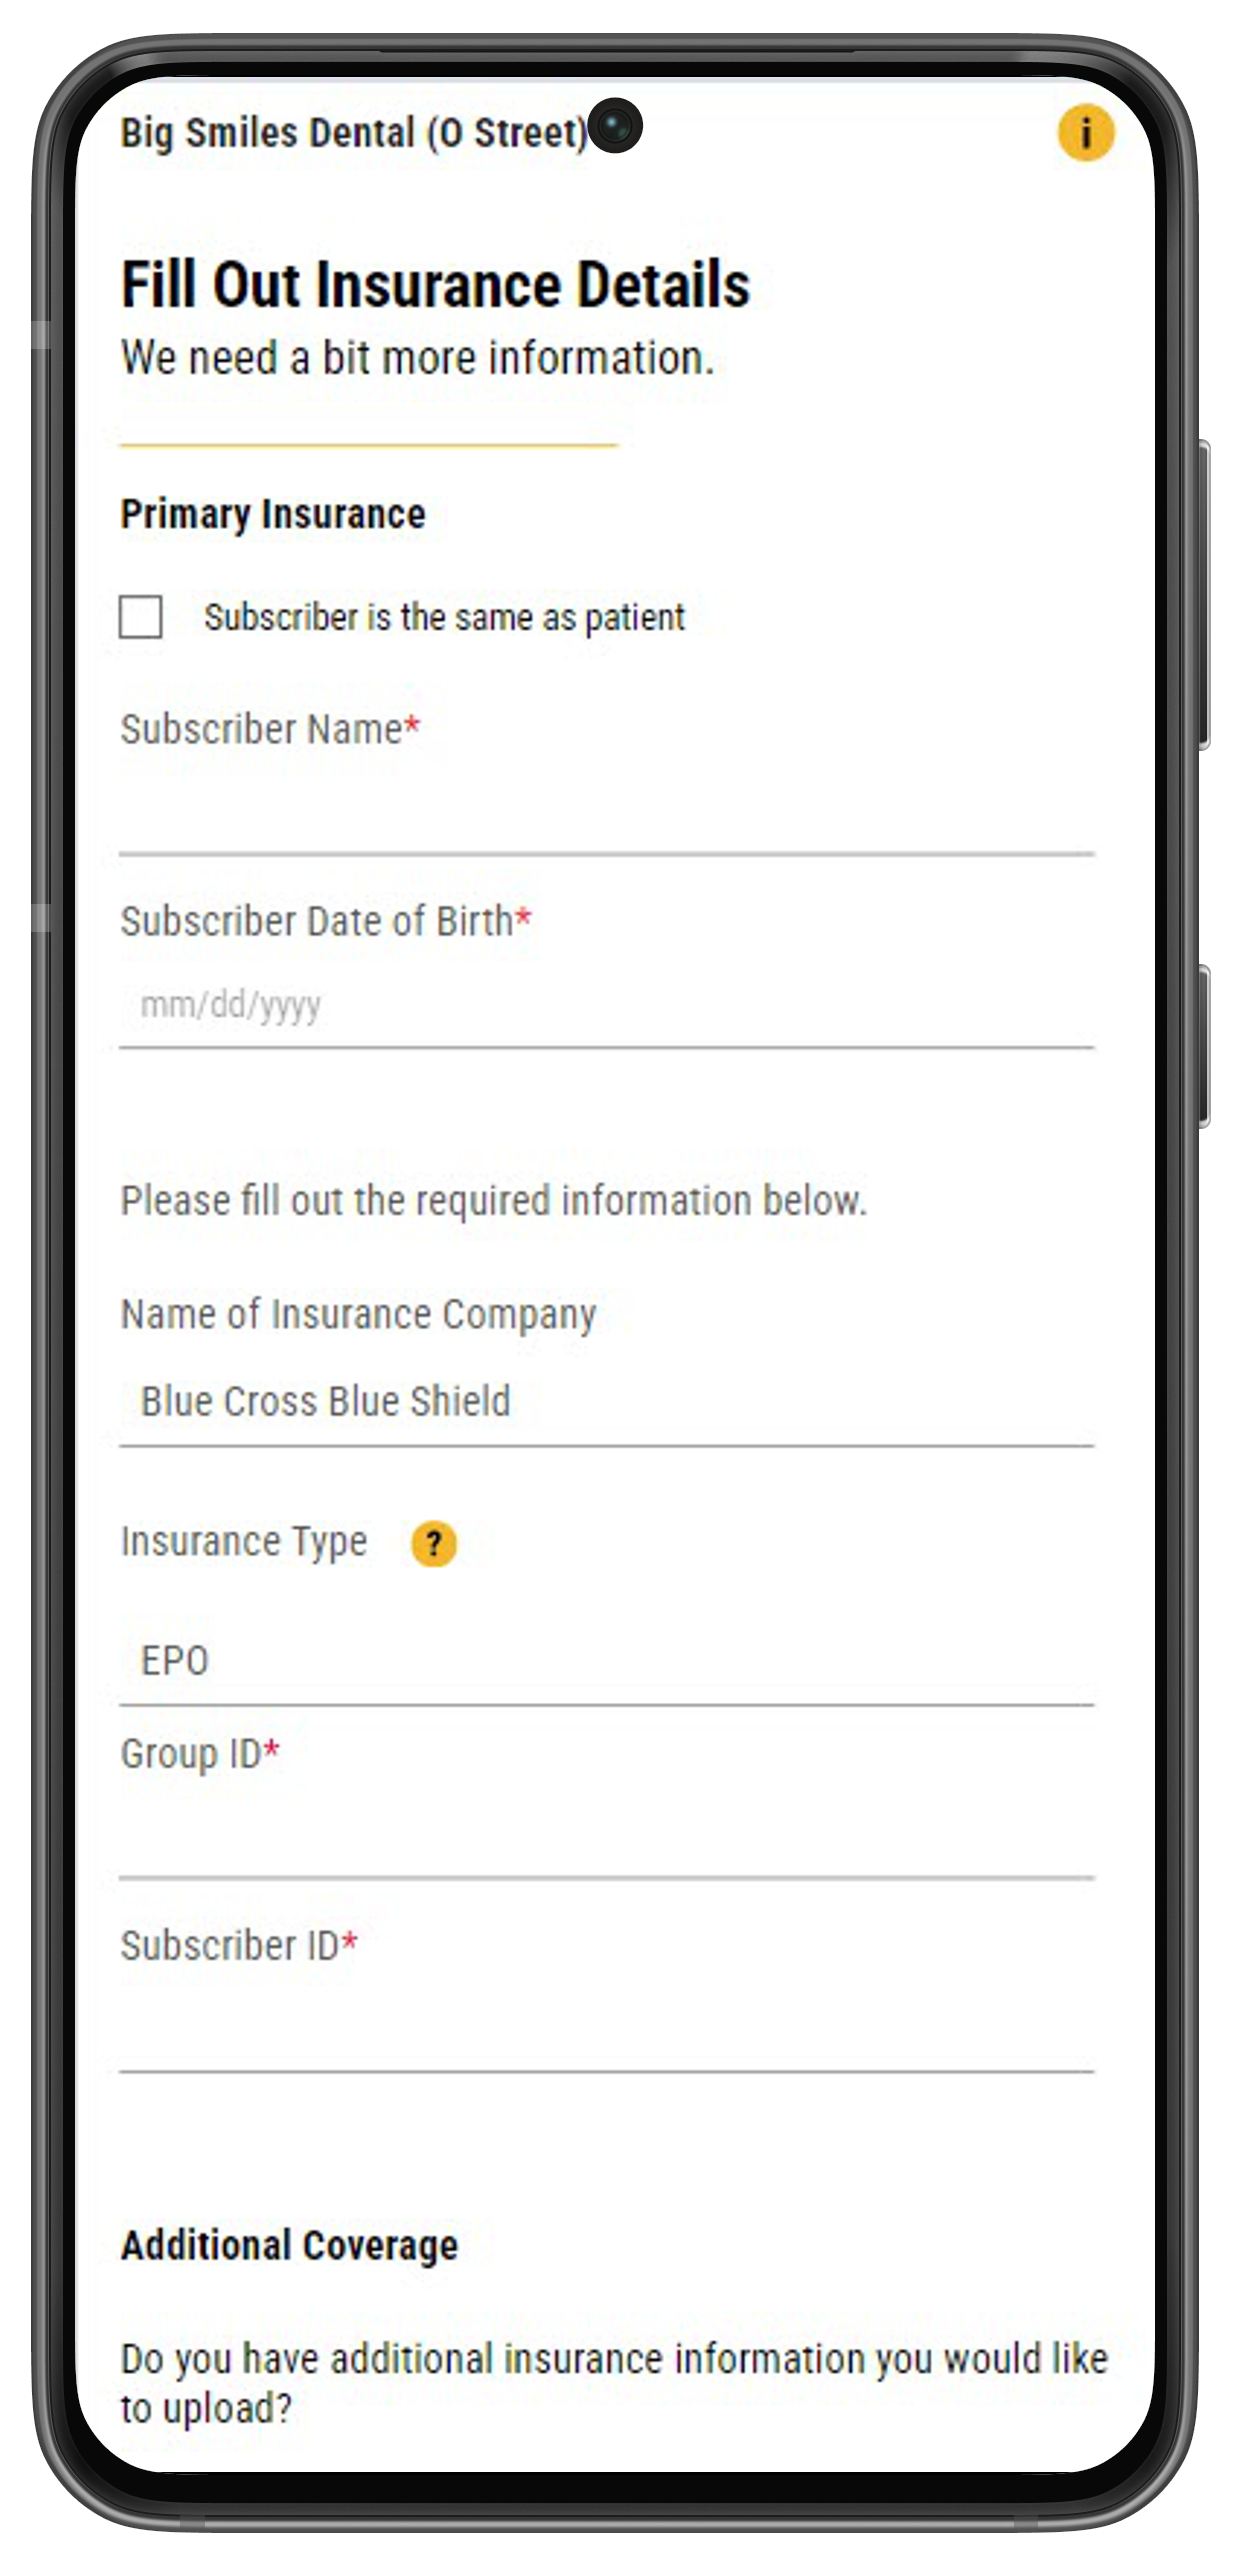 |
If you've added the requirement that patients upload a photo of their insurance card, the patient must submit pictures showing the front and back:
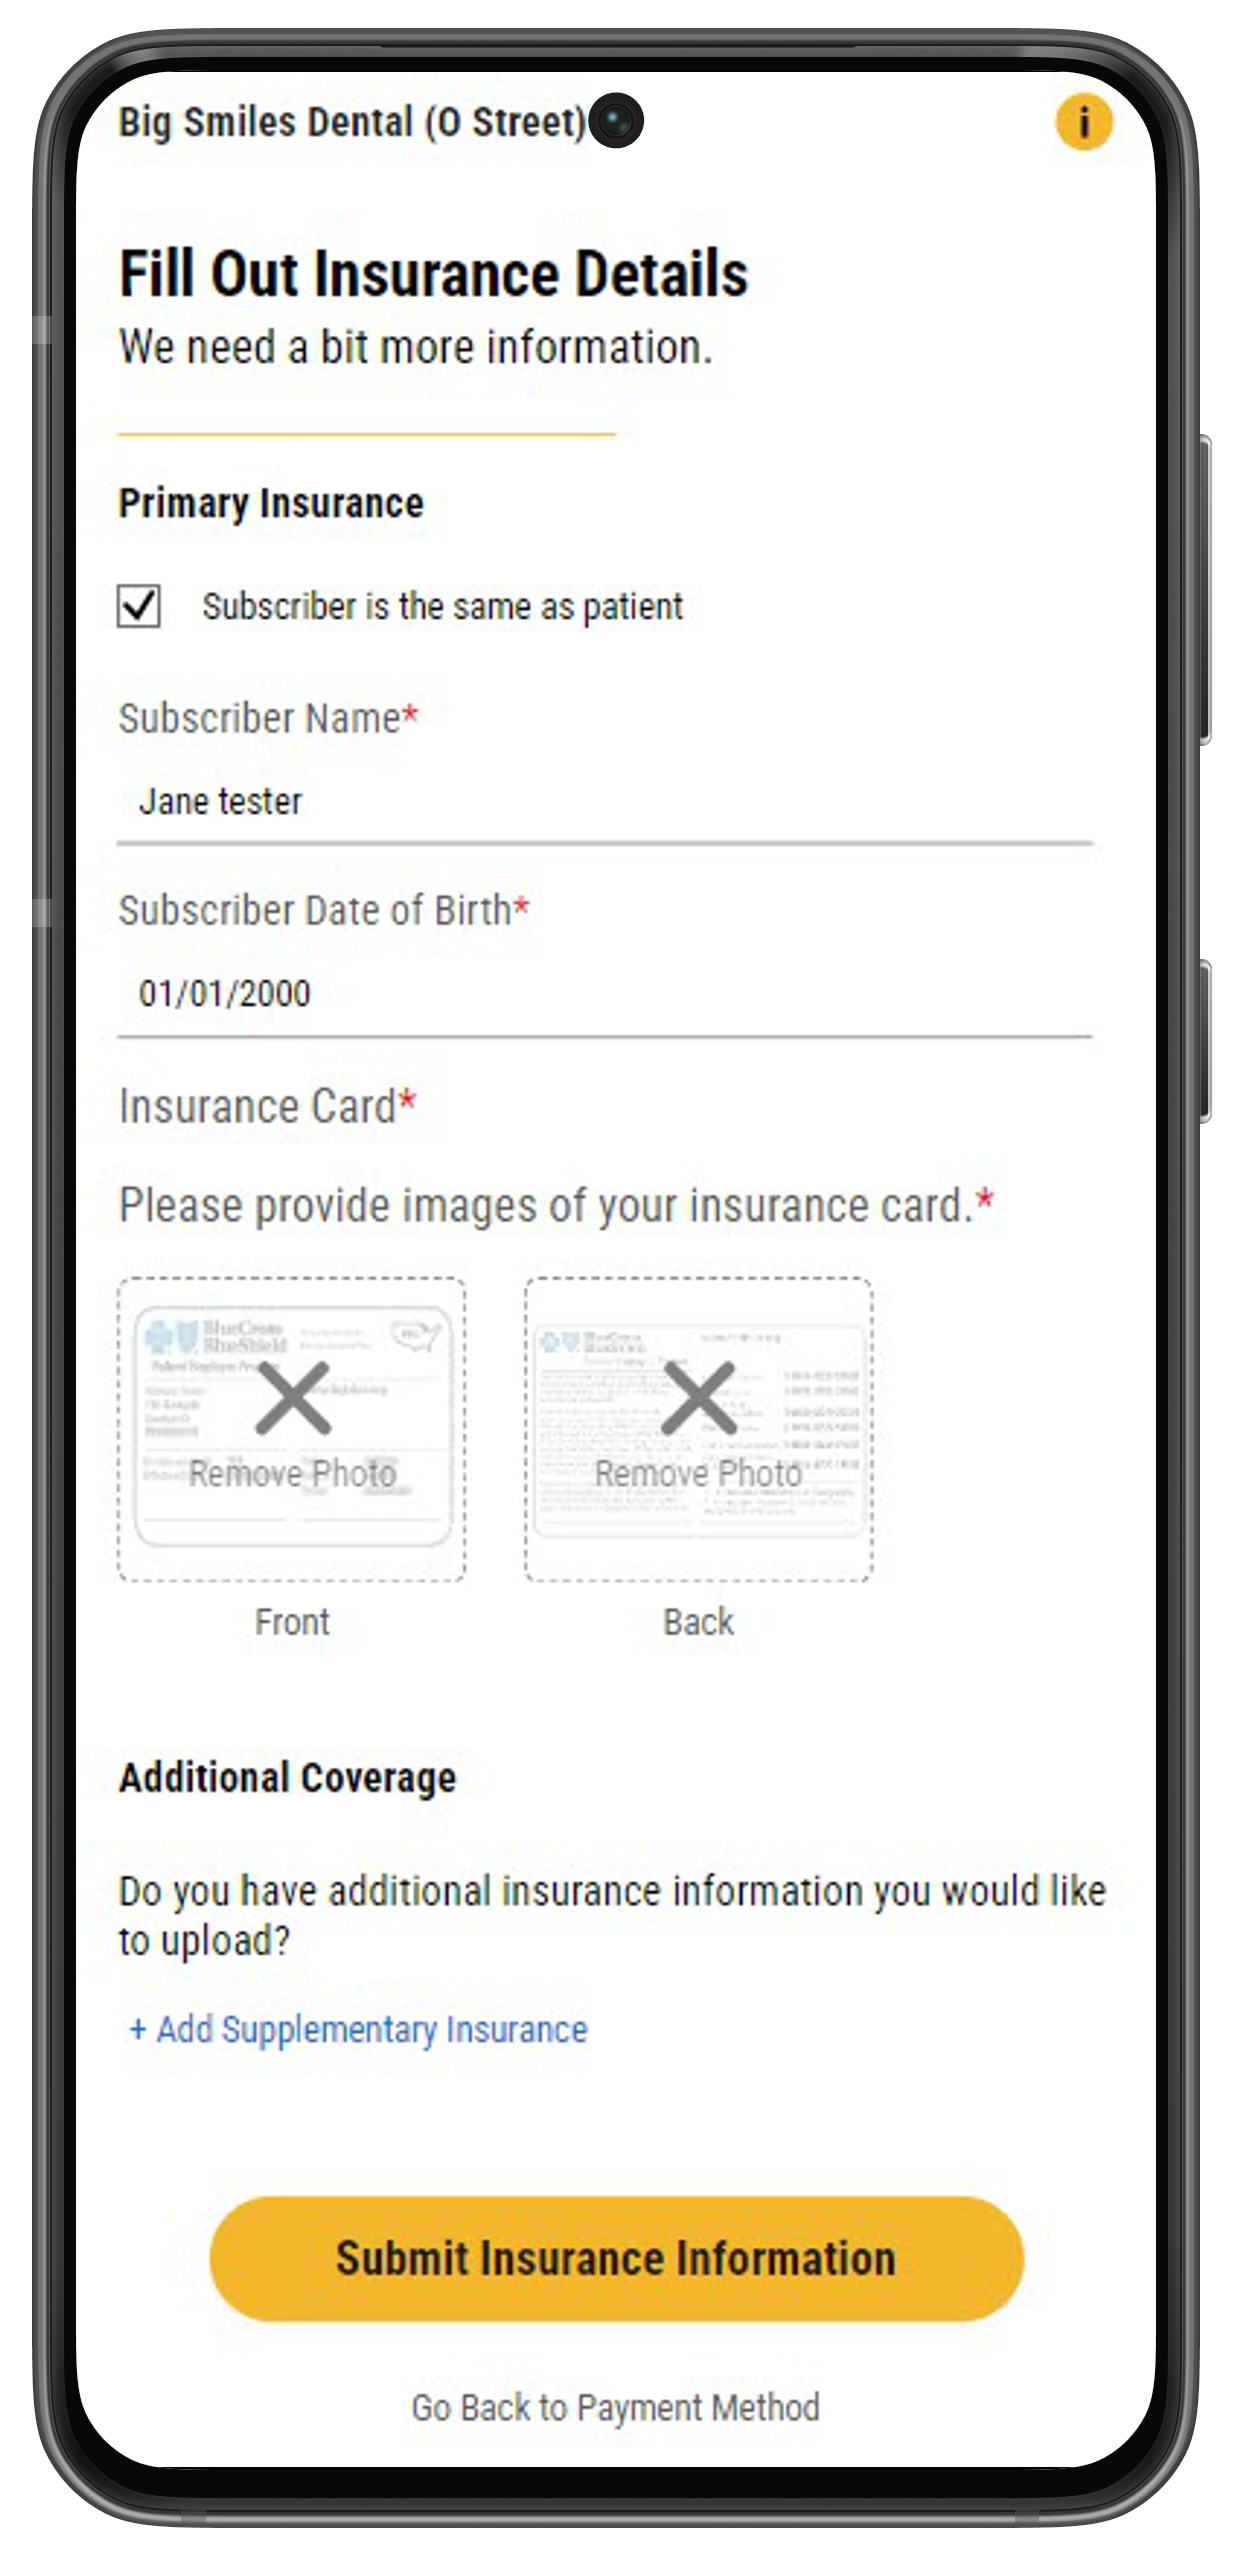 |
Patients also have the option of adding an additional, supplementary insurance at the bottom of the page:
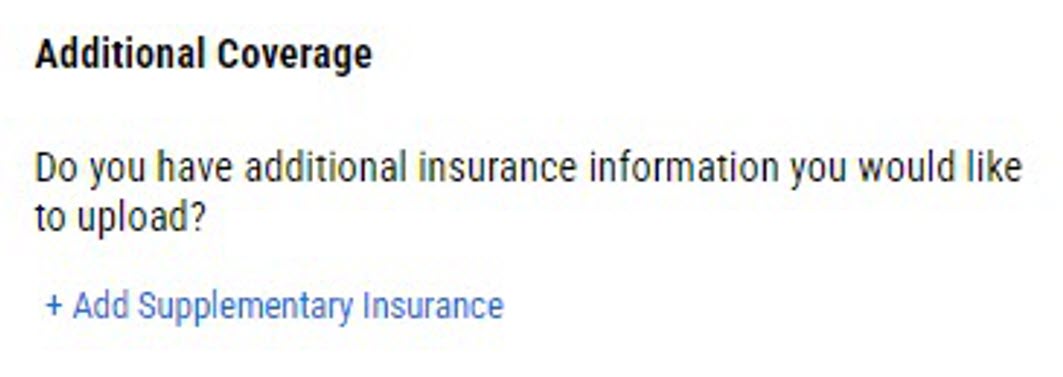 |
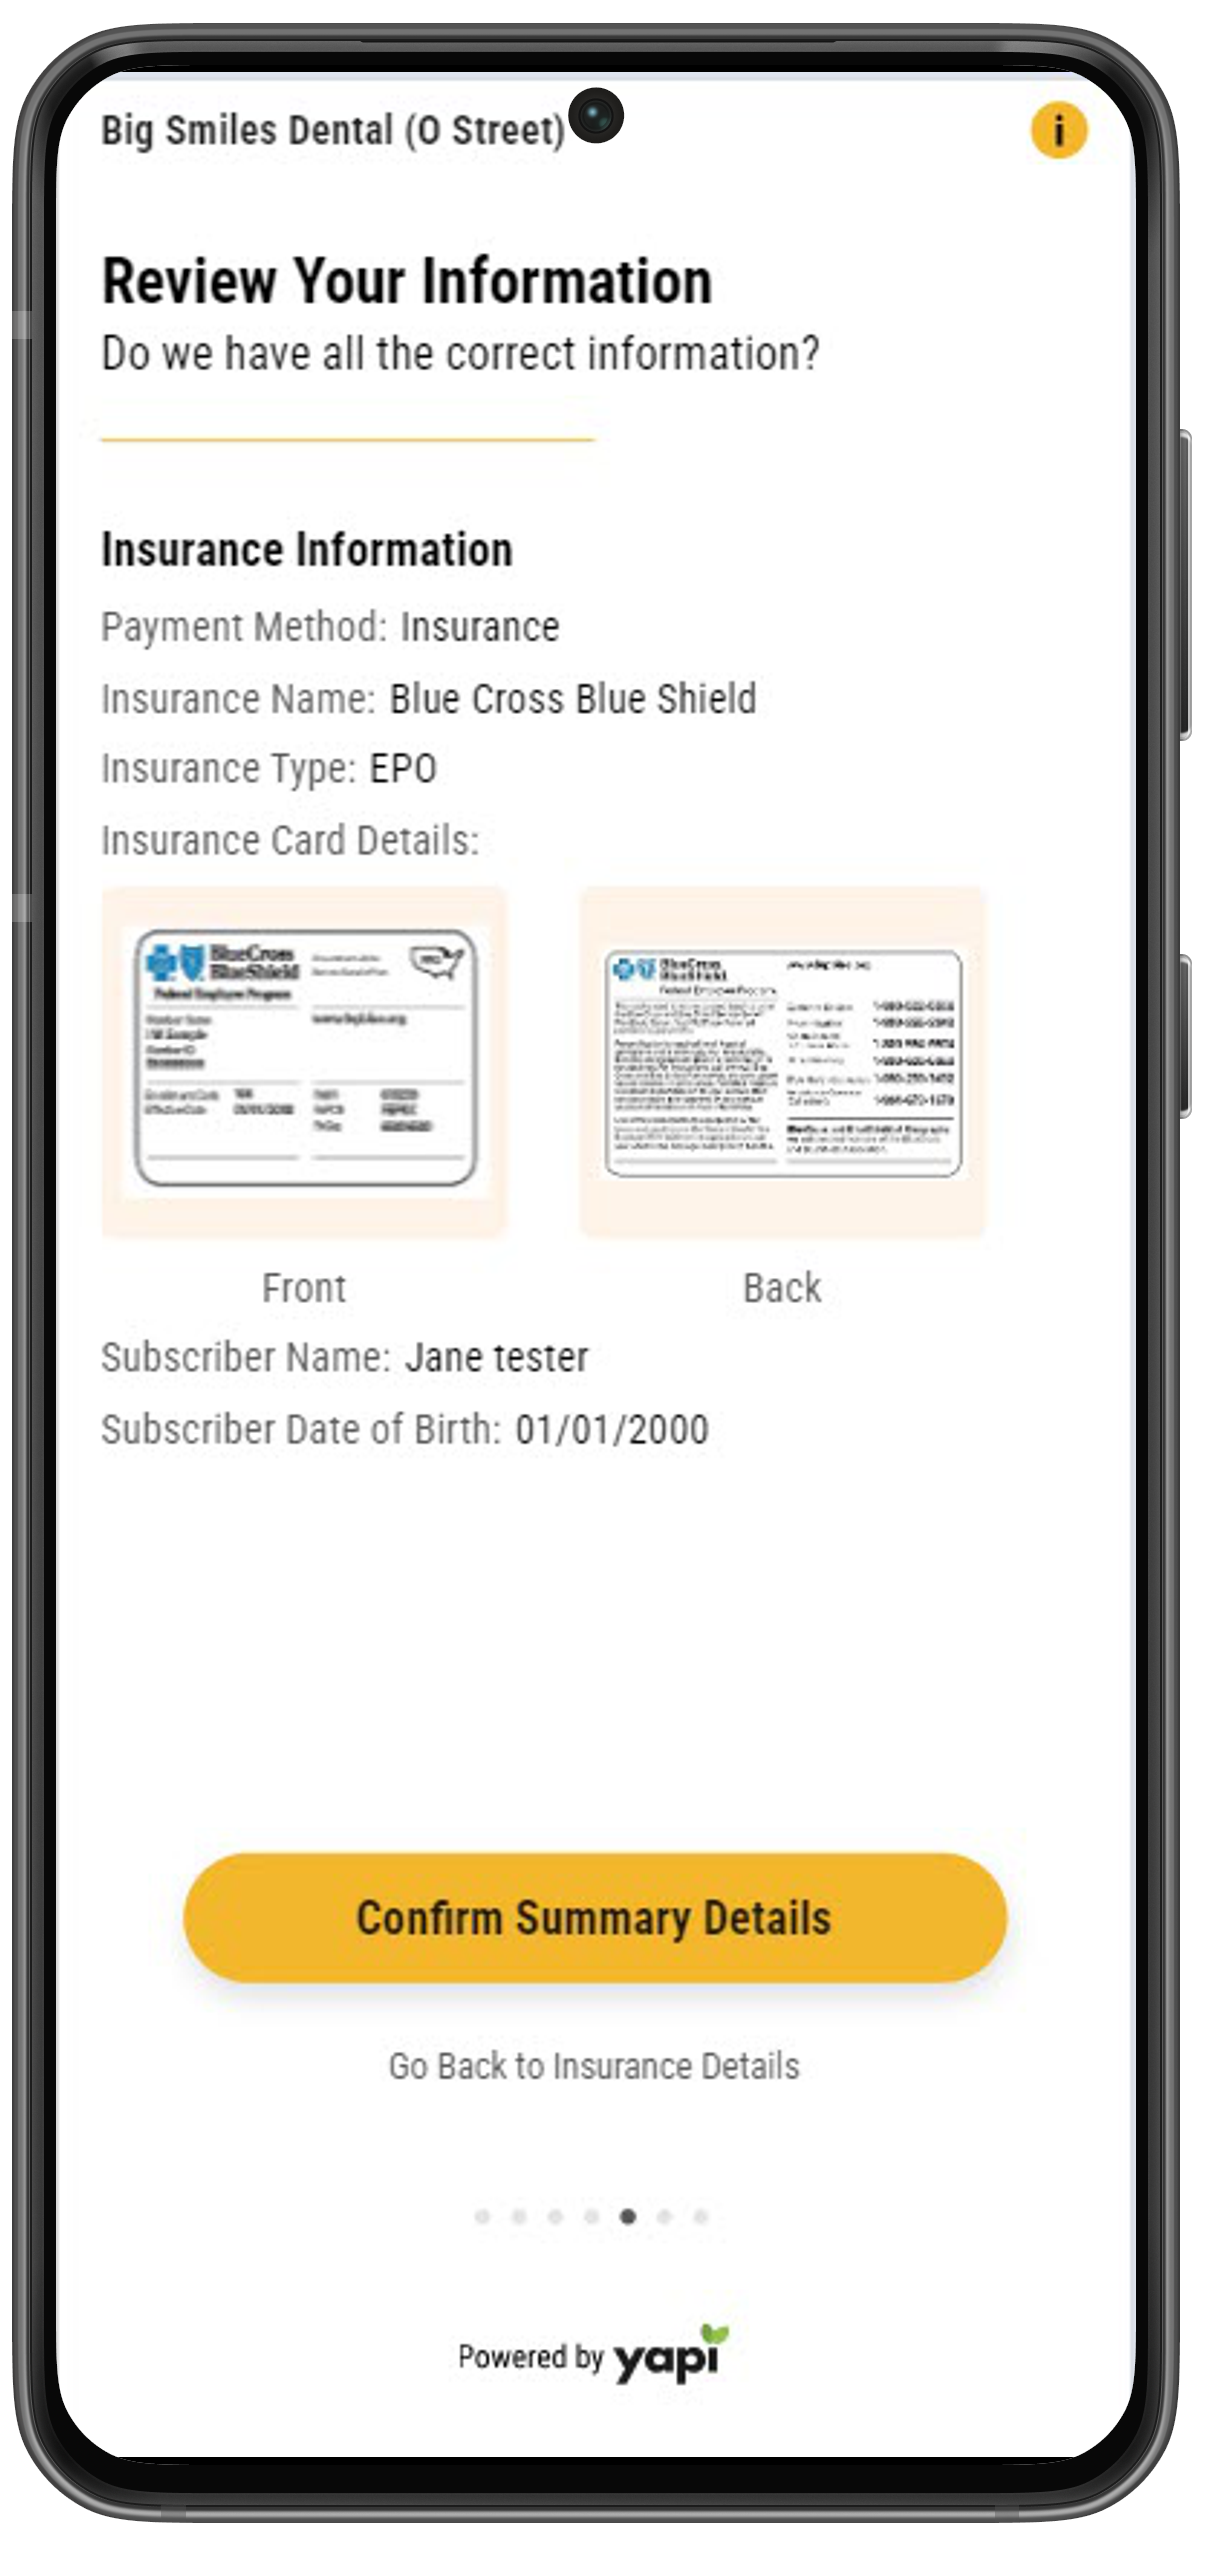
Review Your Information
Clicking on the Submit Insurance Information button takes the patient to a Review Your Information page to confirm their insurance information:
 |
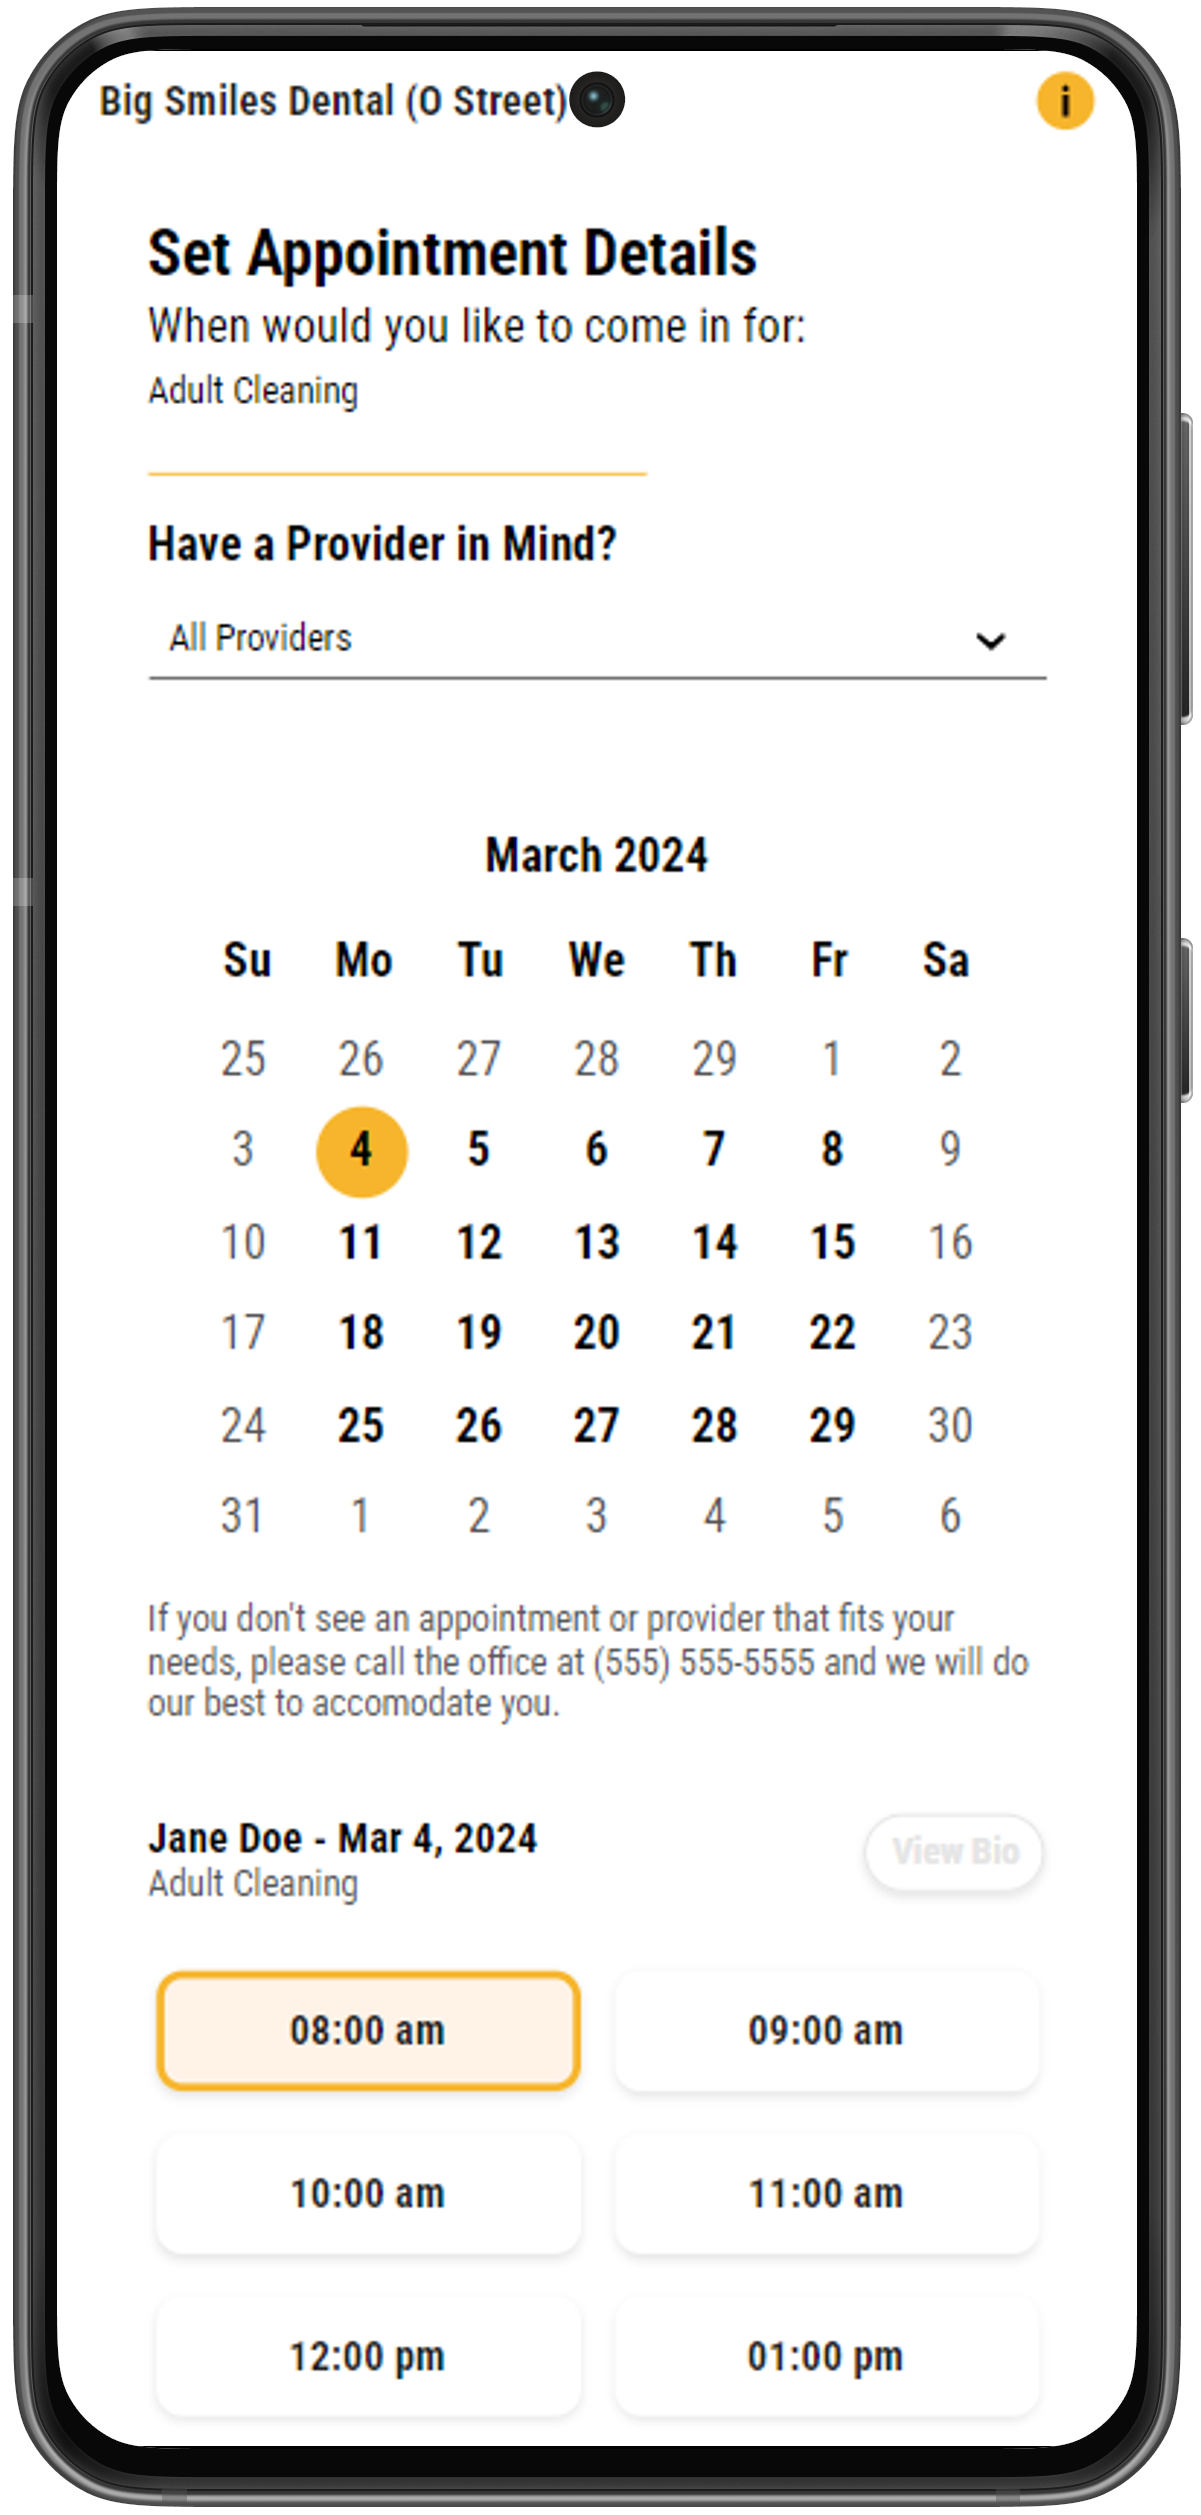
Now the patient can select a date and time for their appointment and, if they want, a provider they want to see. If a patient chooses a specific provider, they'll see available appointments for that provider only.
 |
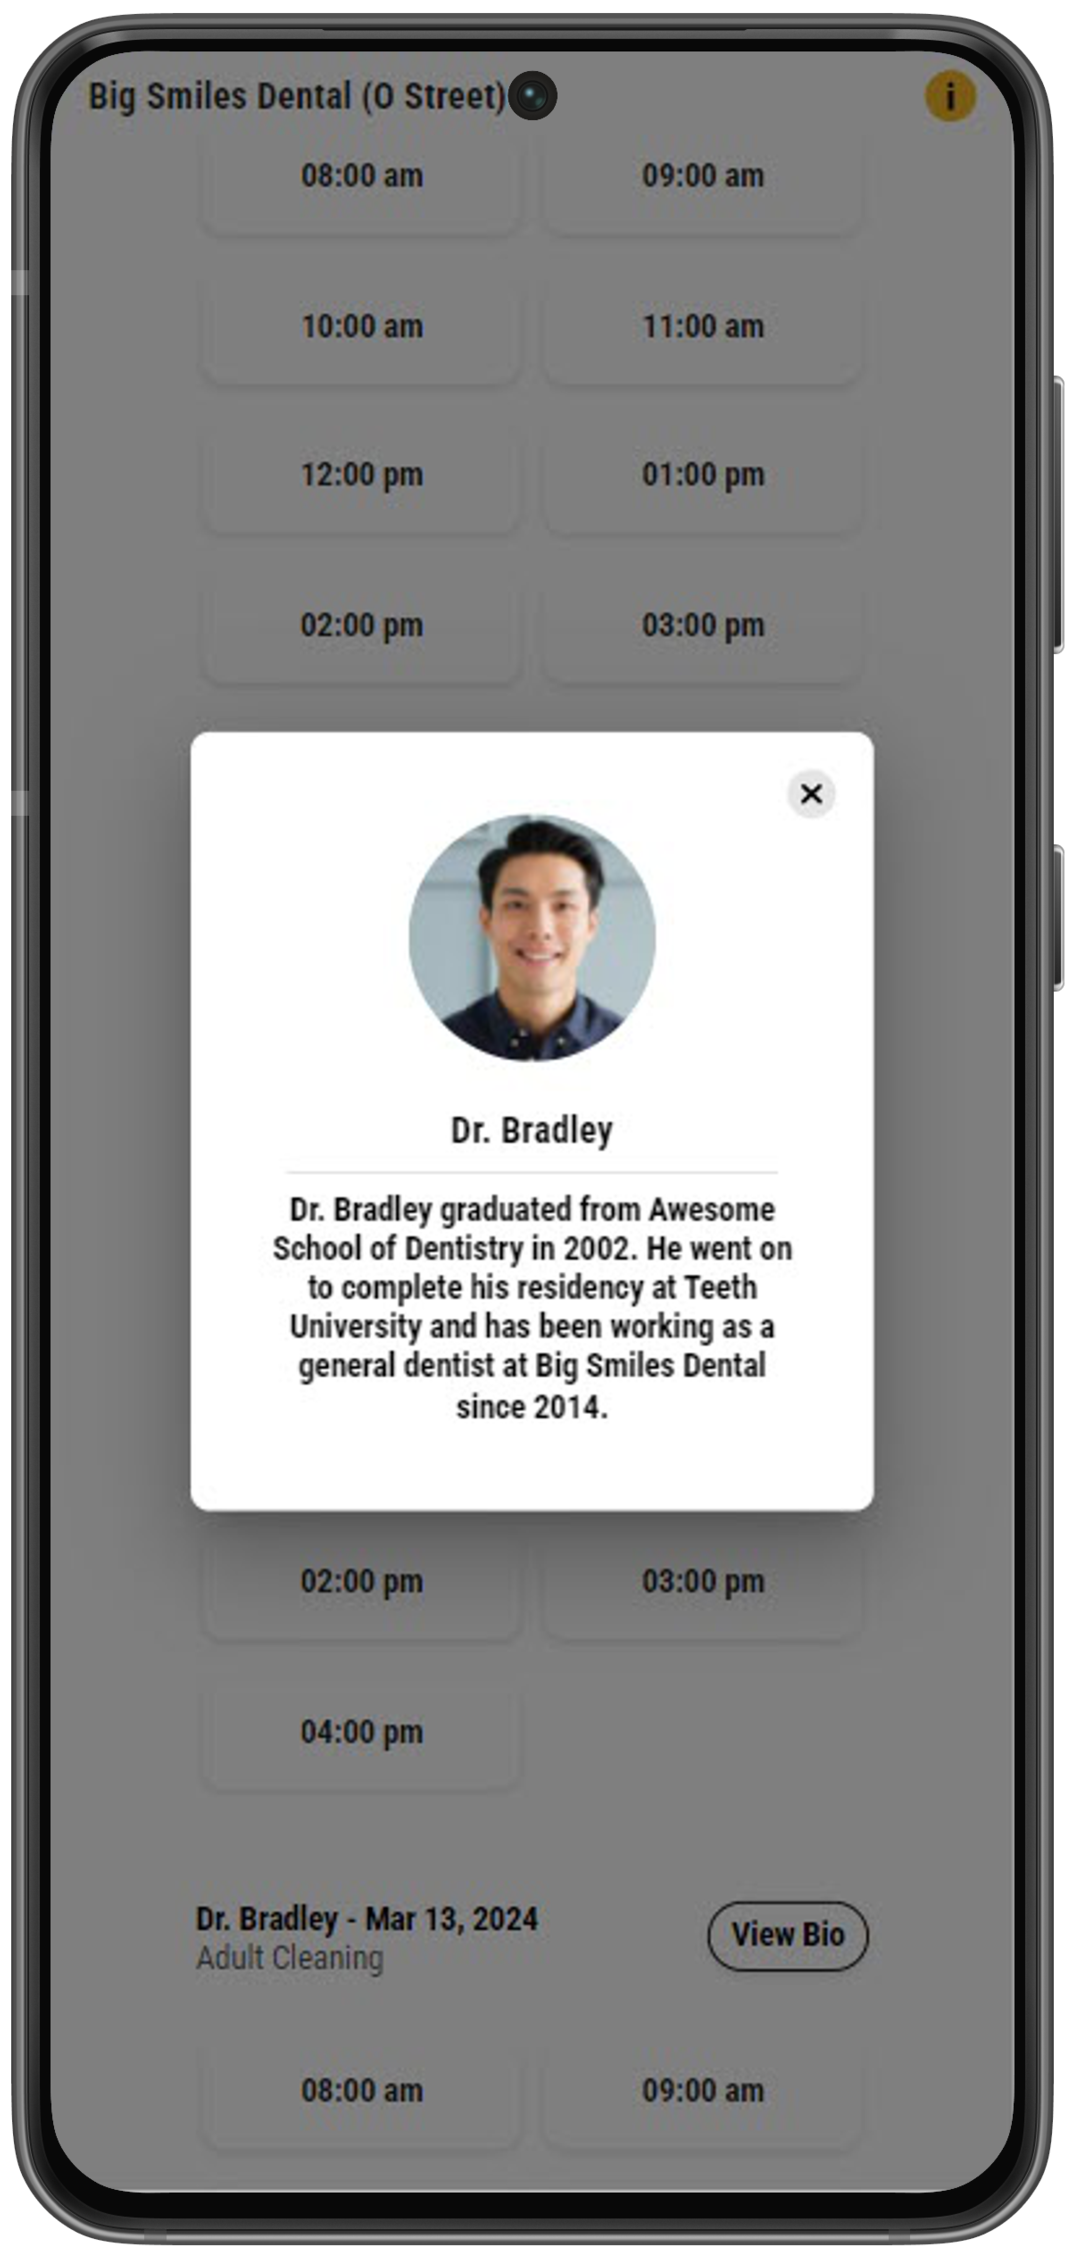
If you've added bios for your providers in Online Scheduling, patients can click View Bio next to each provider name to read a short summary about them.
 |
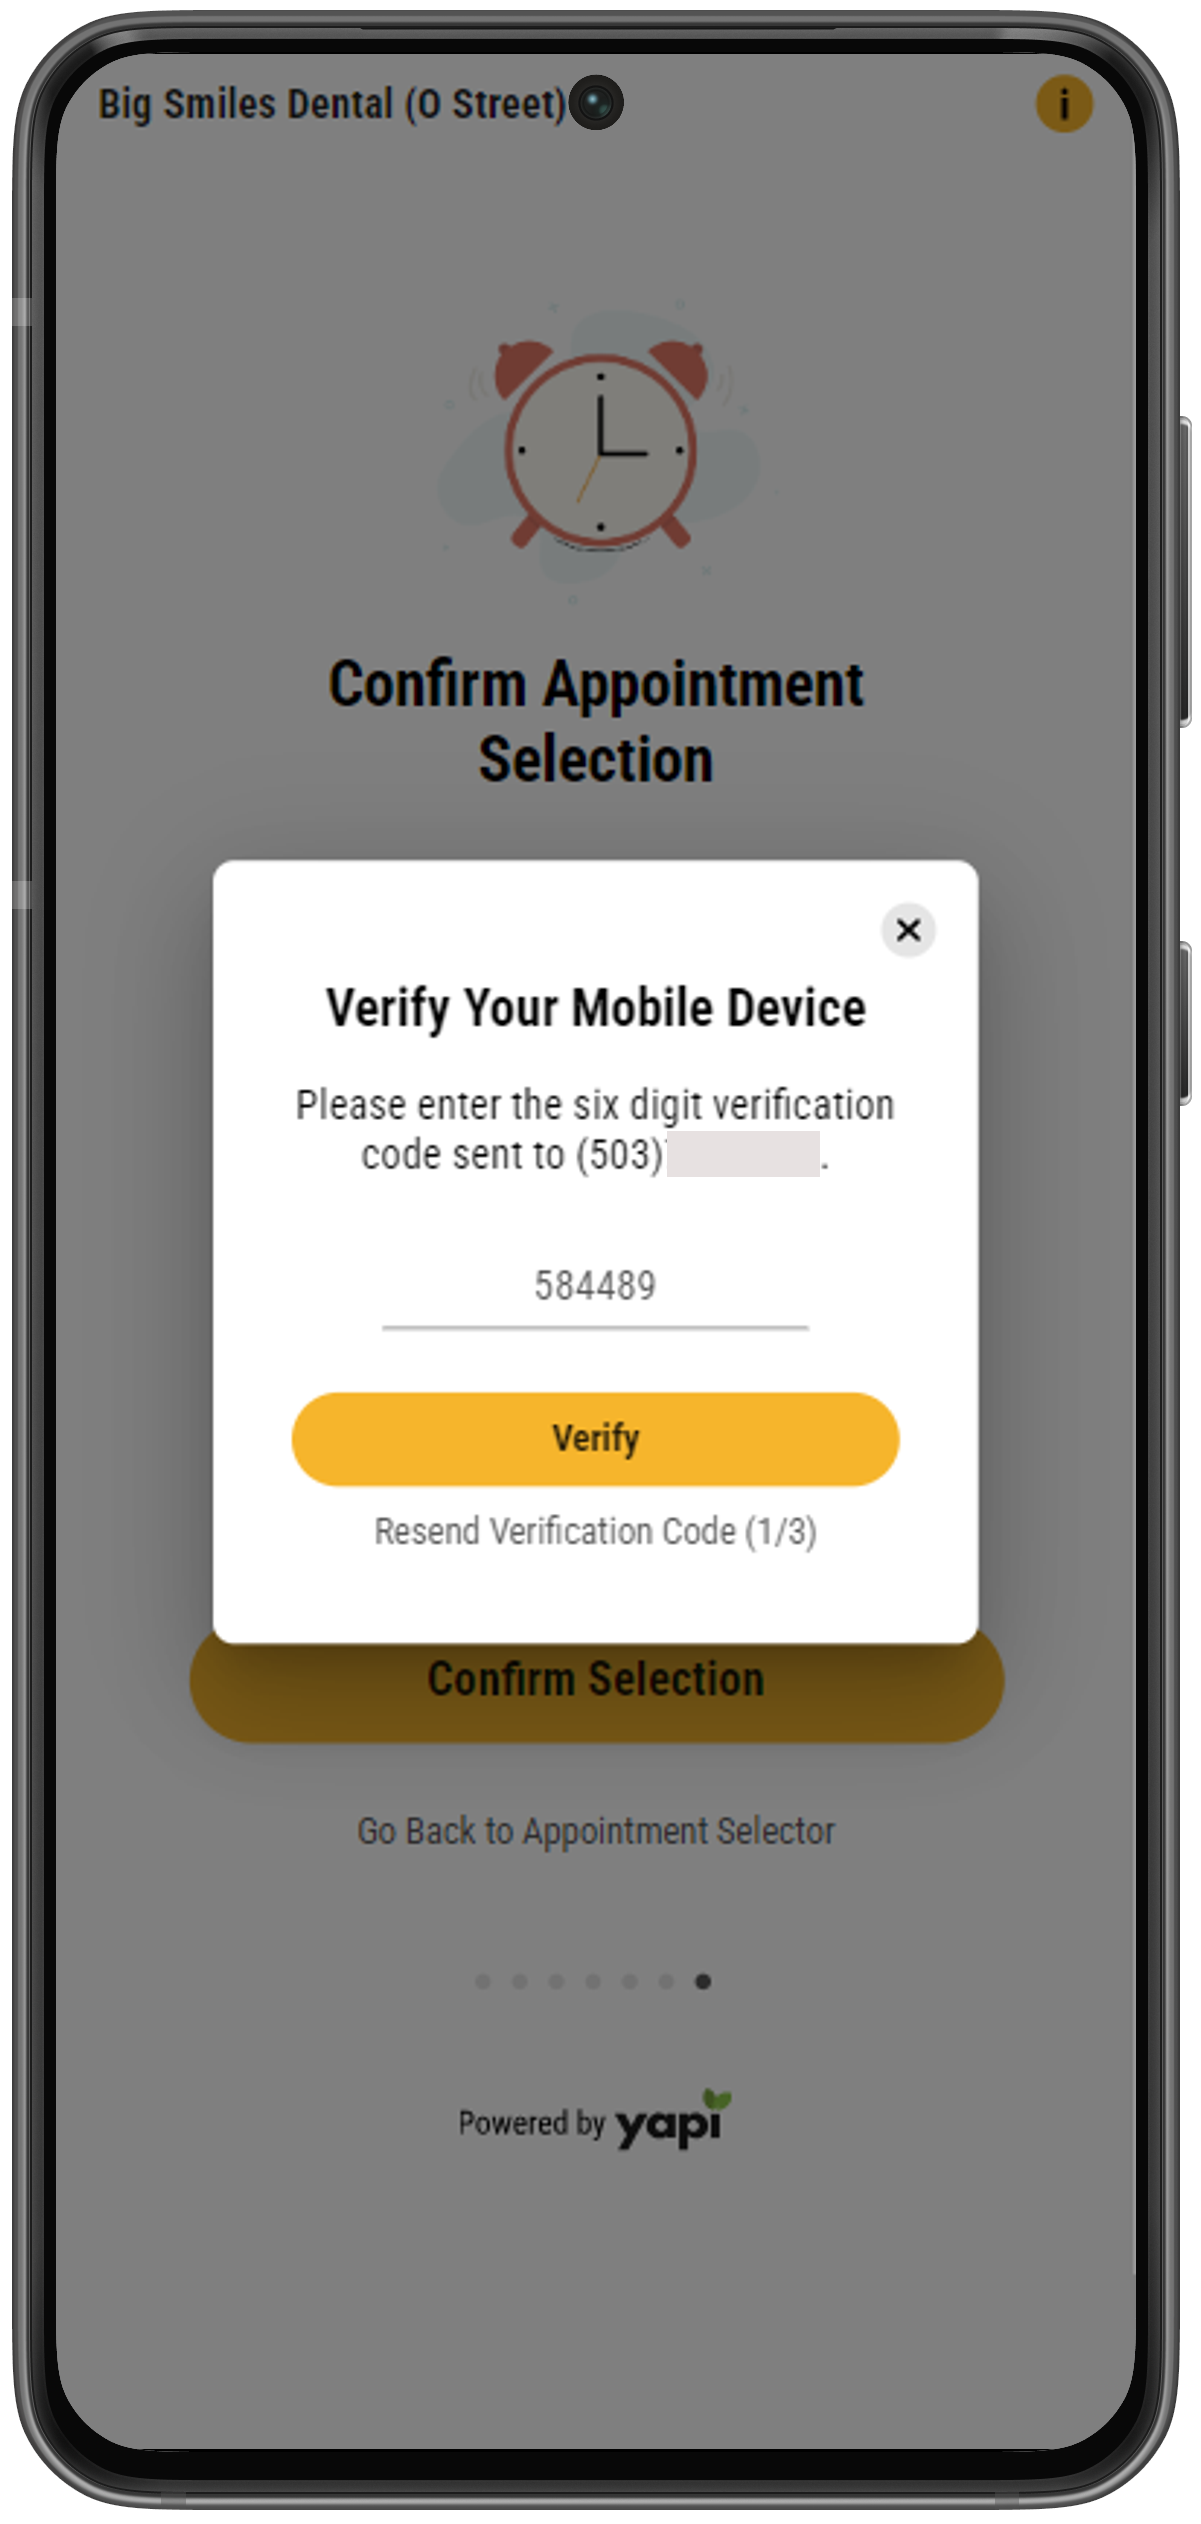
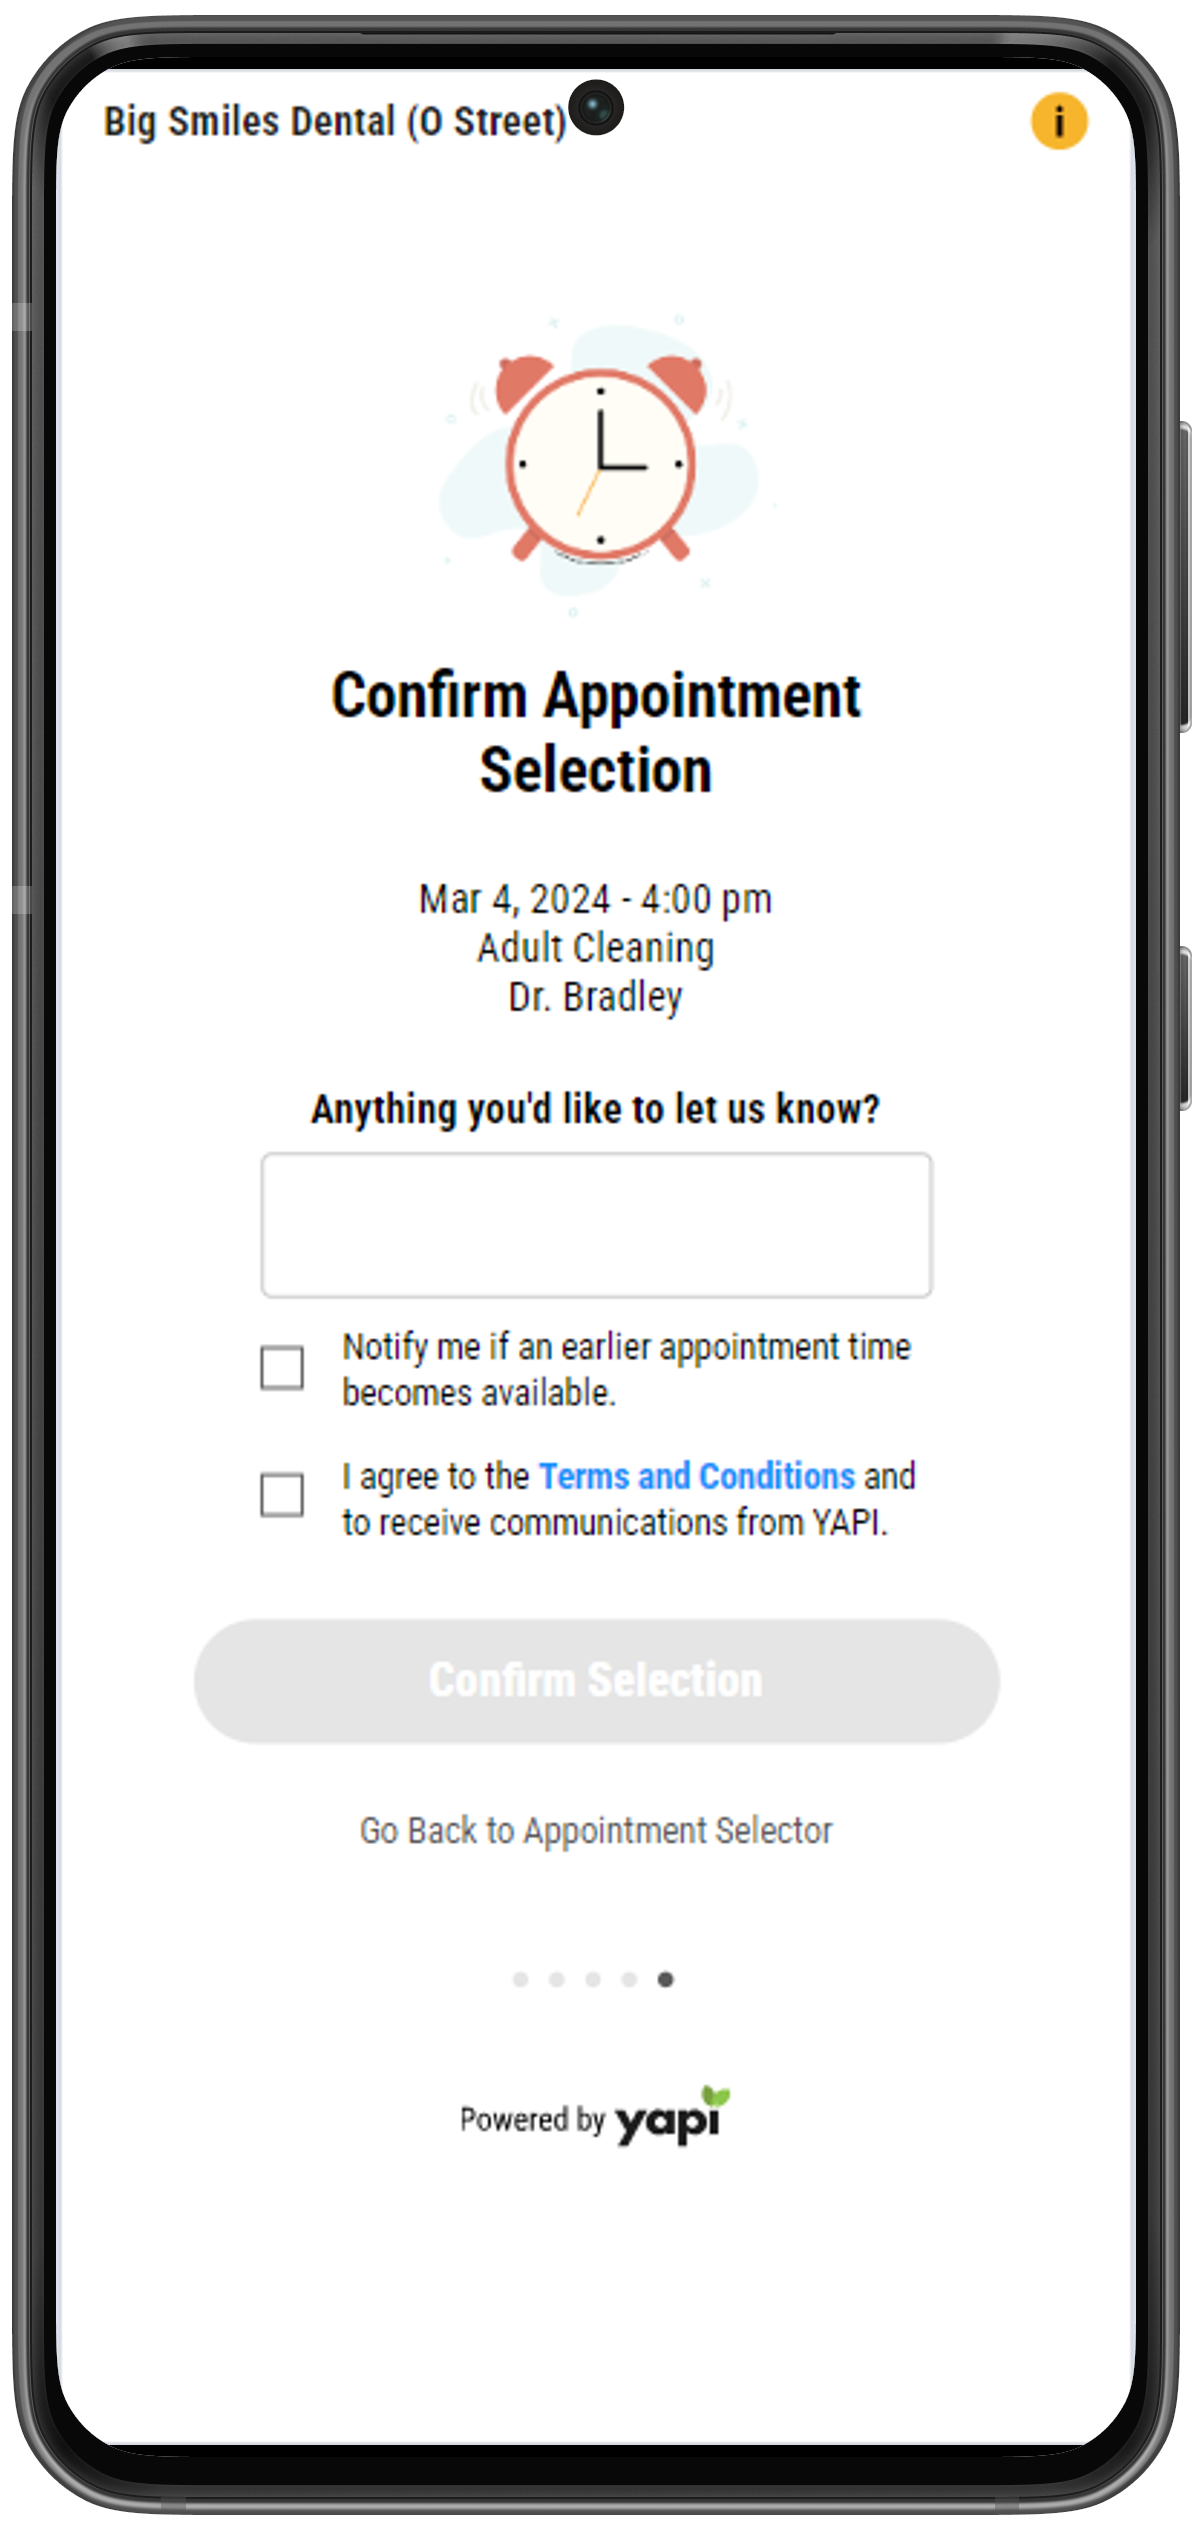
To officially book their appointment, patients must review the appointment details they've selected and click Confirm Selection at the bottom of the screen. When reviewing the appointment details, patients can also leave a message for your office by typing into the Anything you'd like us to know? field. This message then shows in the Appointment Note in Eaglesoft and will display in the patient's appointment details in Leap.
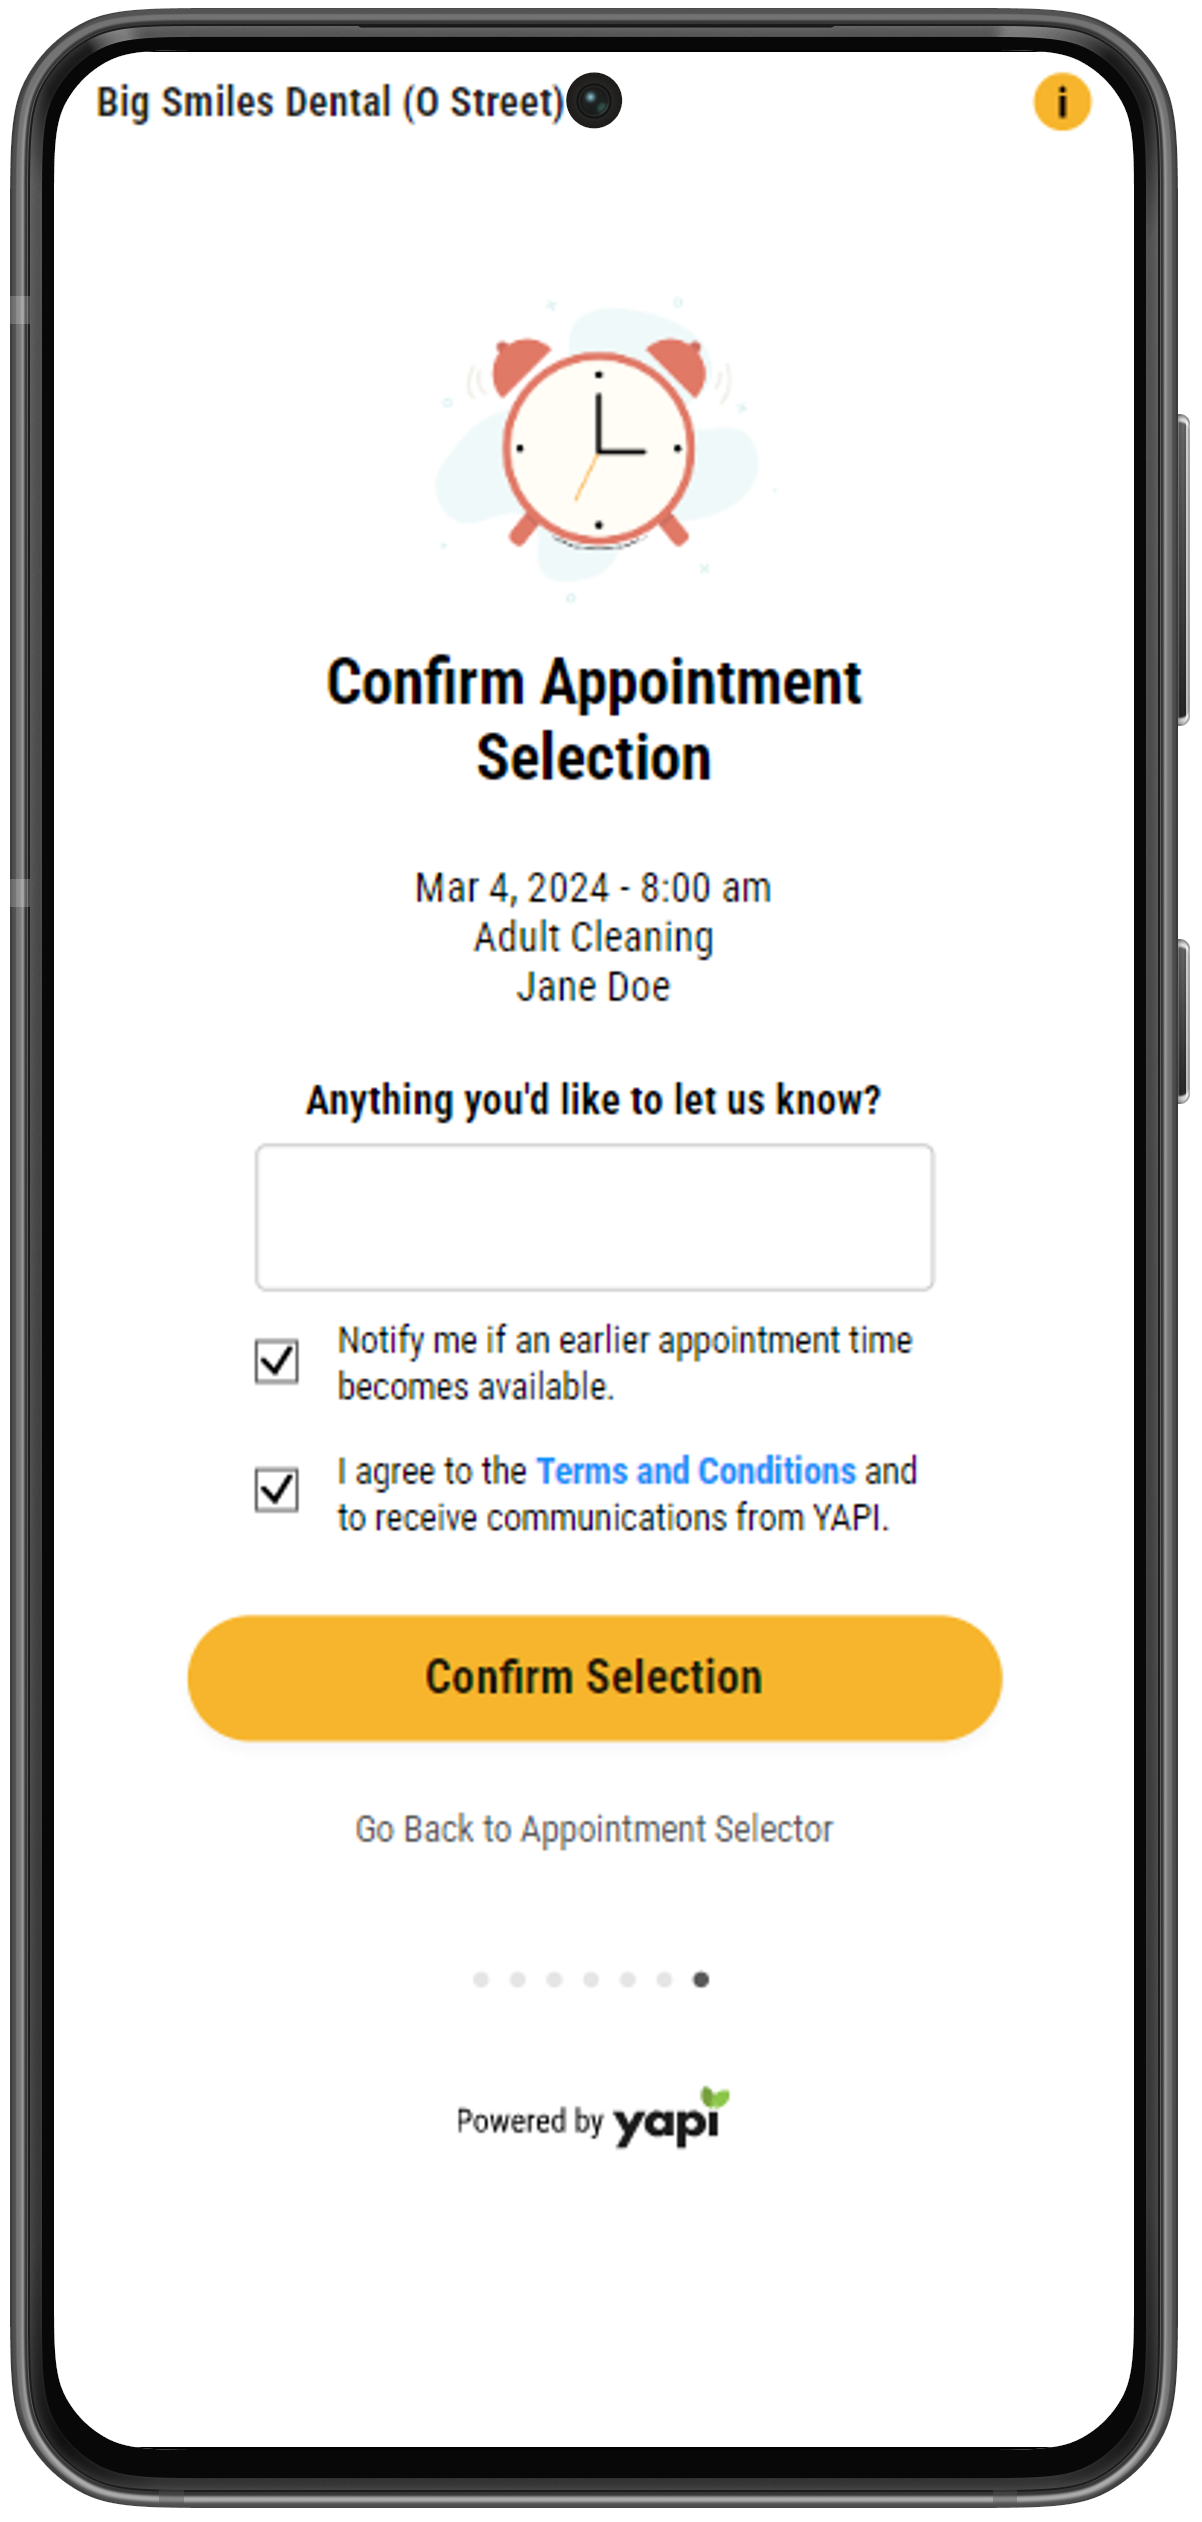 |
Before confirming their selection, the patient can also select Notify me if an earlier appointment time becomes available. This automatically adds the appointment to your ASAP list in Yapi Classic and sets the appointment as Sooner if Possible in Eaglesoft.
When the patient clicks the Confirm Selection button, a pop-up window appears asking for a verification code that the patient will receive via text. The patient has 3 attempts to enter the verification code correctly. If they aren't able to do this after 3 tries, they'll see a message to contact your office and will forfeit their appointment reservation. The patient can also choose to resend a new code and they'll be asked if they want to change their mobile phone number before sending the new verification text.
 |
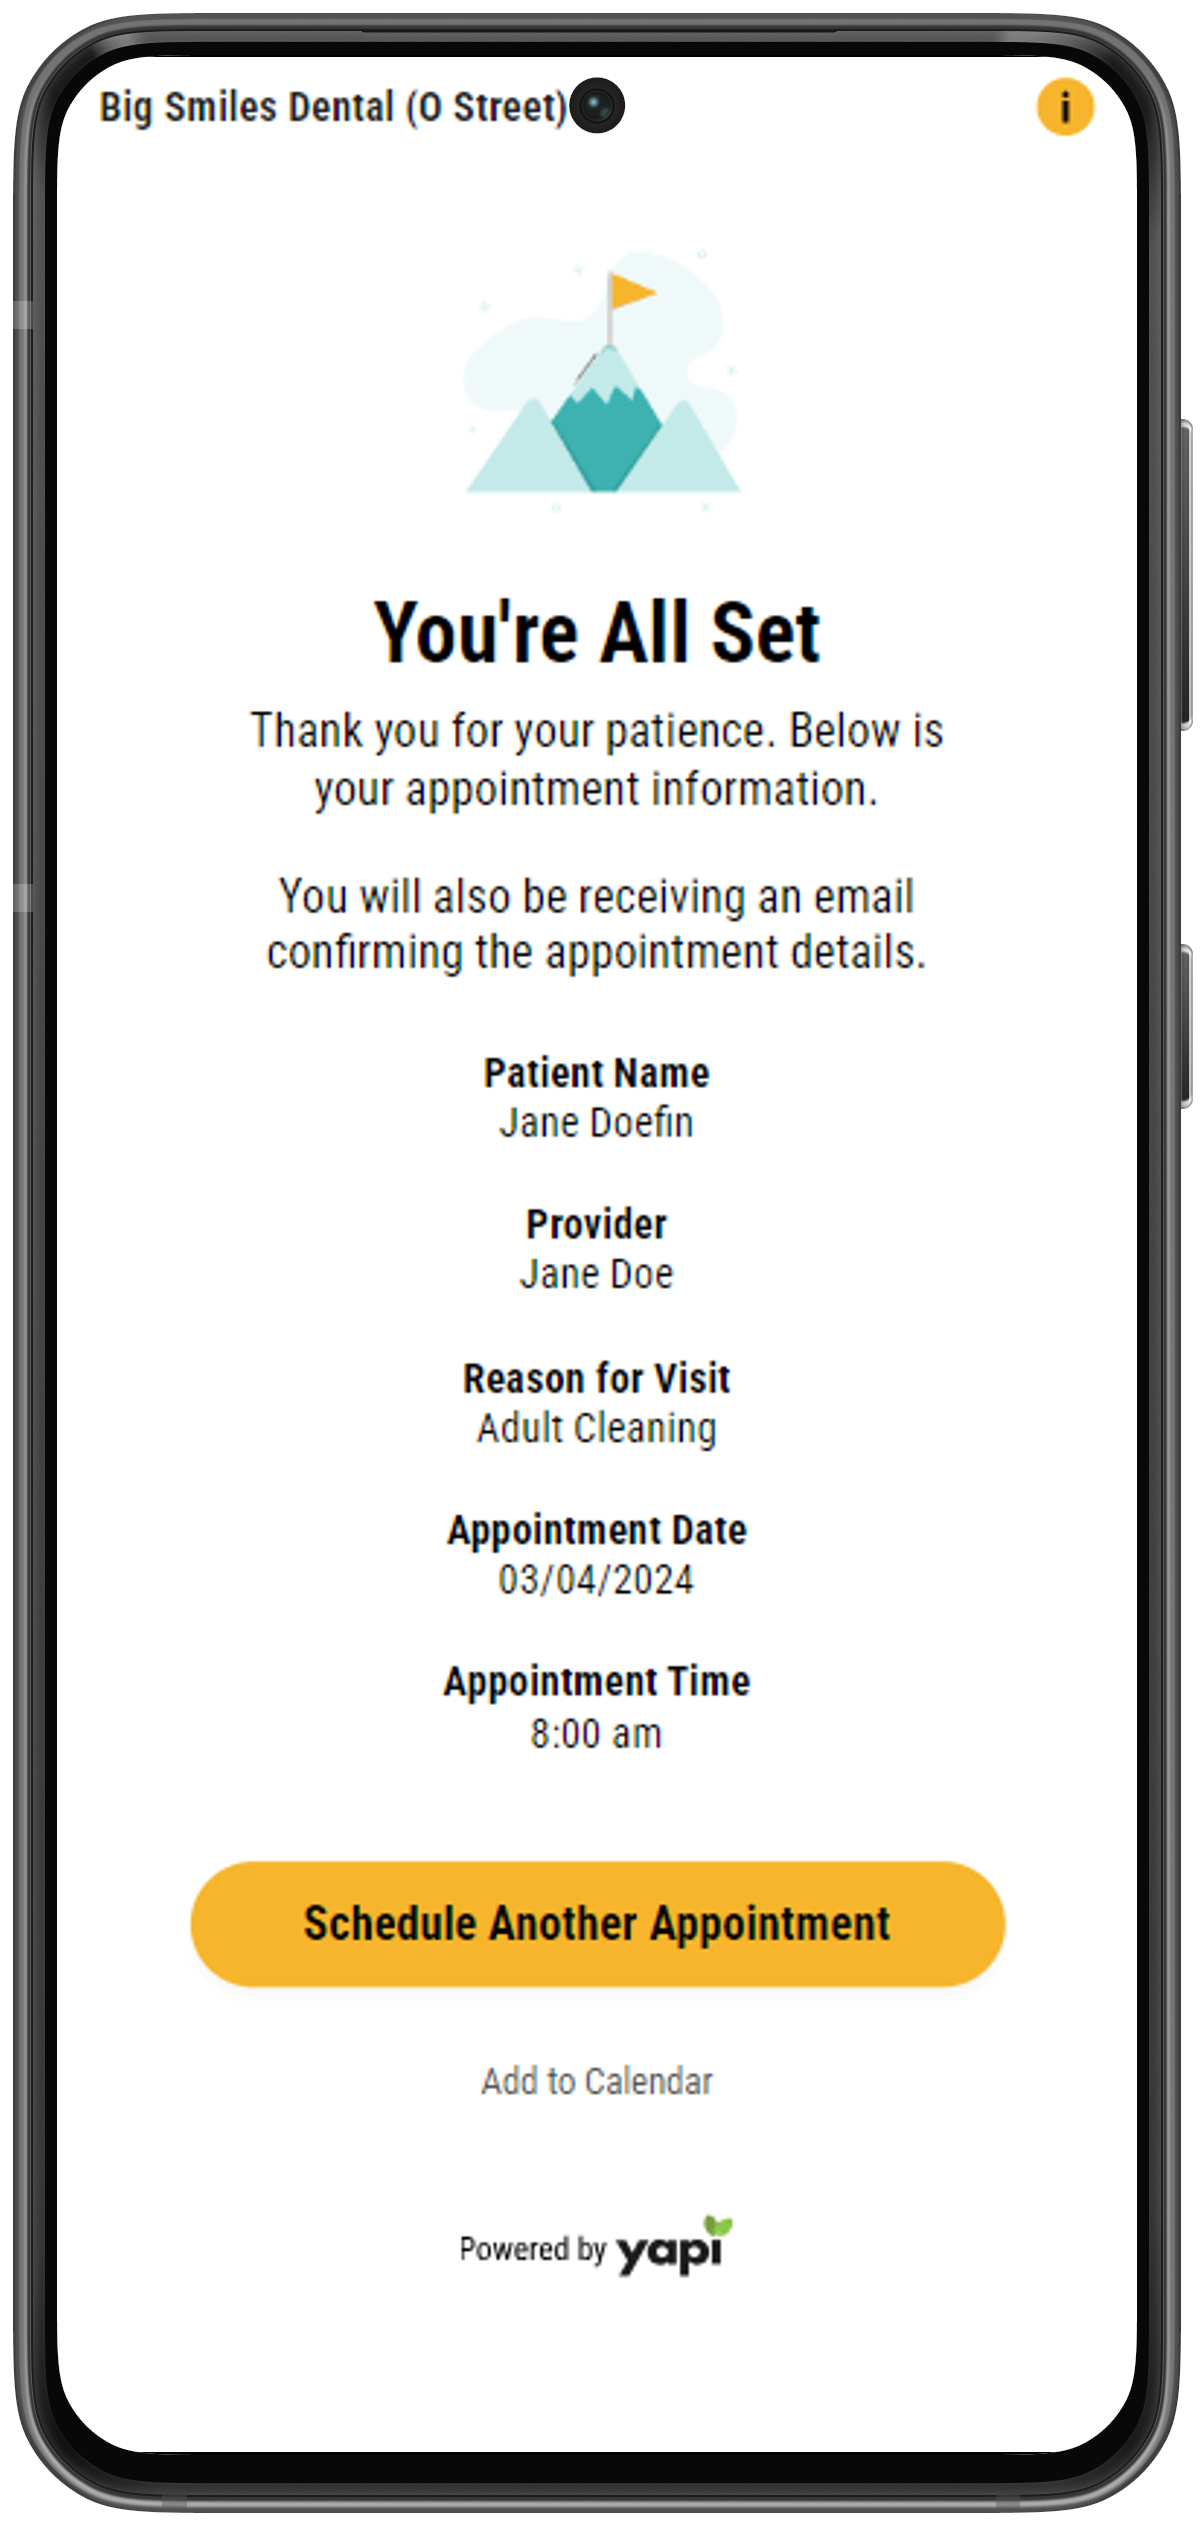
Once they've correctly entered the verification code, the system will attempt to book the appointment. If the booking is successful, the patient is taken to the Appointment Booked page.
Note
If the patient’s selected time and date have been booked before they were able to complete their booking, the system will display an error and send them back to the appointment selection screen to select a new date and time.
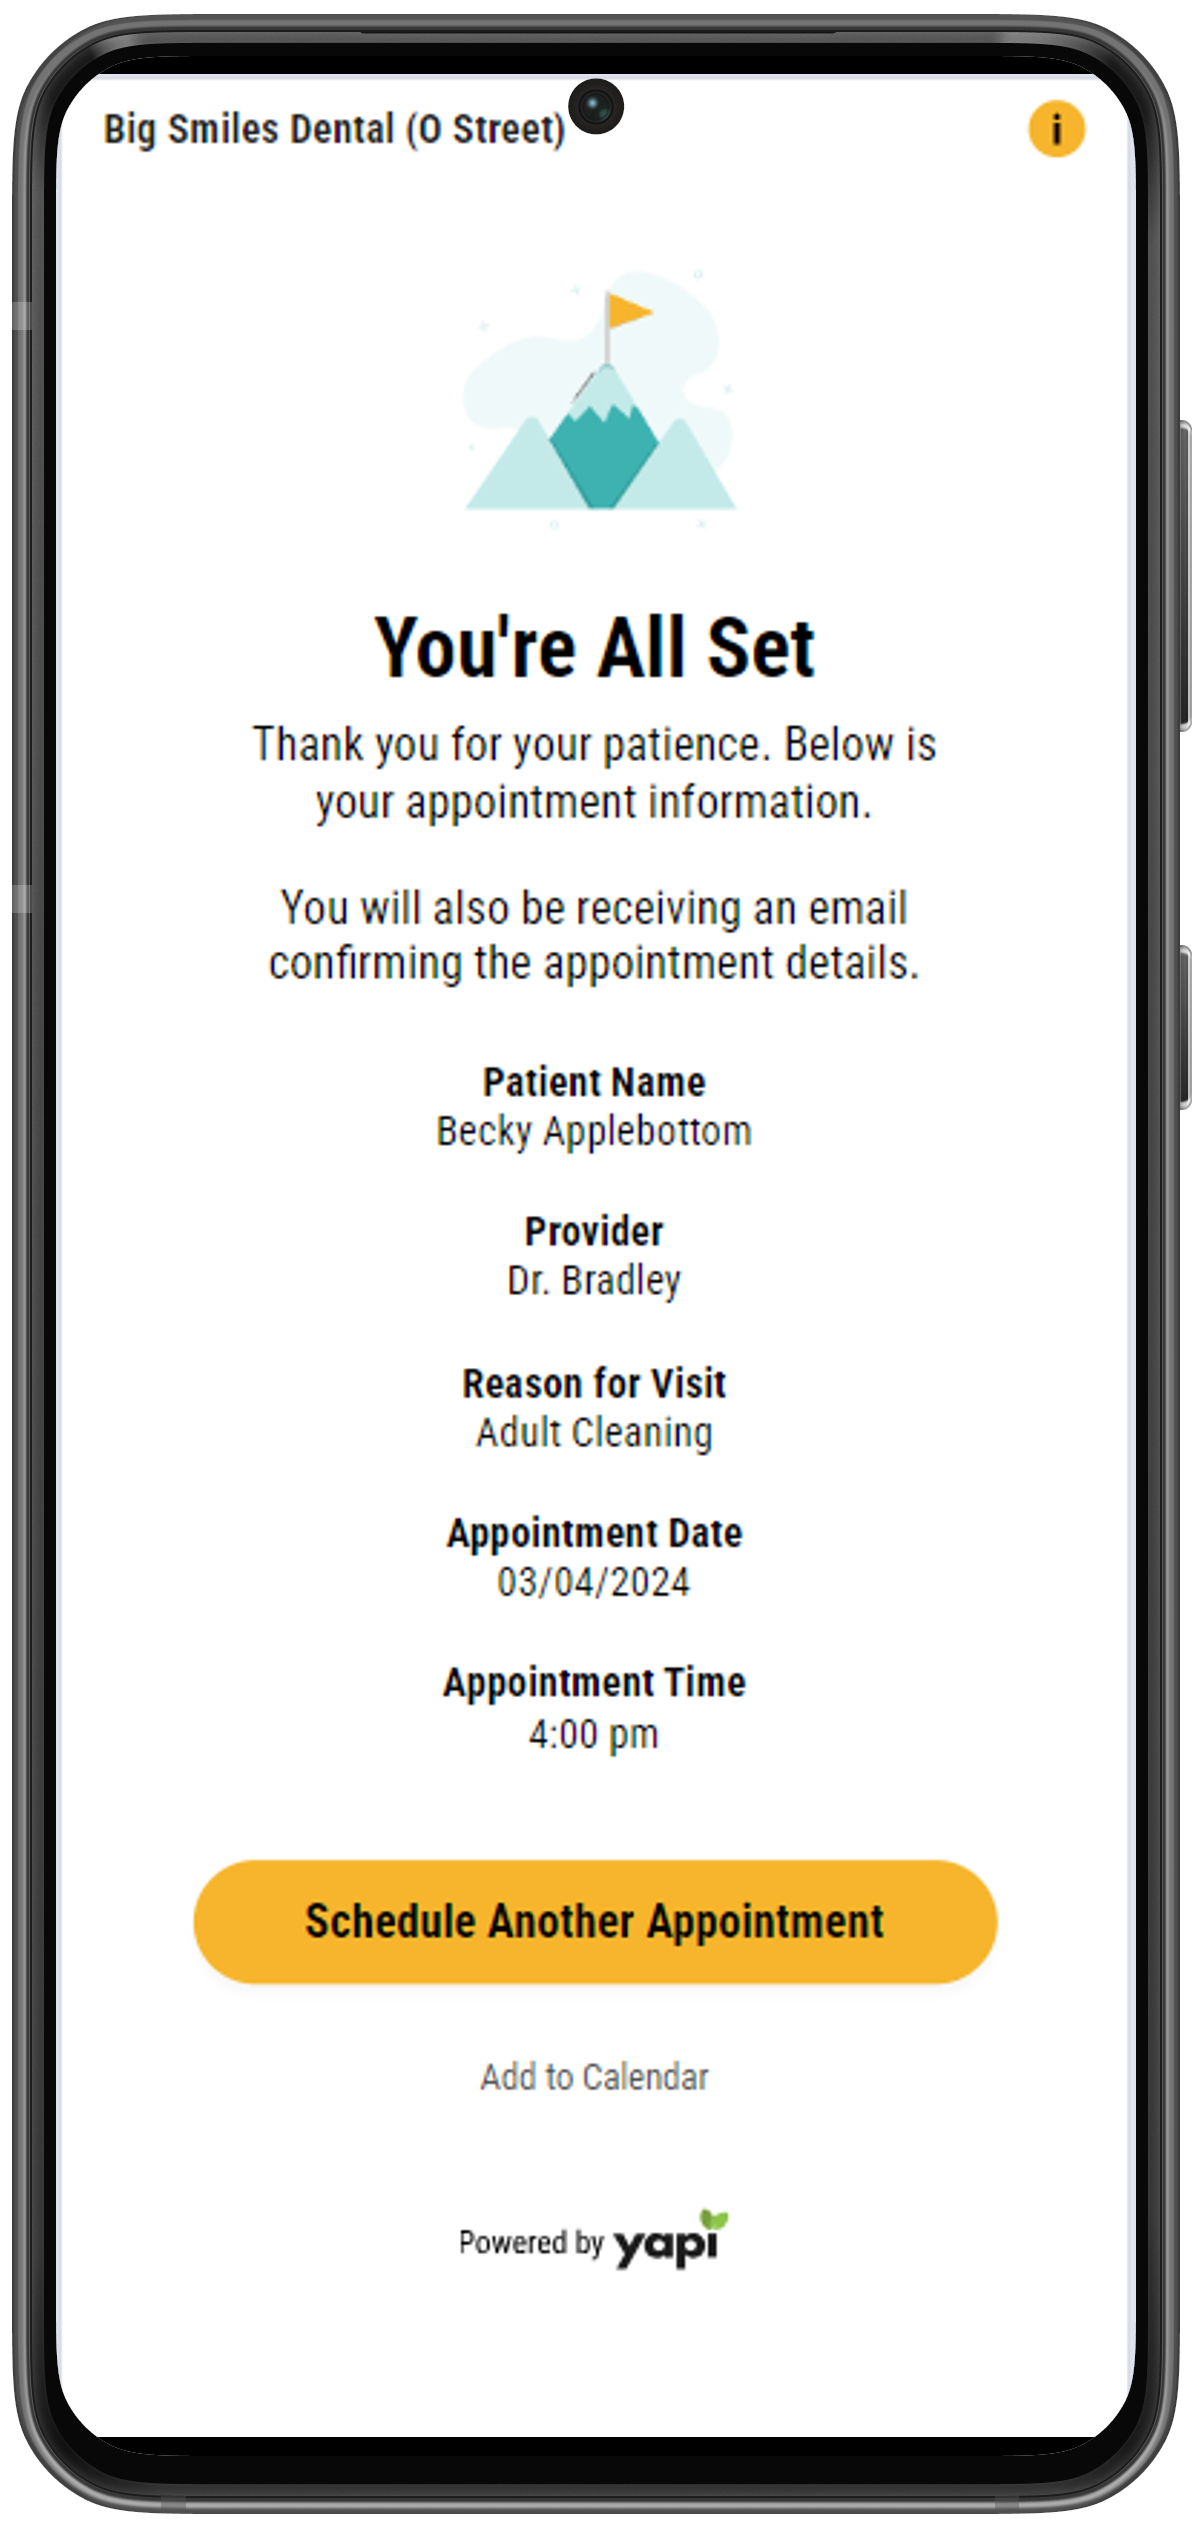
Once an appointment has been successfully booked in Eaglesoft the patient will see a You're All Set message along with their appointment details:
 |
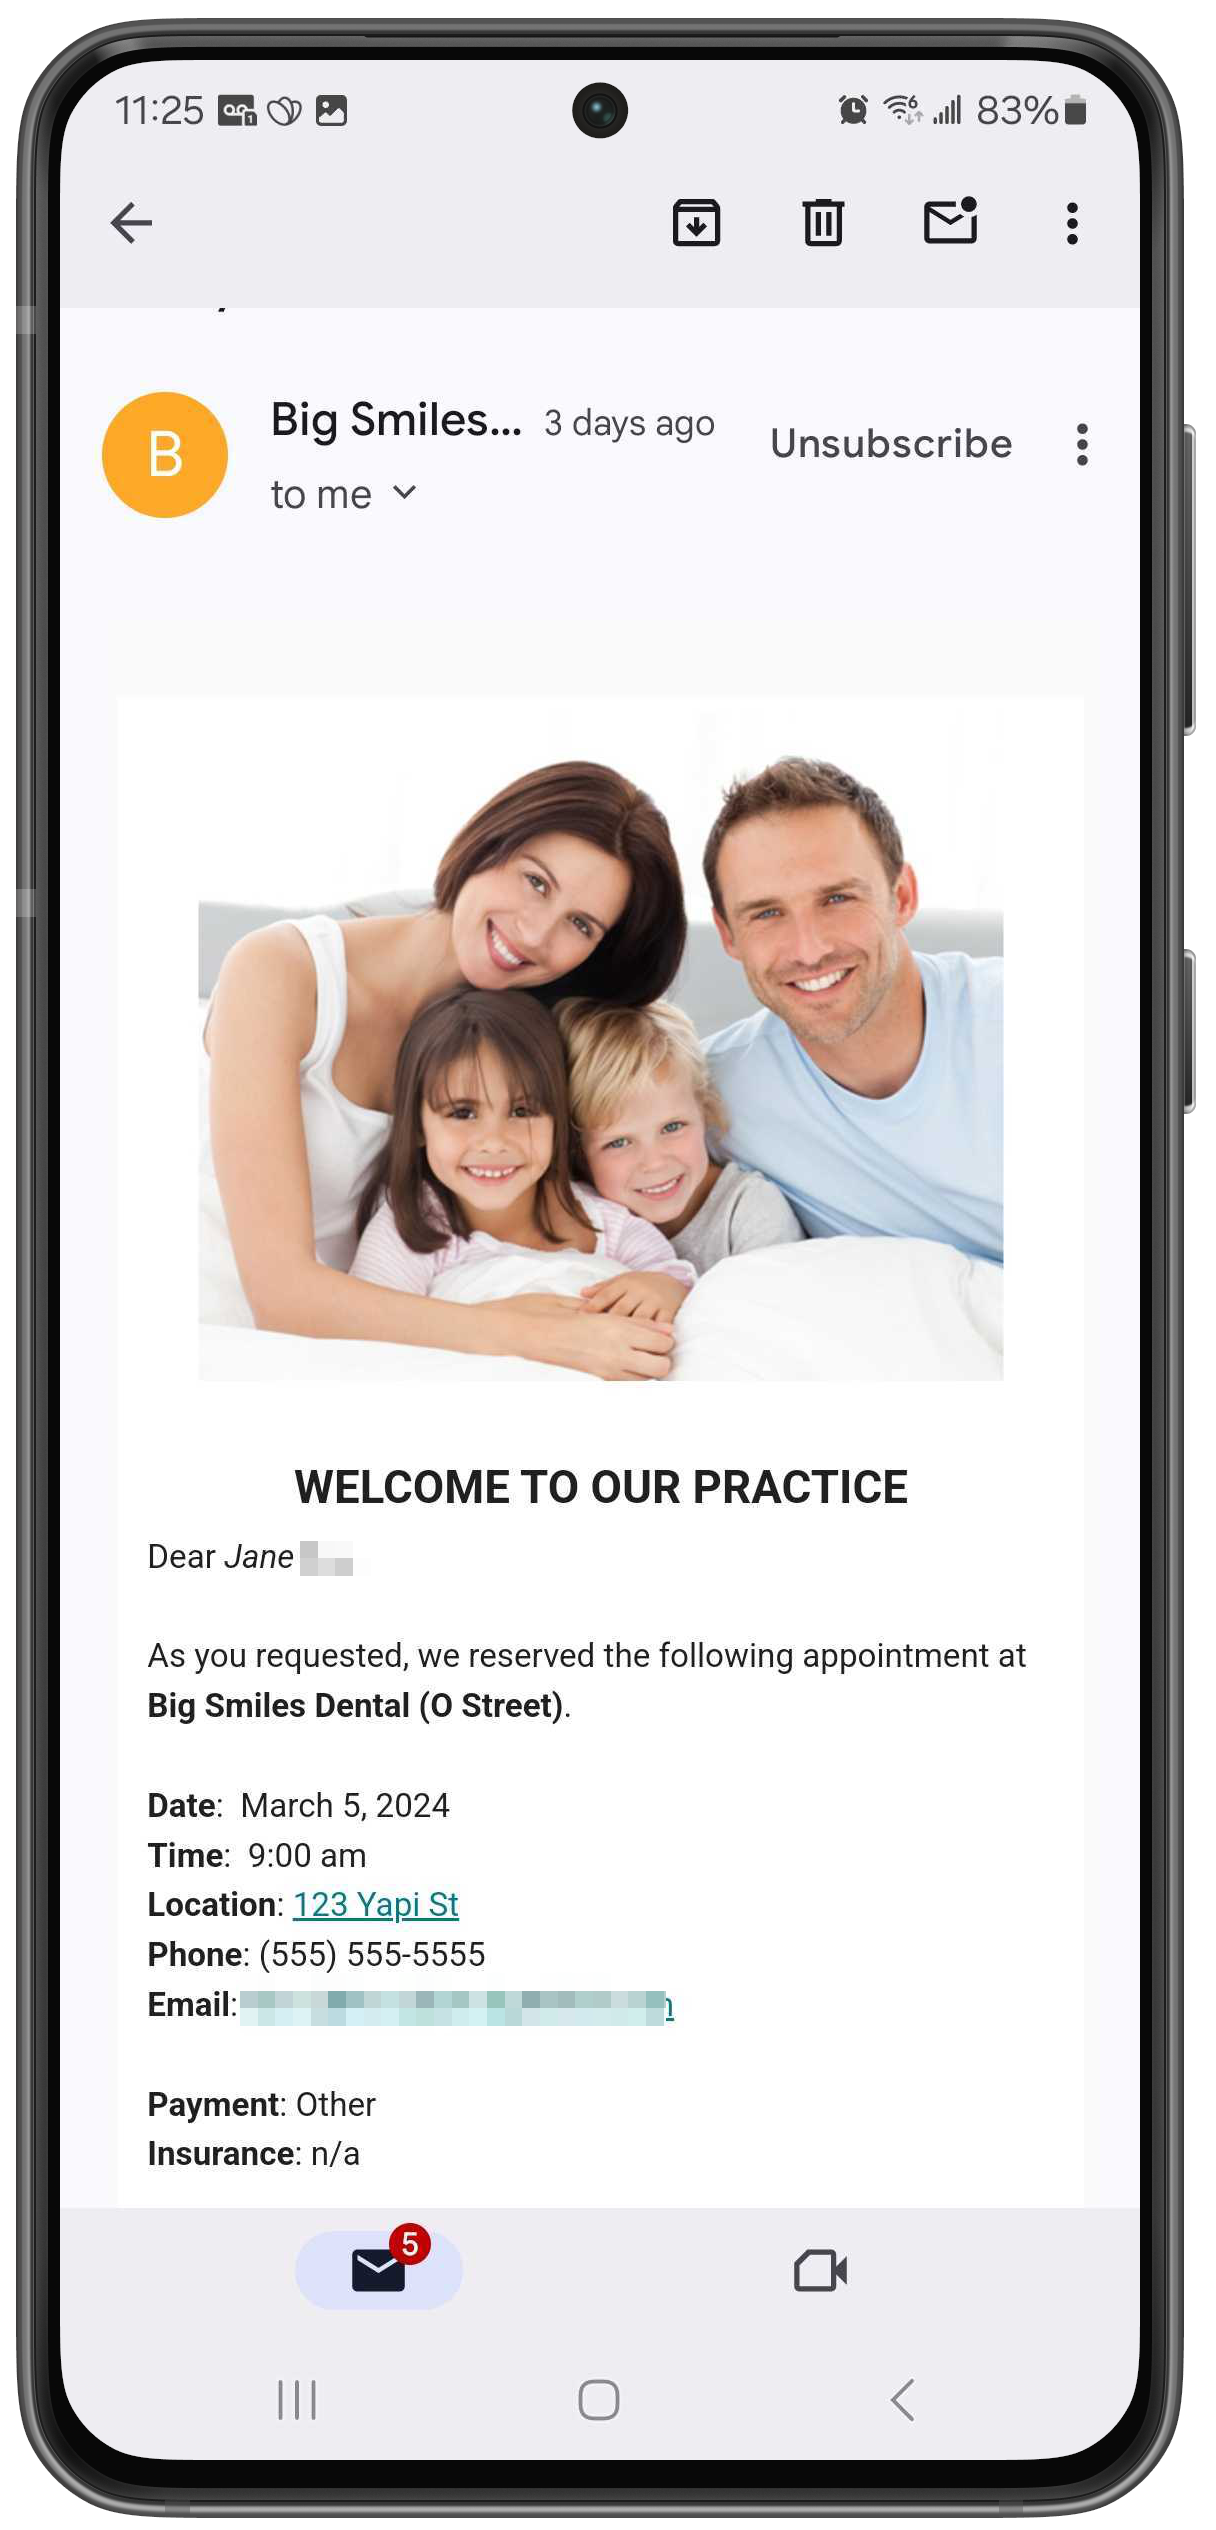
Email Confirmation
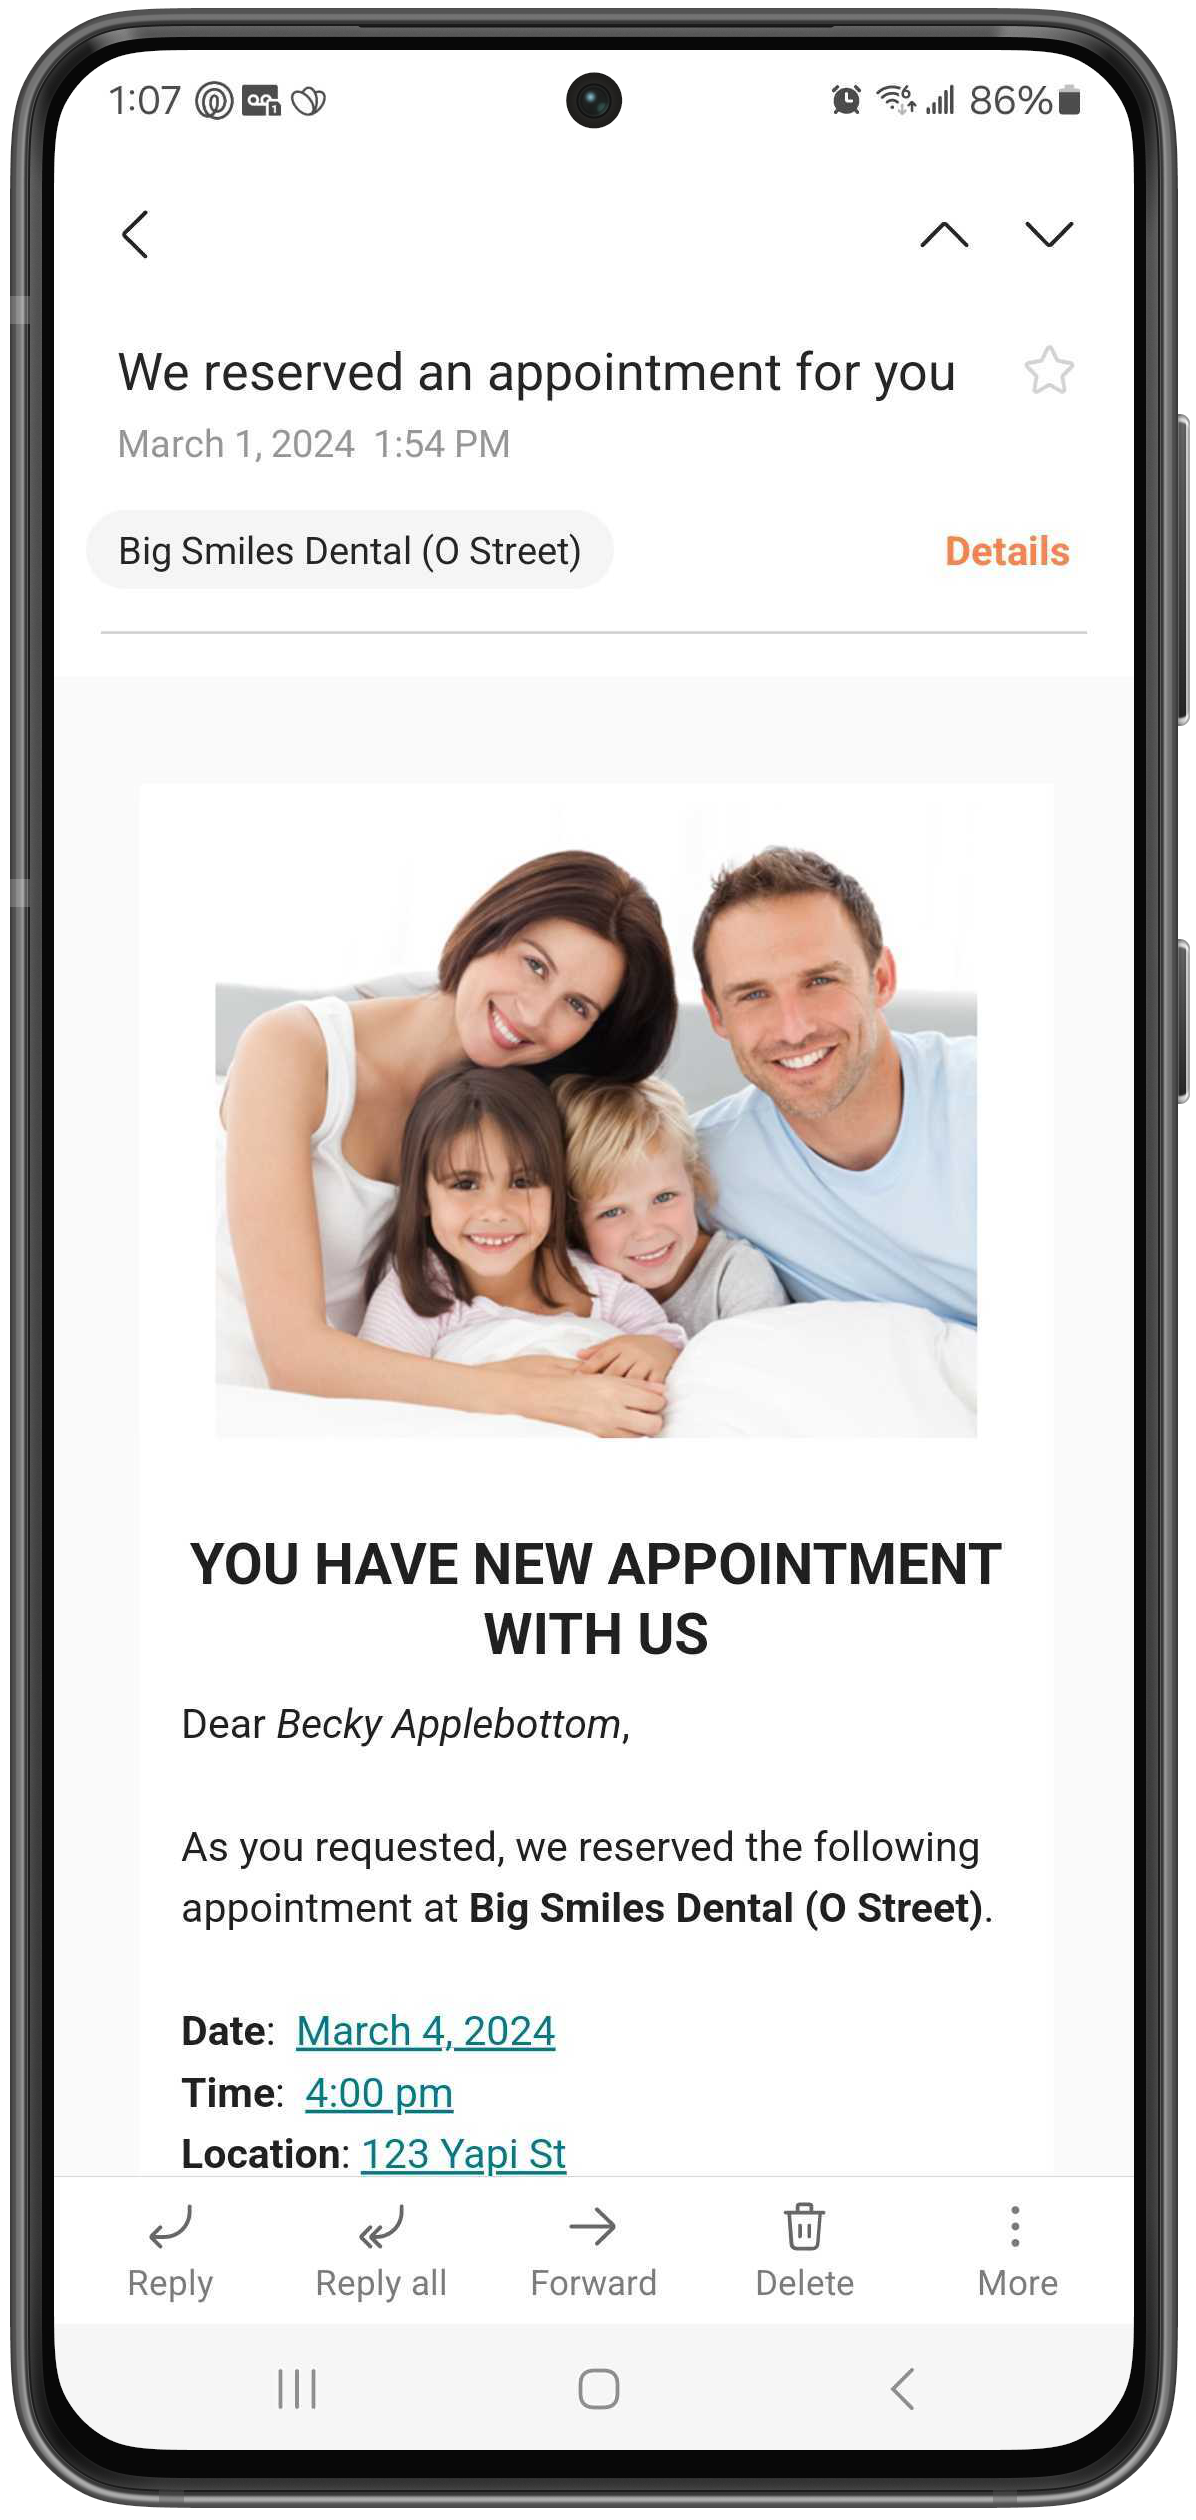
If you've set up an email confirmation in your Online Scheduling Settings, patients are automatically sent an email that has their appointment information.
 |
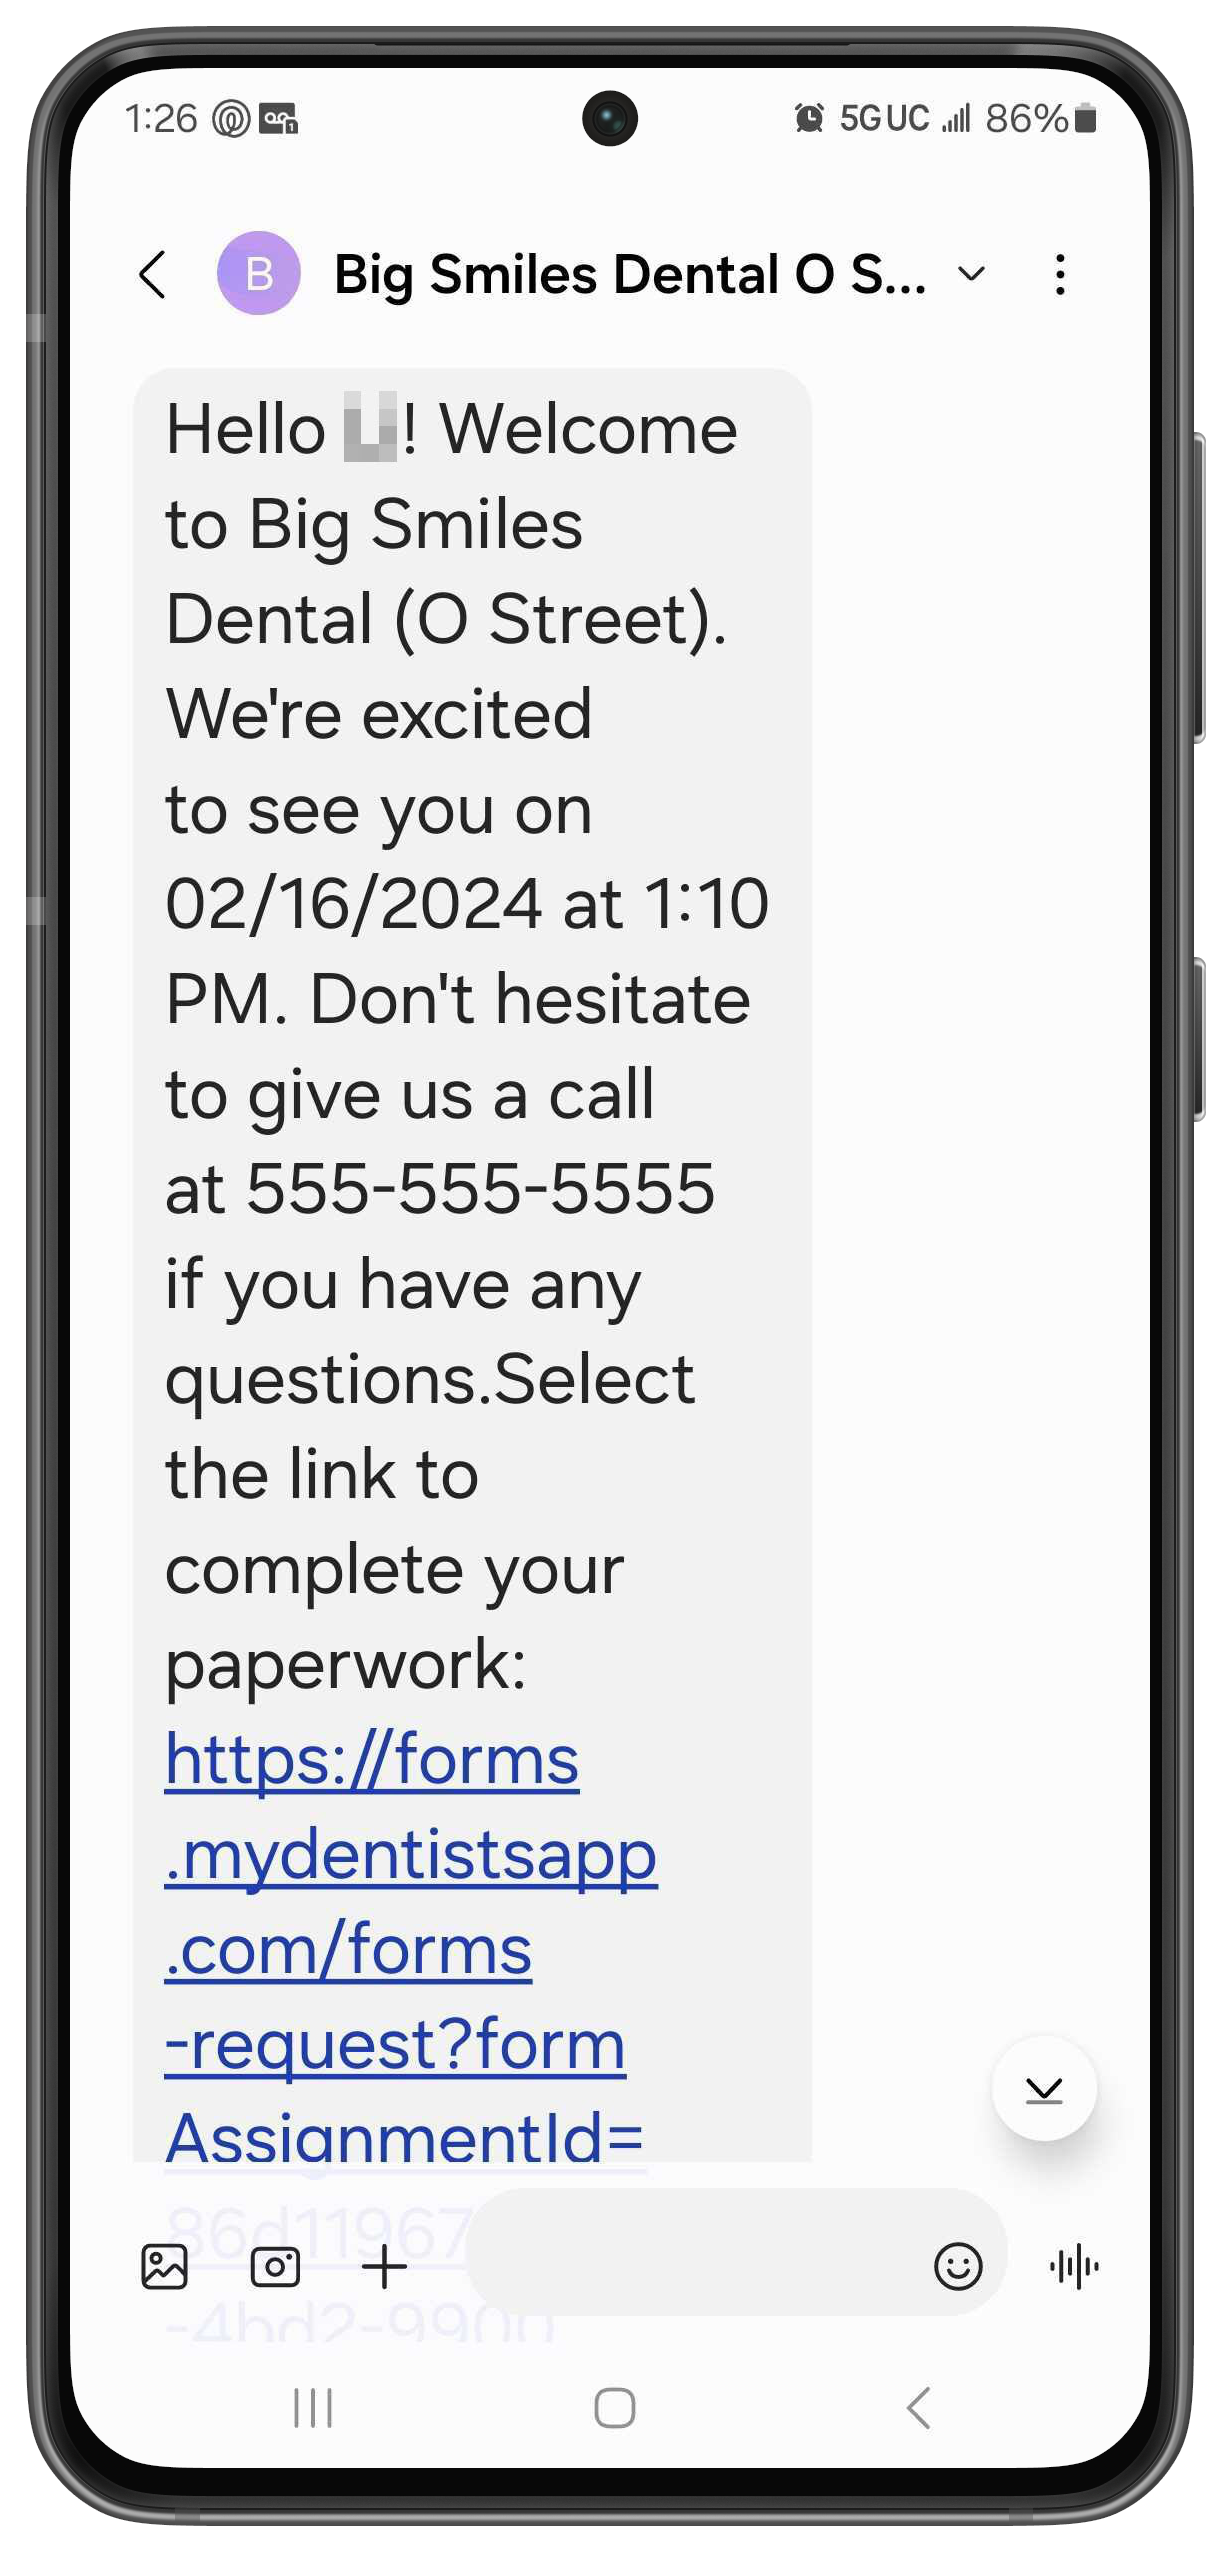
Text Confirmation
If you've enabled your New Patient Welcome text in your Appointment Reminders settings the patient also receives a text with a link to complete the new patient forms.
 |
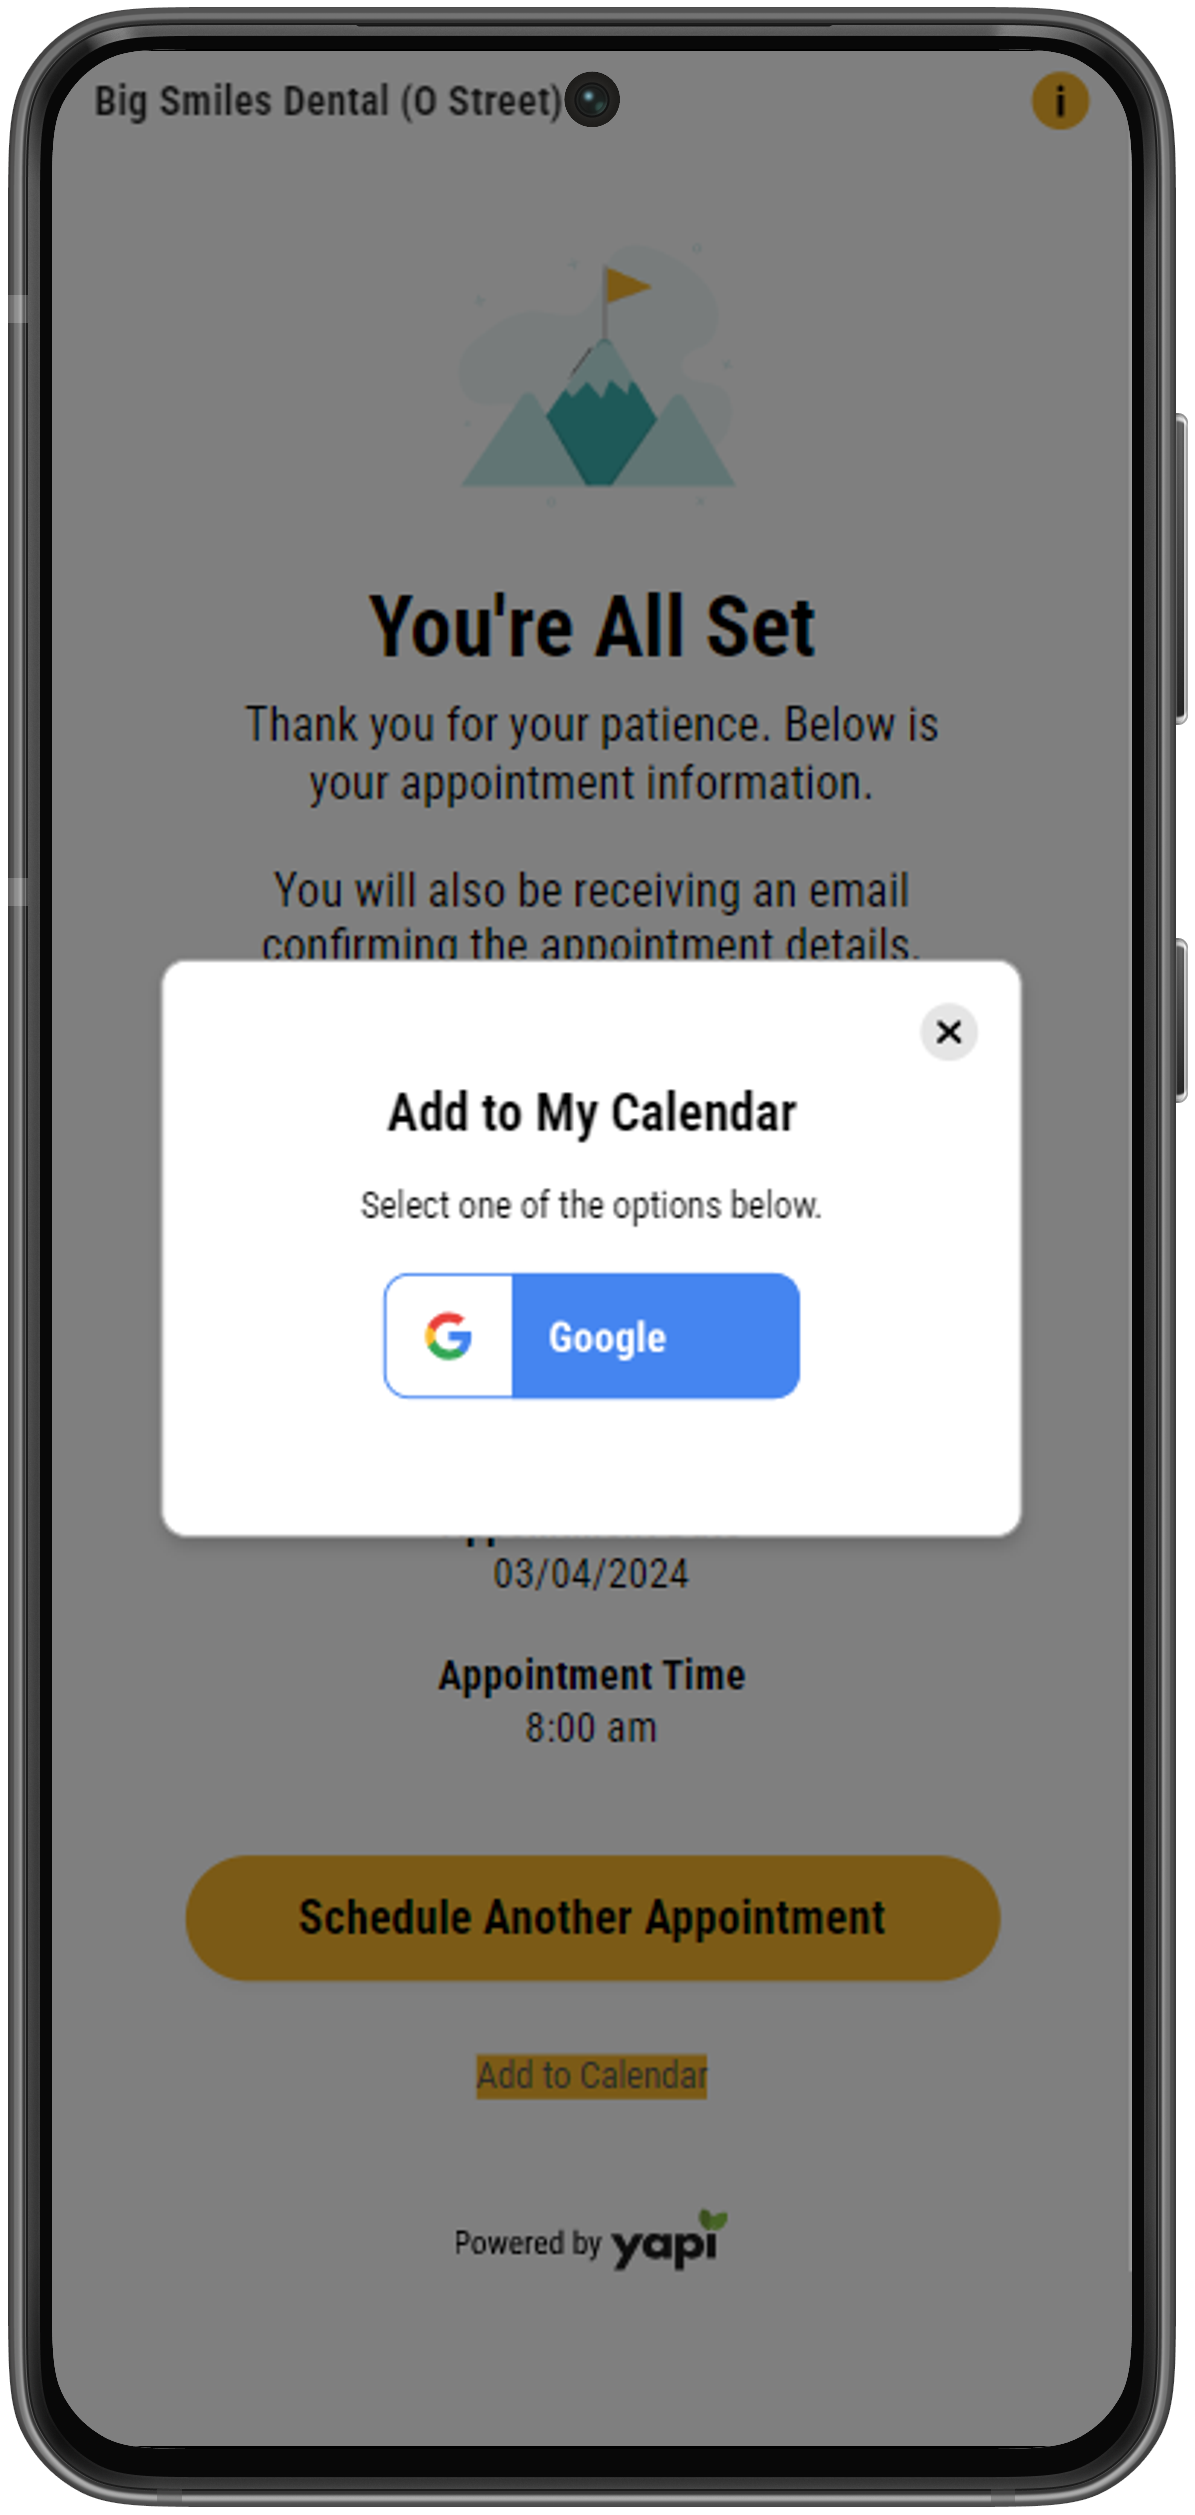
Add to Calendar
At the bottom of the You're All Set page, patients also have the option of clicking Add to My Calendar to add the appointment to their Google calendar:
 |
This section shows an existing patient's point of view when using Online Scheduling to book an appointment.
When Online Scheduling is enabled for existing patients, the screen below displays when a patient selects the online scheduling link on your practice's website or in an email from you.
 |
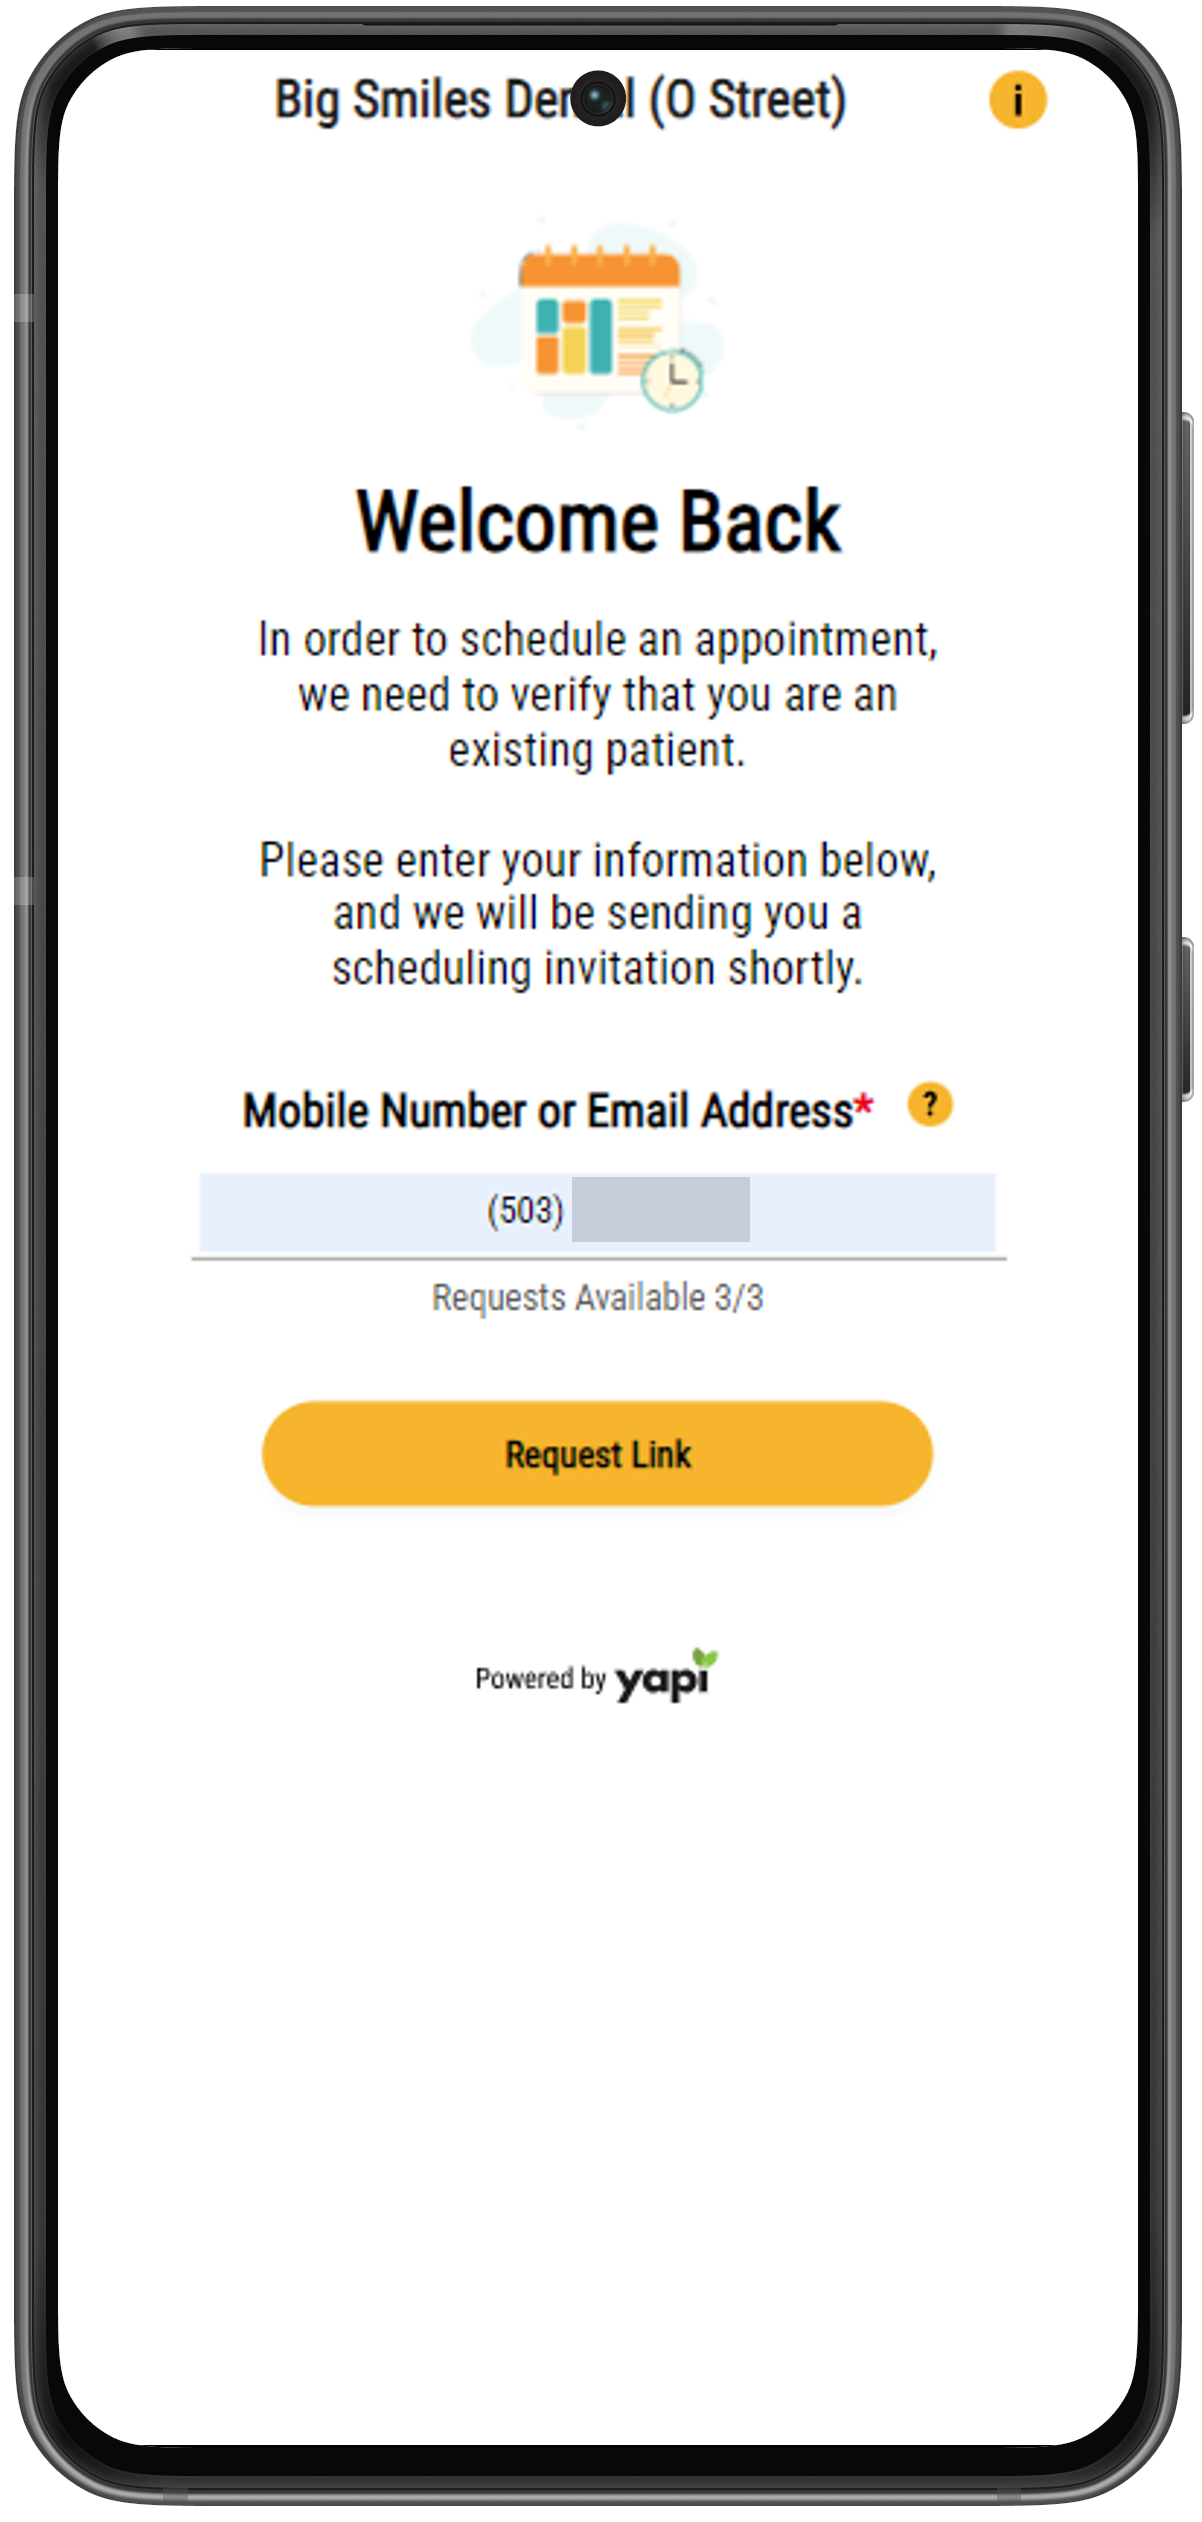
When a patient selects I'm a Returning Patient, they're asked to enter their email address or mobile number so the system can send them an appointment request link. This helps to verify that they're an existing patient at your practice.
 |
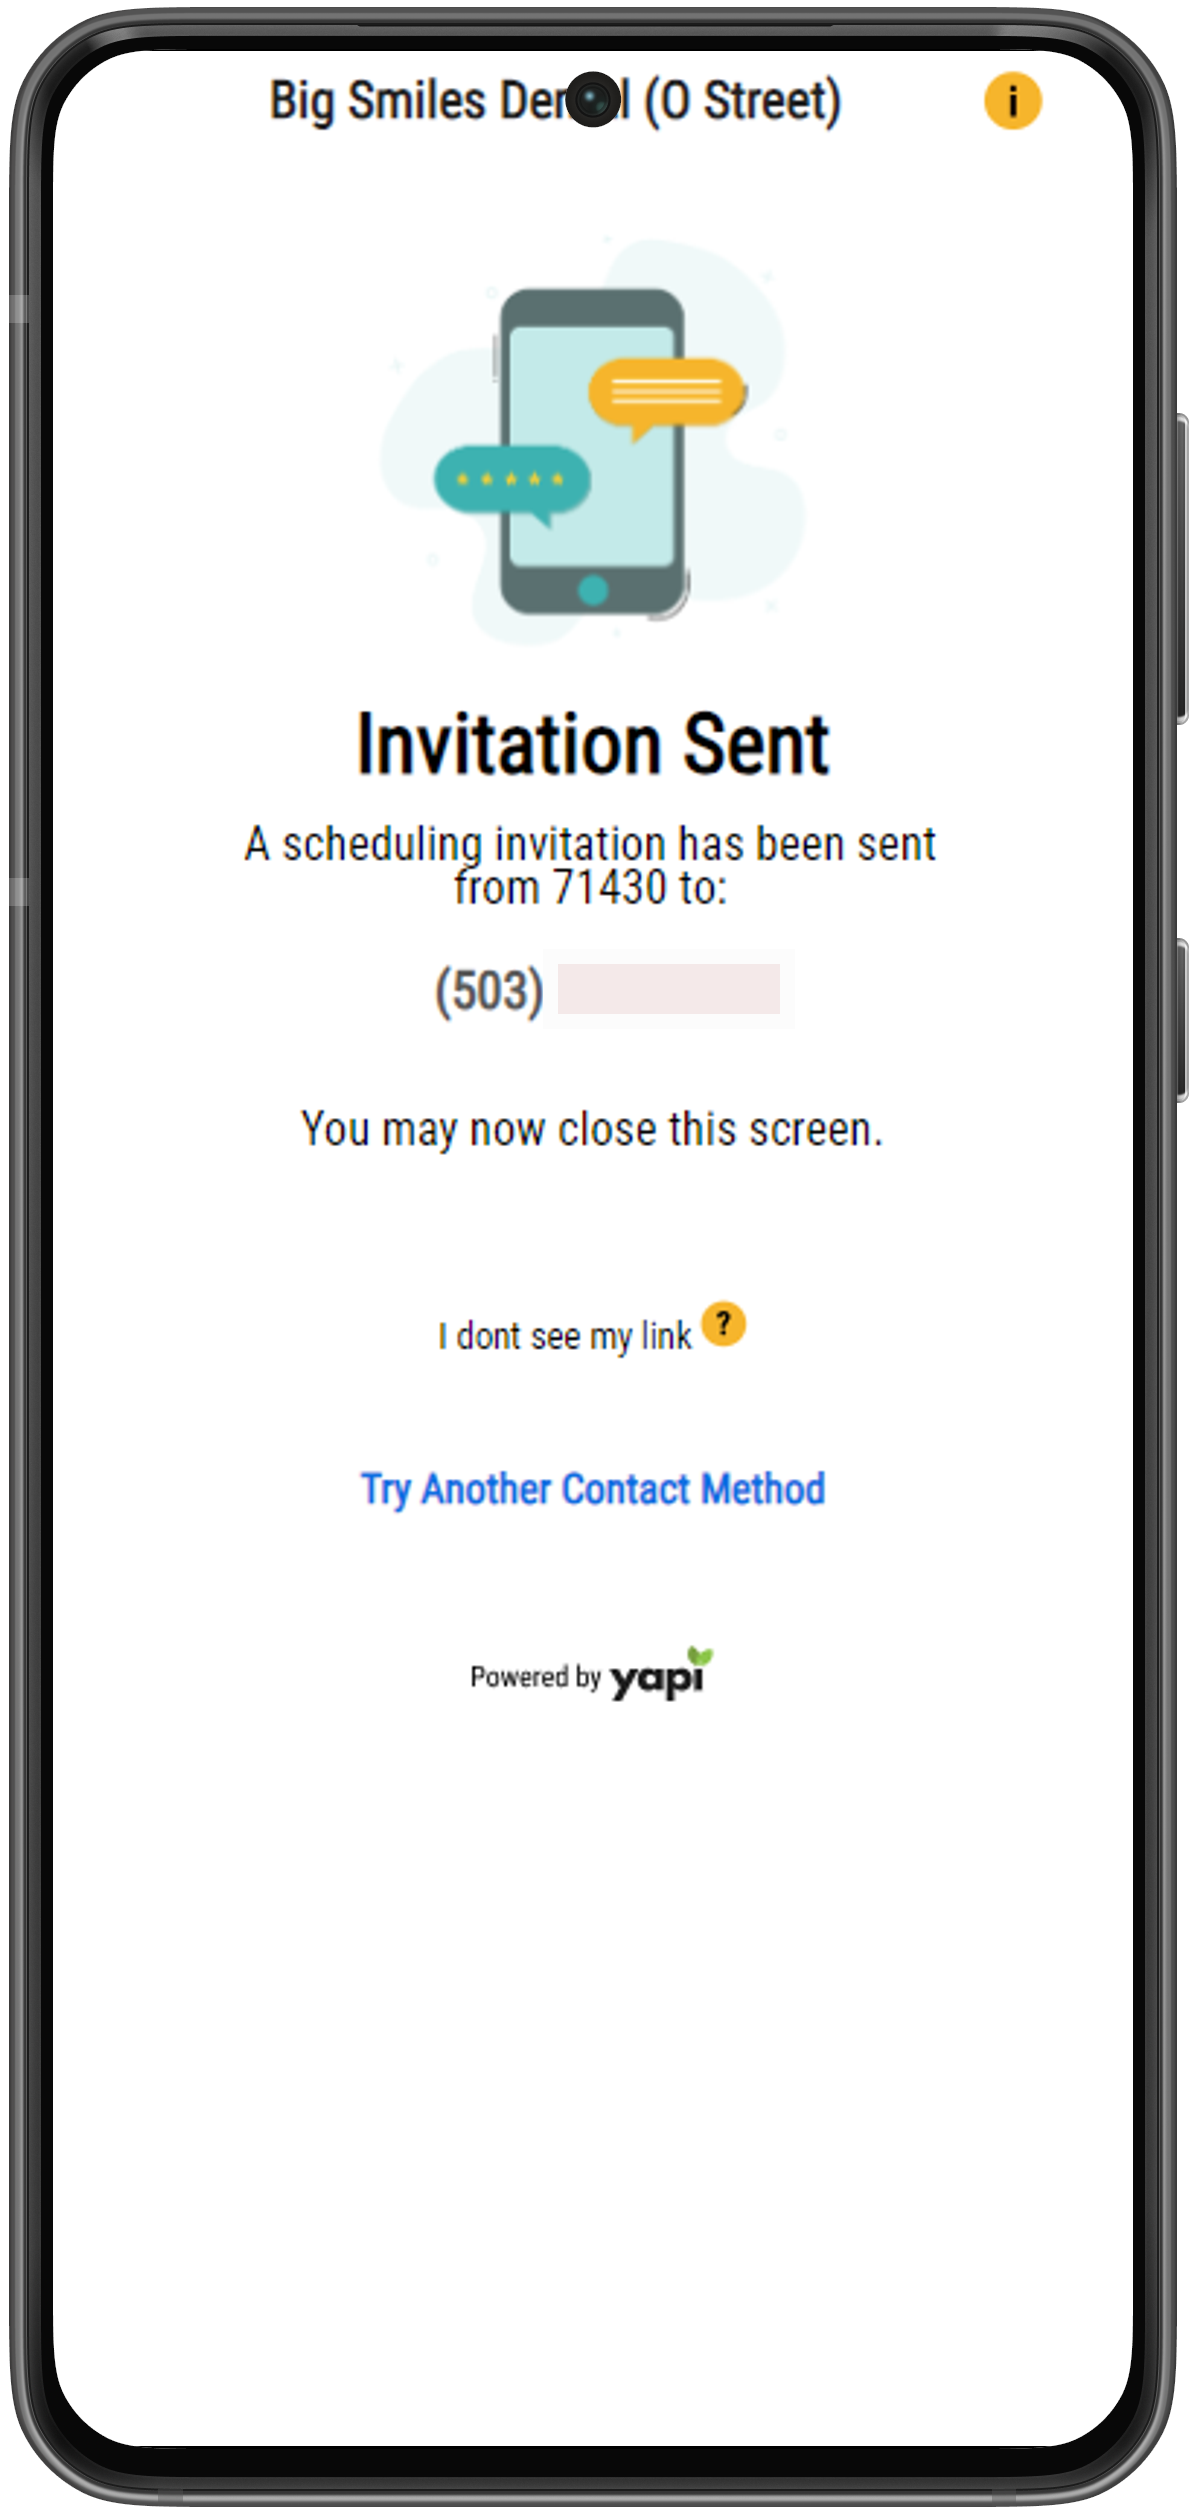
Once the patient successfully verifies their phone number or email address, they'll receive a scheduling link in their email (if they provided an email address) or on their phone (if they provided a mobile number). They'll see a message that this invitation was sent and should check their email or phone for their personalized scheduling link.
 |
The patient can now use the link from the email or text to schedule an appointment.
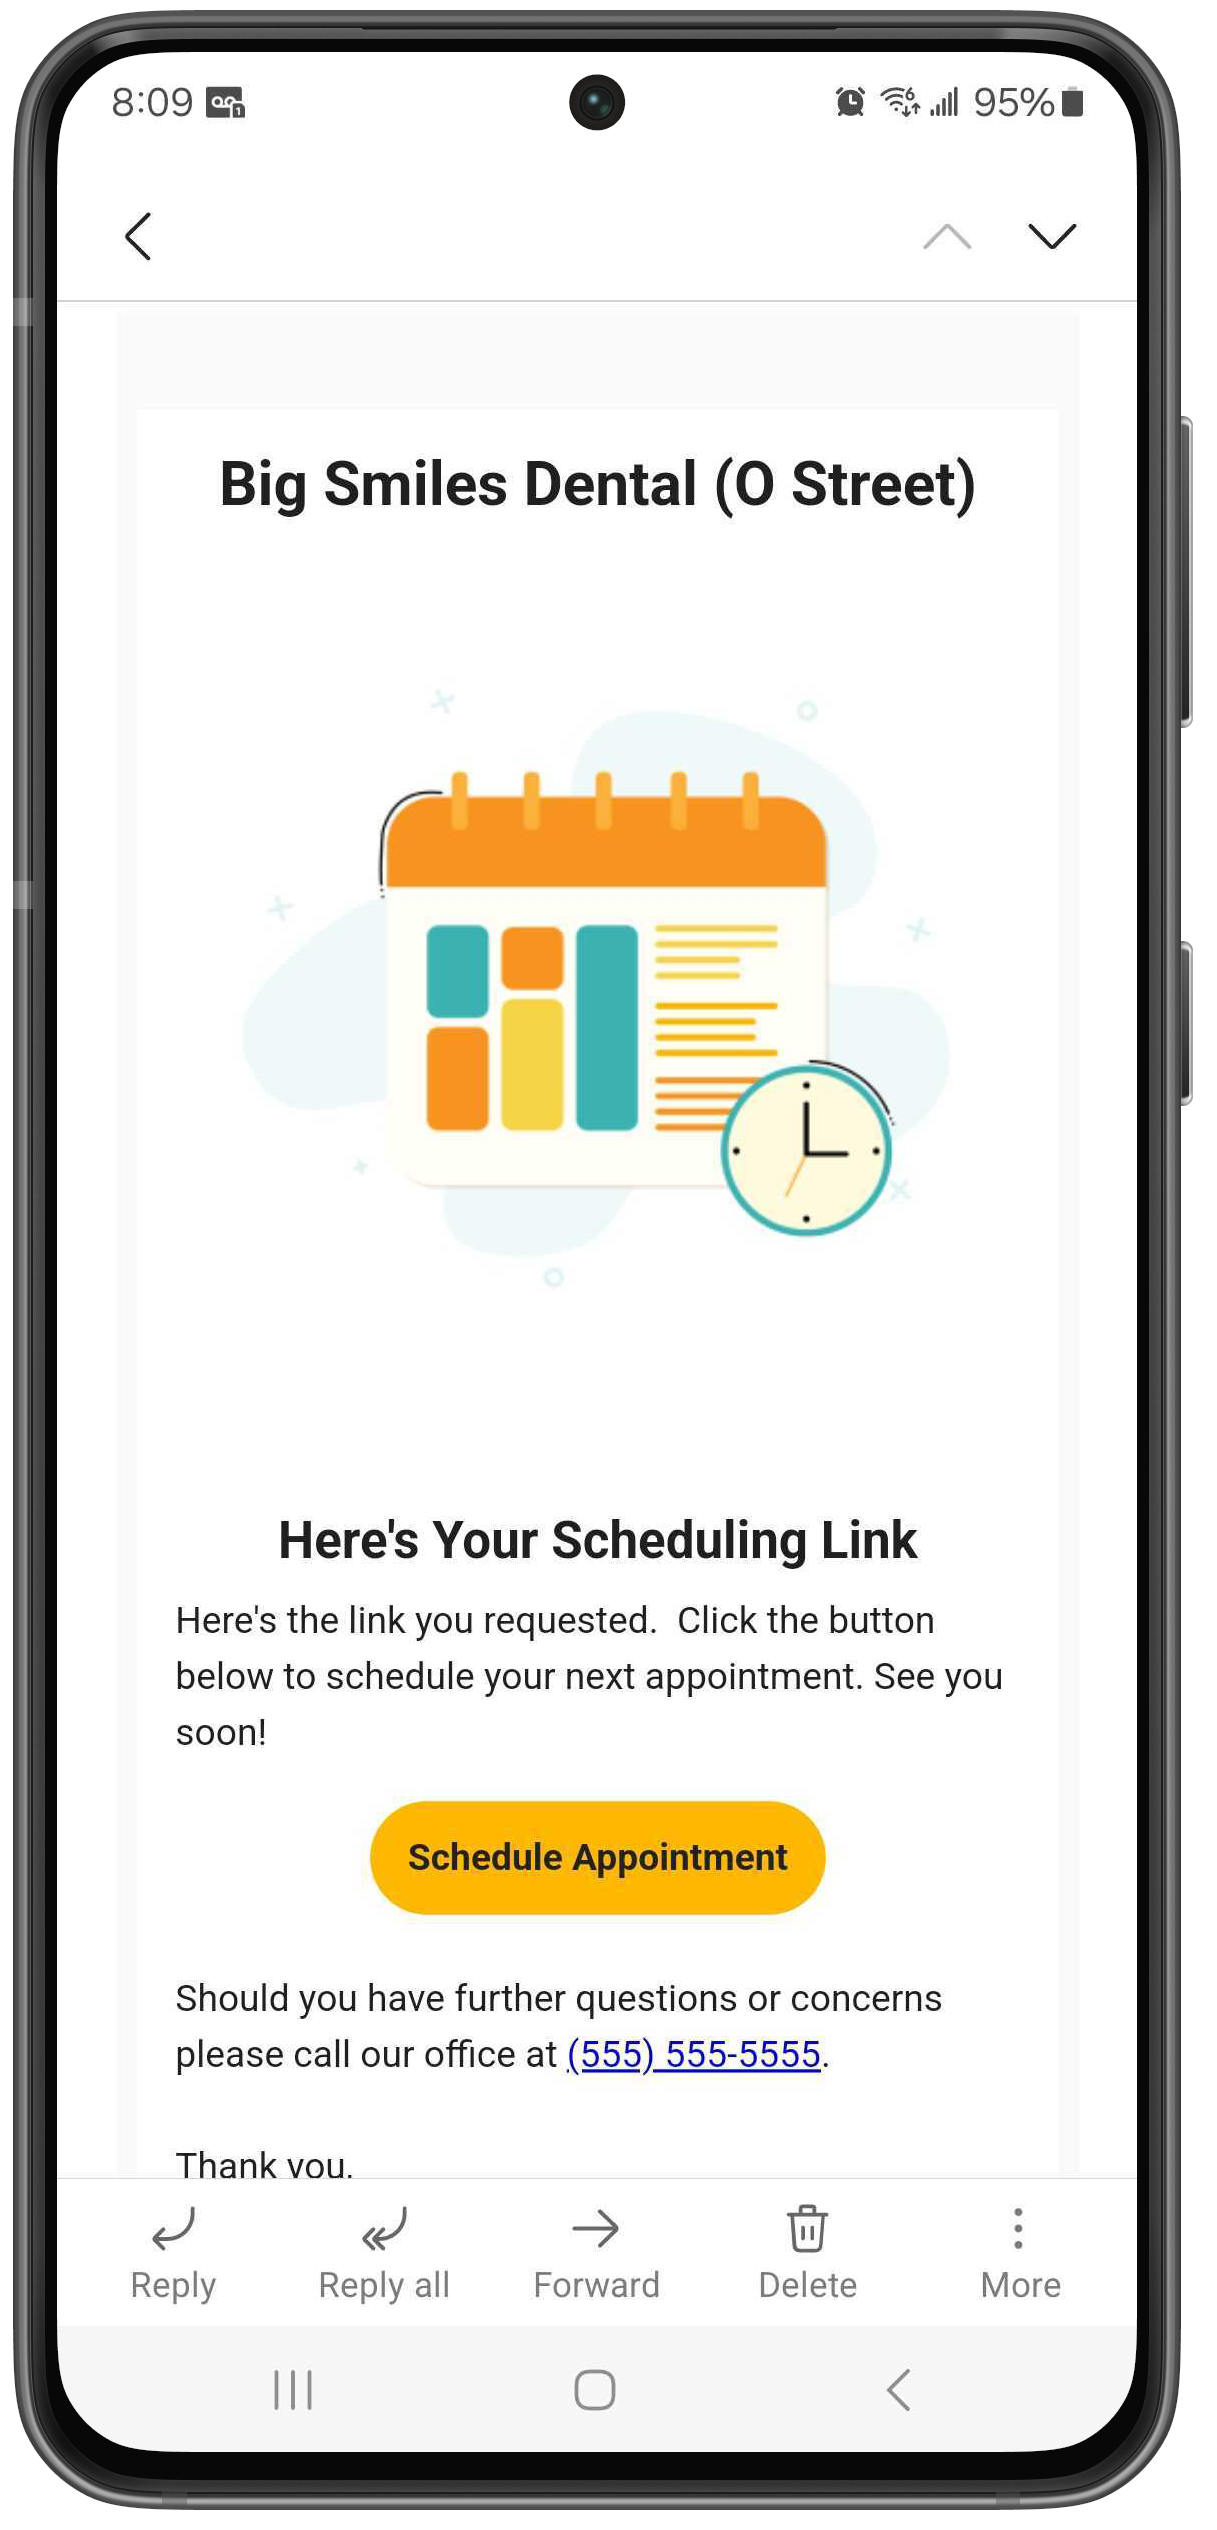 |
Email Example
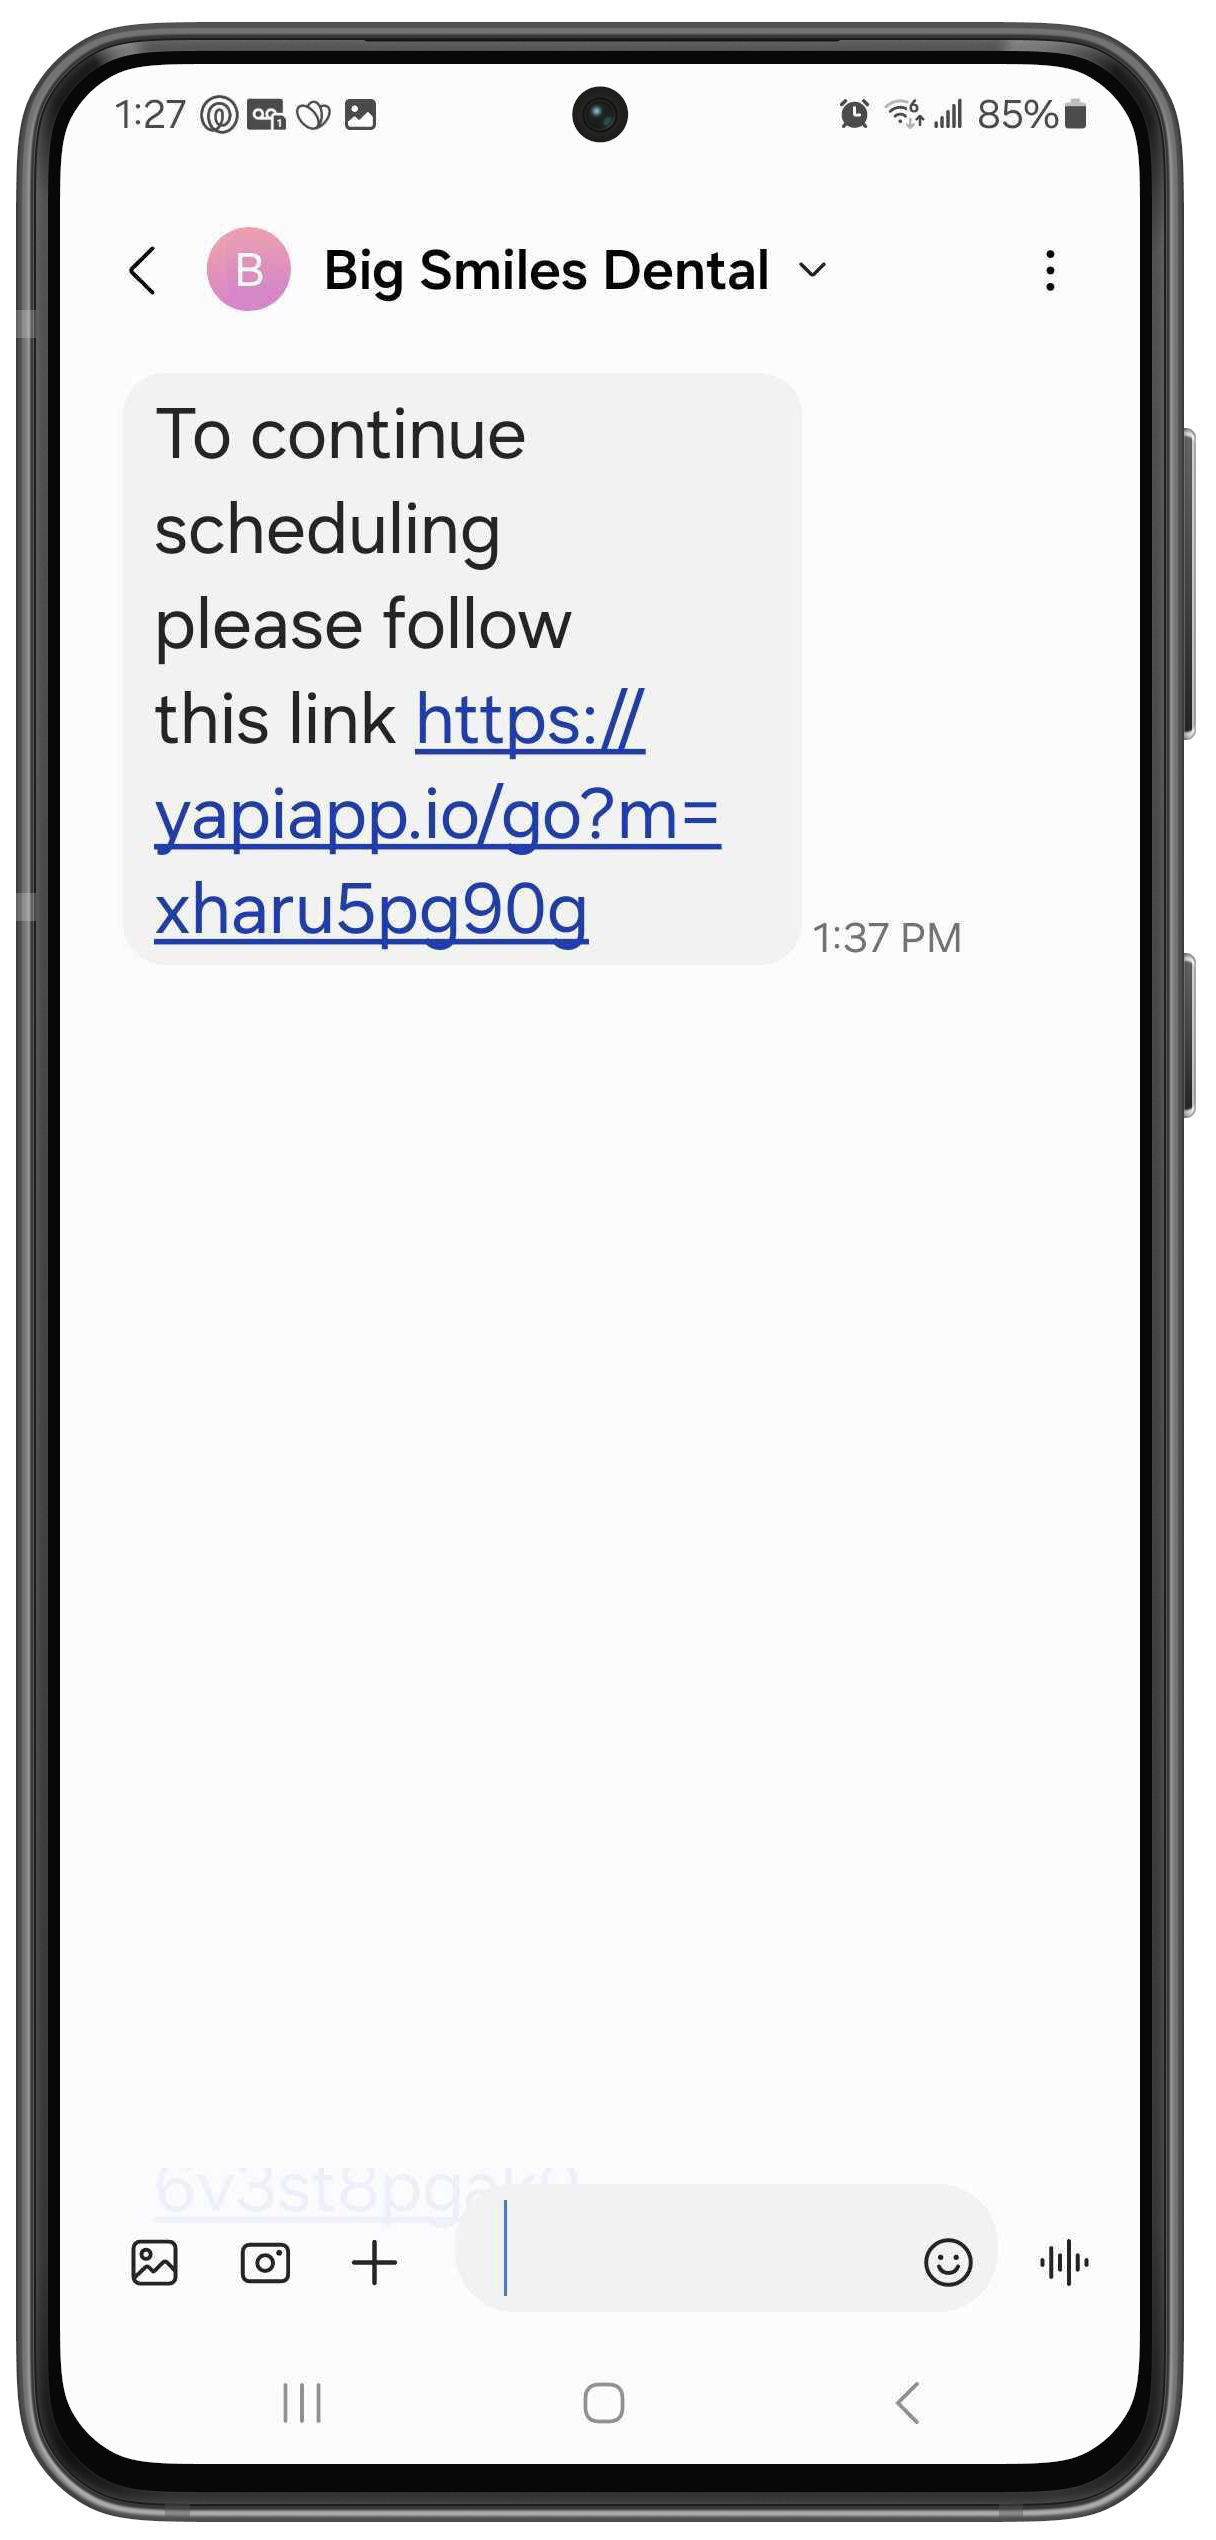 |
Text Example
Once a patient clicks on the link sent to them by email or text, they'll see a Welcome Back message. If the email or mobile number they entered to get the appointment link is attached to multiple family members, they're shown a list of all family members and need to select the family member the appointment is for. Once they select a family member, they'll see a welcome for the individual patient. If no family members share this contact information, patients skip to the individual welcome screen. This screen then asks them to enter their date of birth to verify their identity:
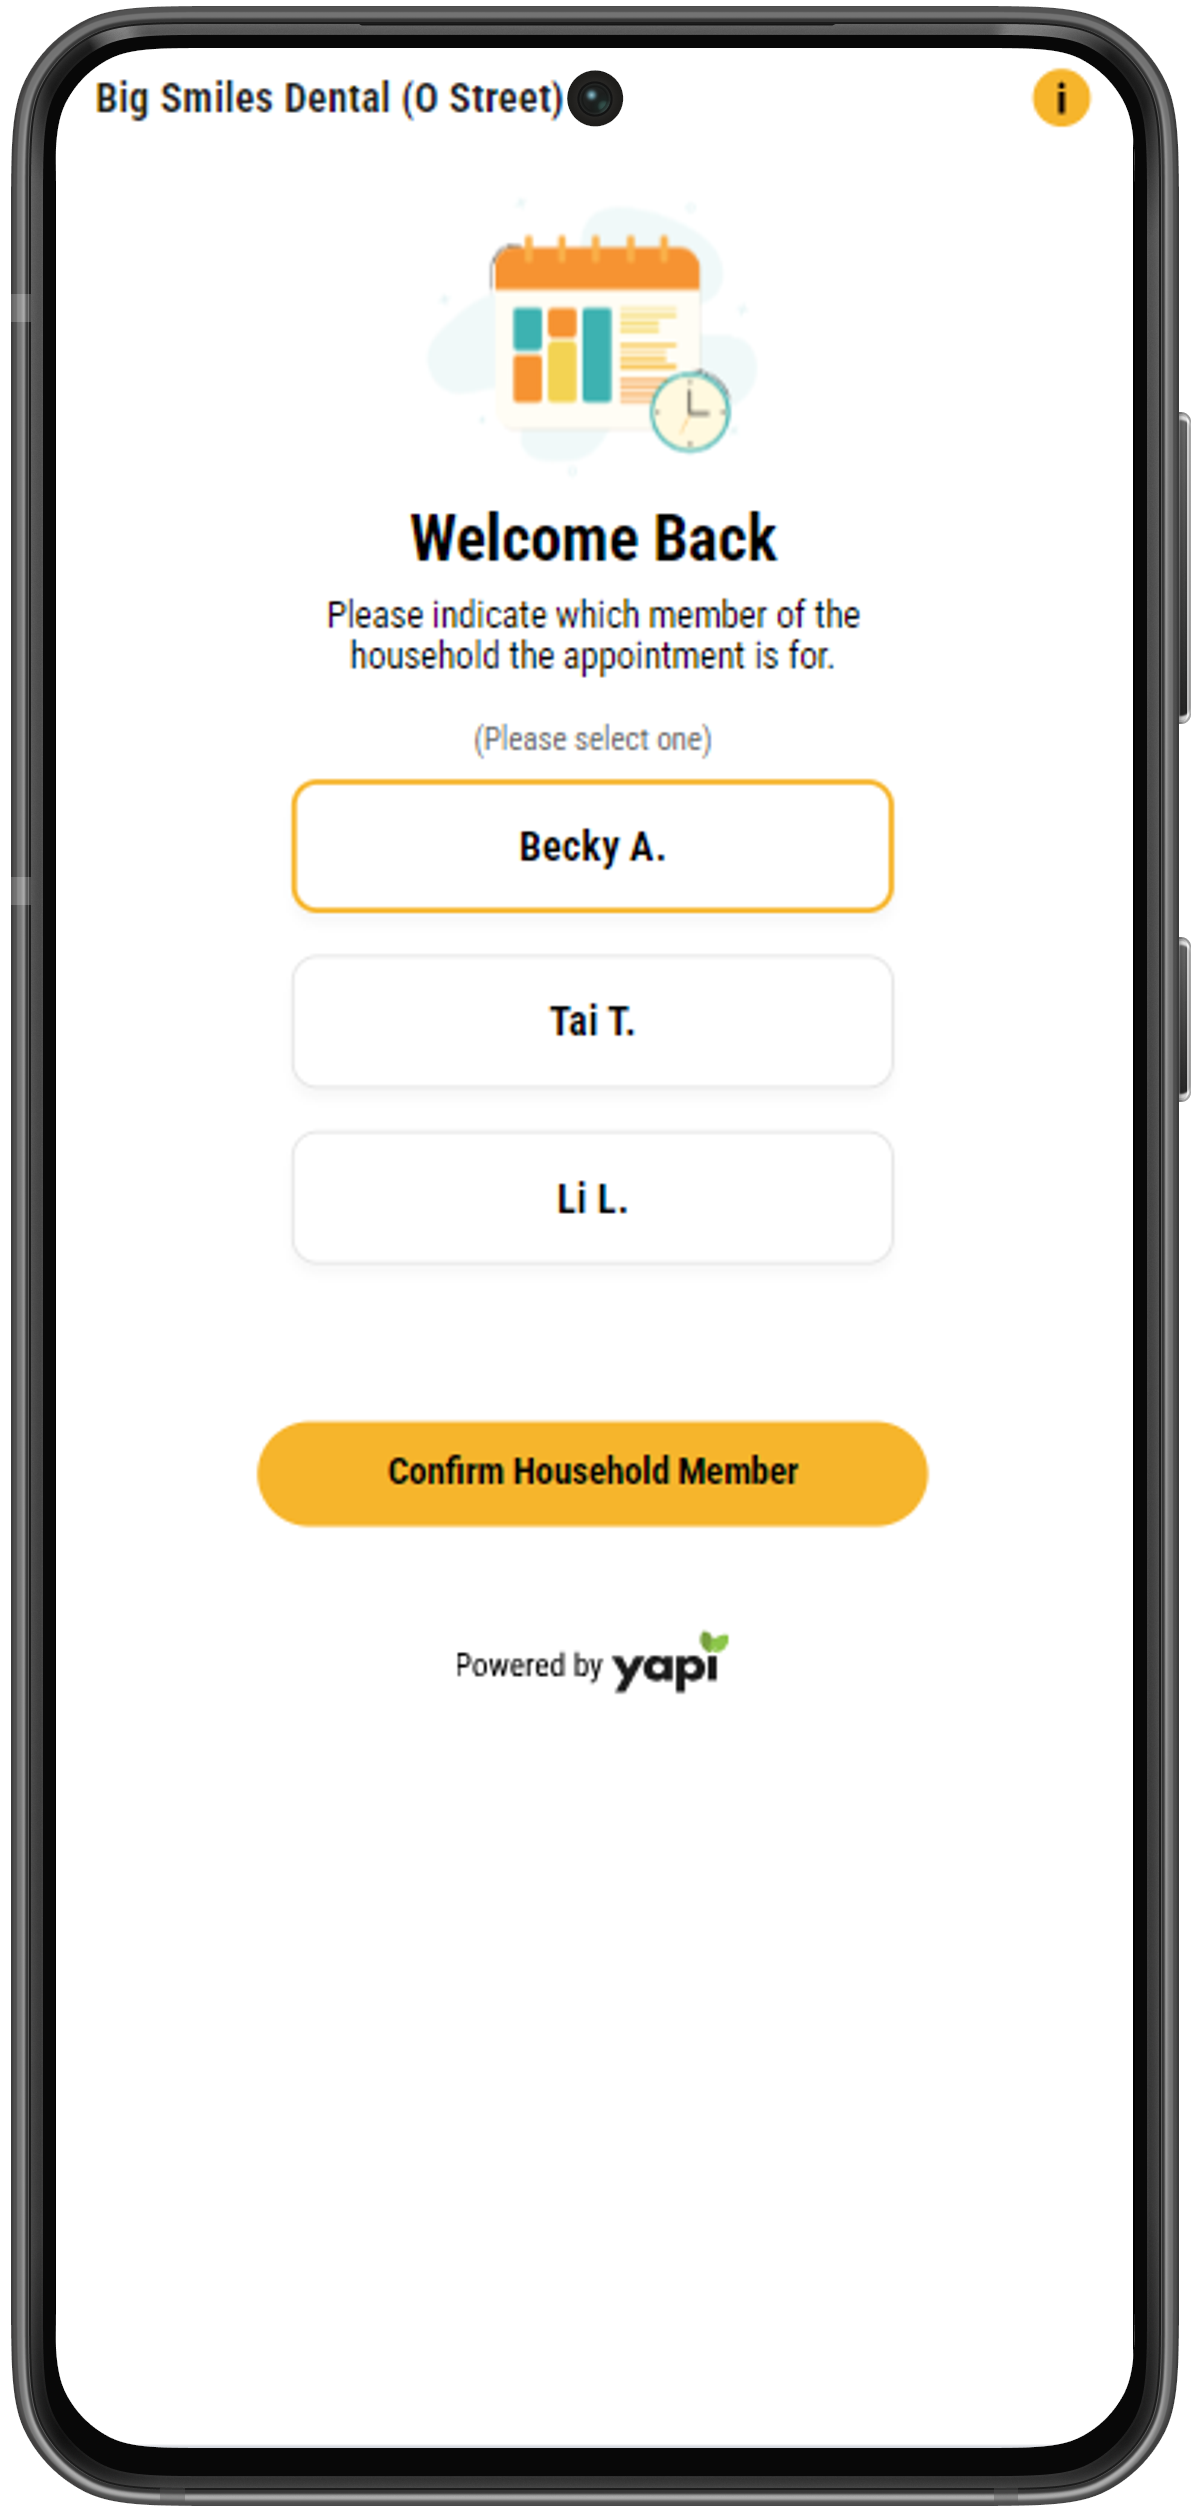 |
Welcome Screen for Families
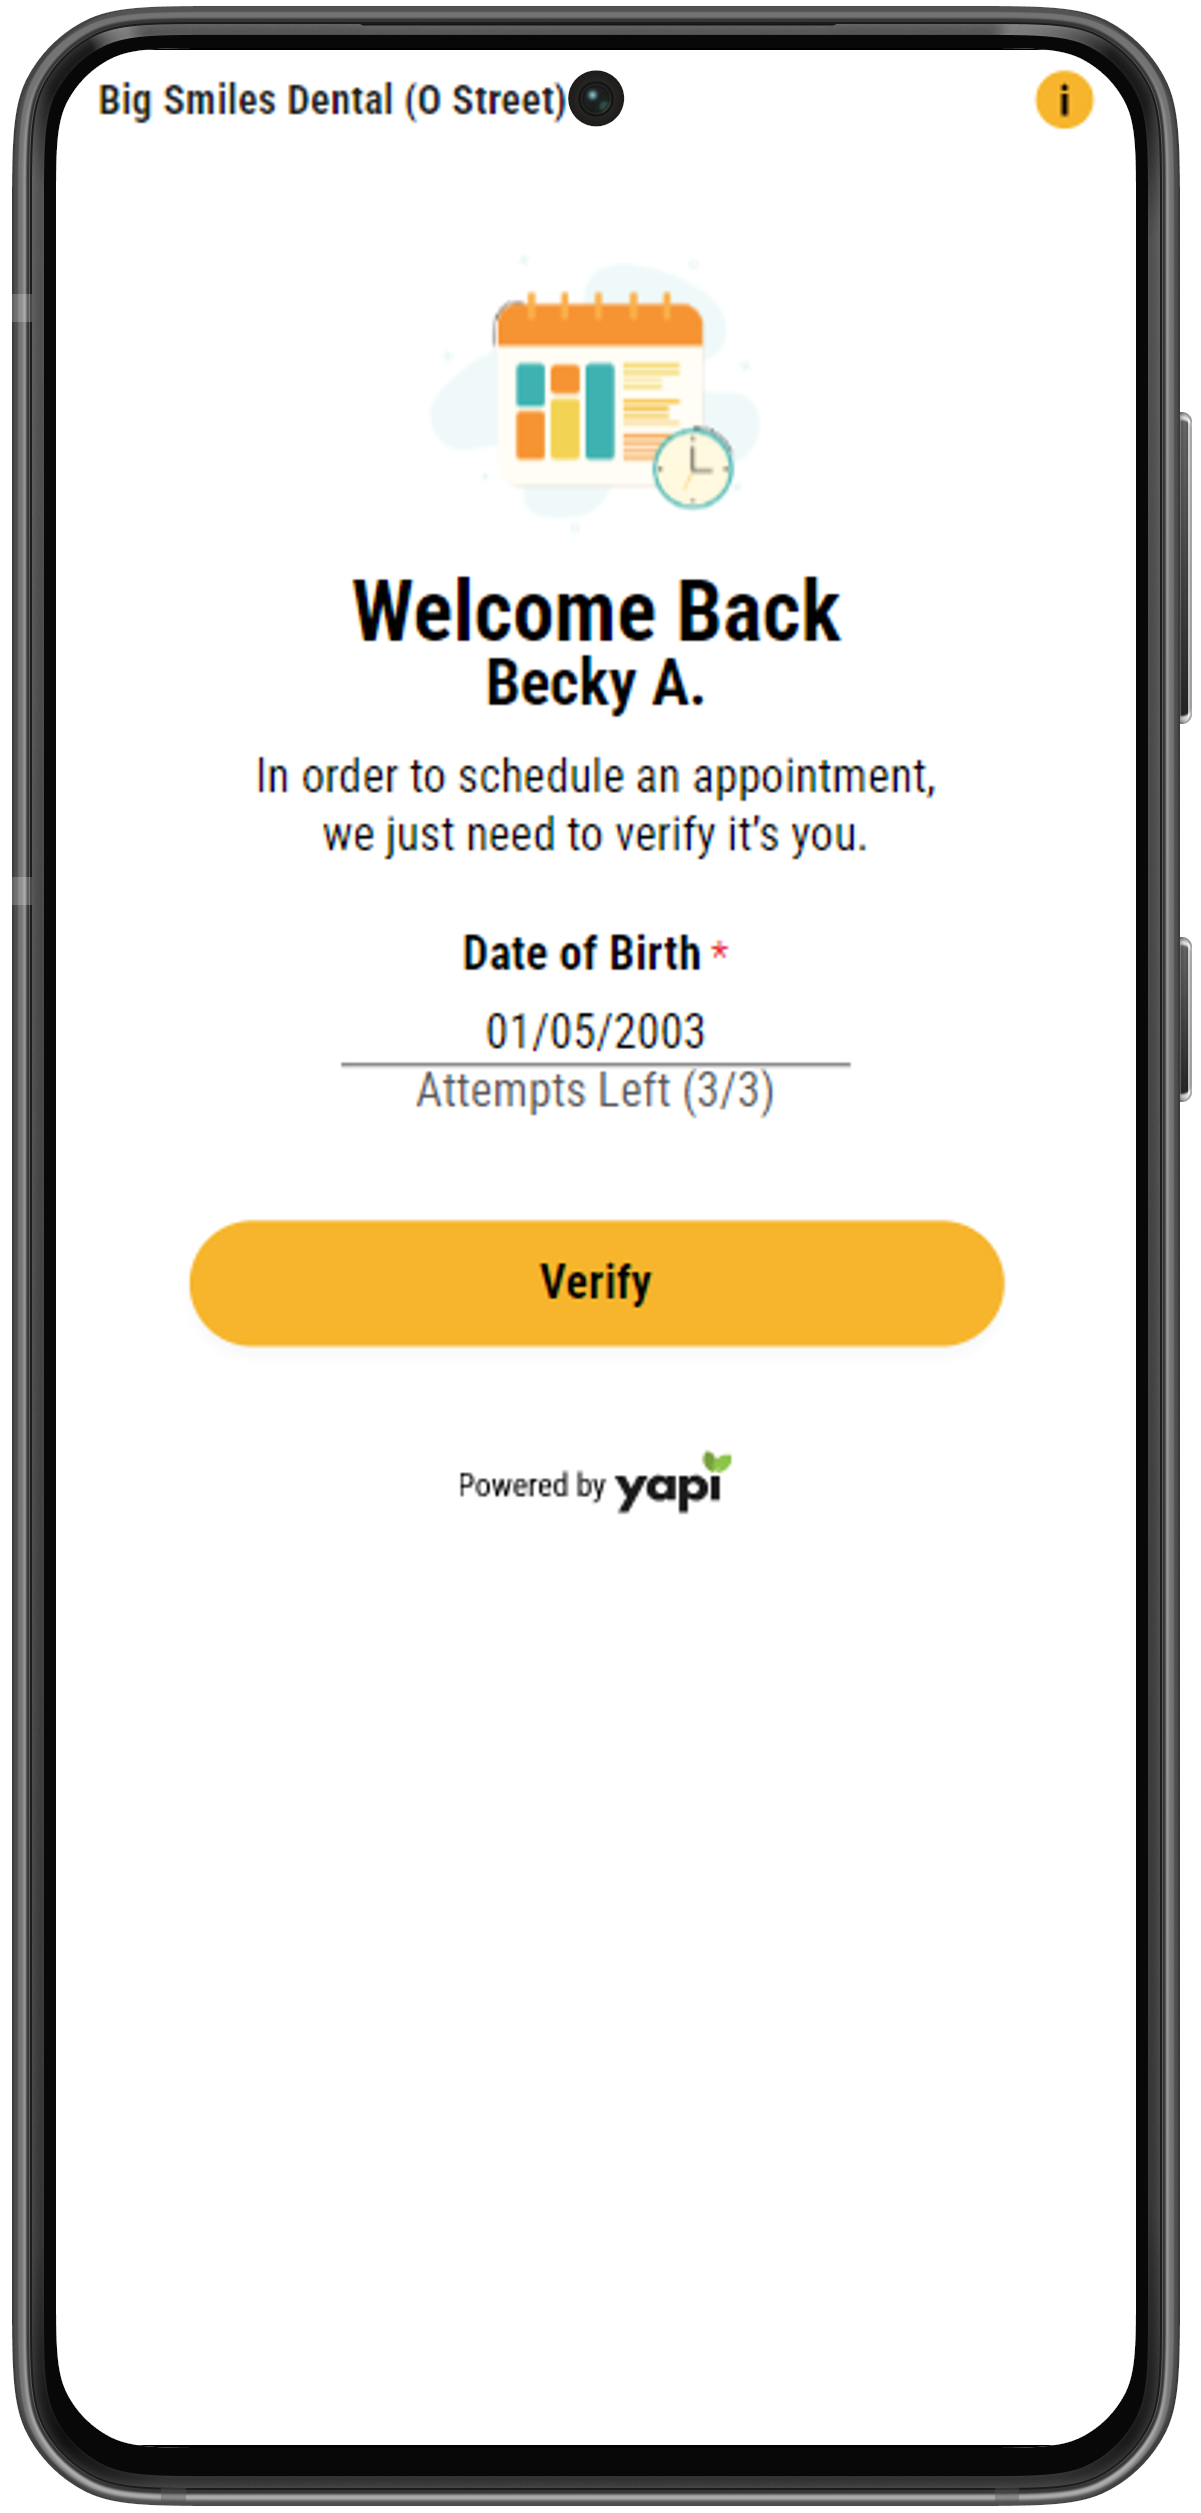 |
Welcome Screen for Individual Patients
Note
The patient has 3 attempts to enter the correct birthdate. If they aren't able to do this after 3 tries, they'll see a message to contact your office.
Next, the patient is asked What brings you to our practice? to determine what treatment they need to schedule. This lists all the treatments you've set up for new patients in your Online Scheduling settings.
|
If a patient already has insurance information on file, the screen below displays. This gives them an opportunity to confirm whether or not their insurance has changed since their last visit. If a patient selects No Changes to Insurance, they're taken straight to selecting an appointment date, time, and provider.
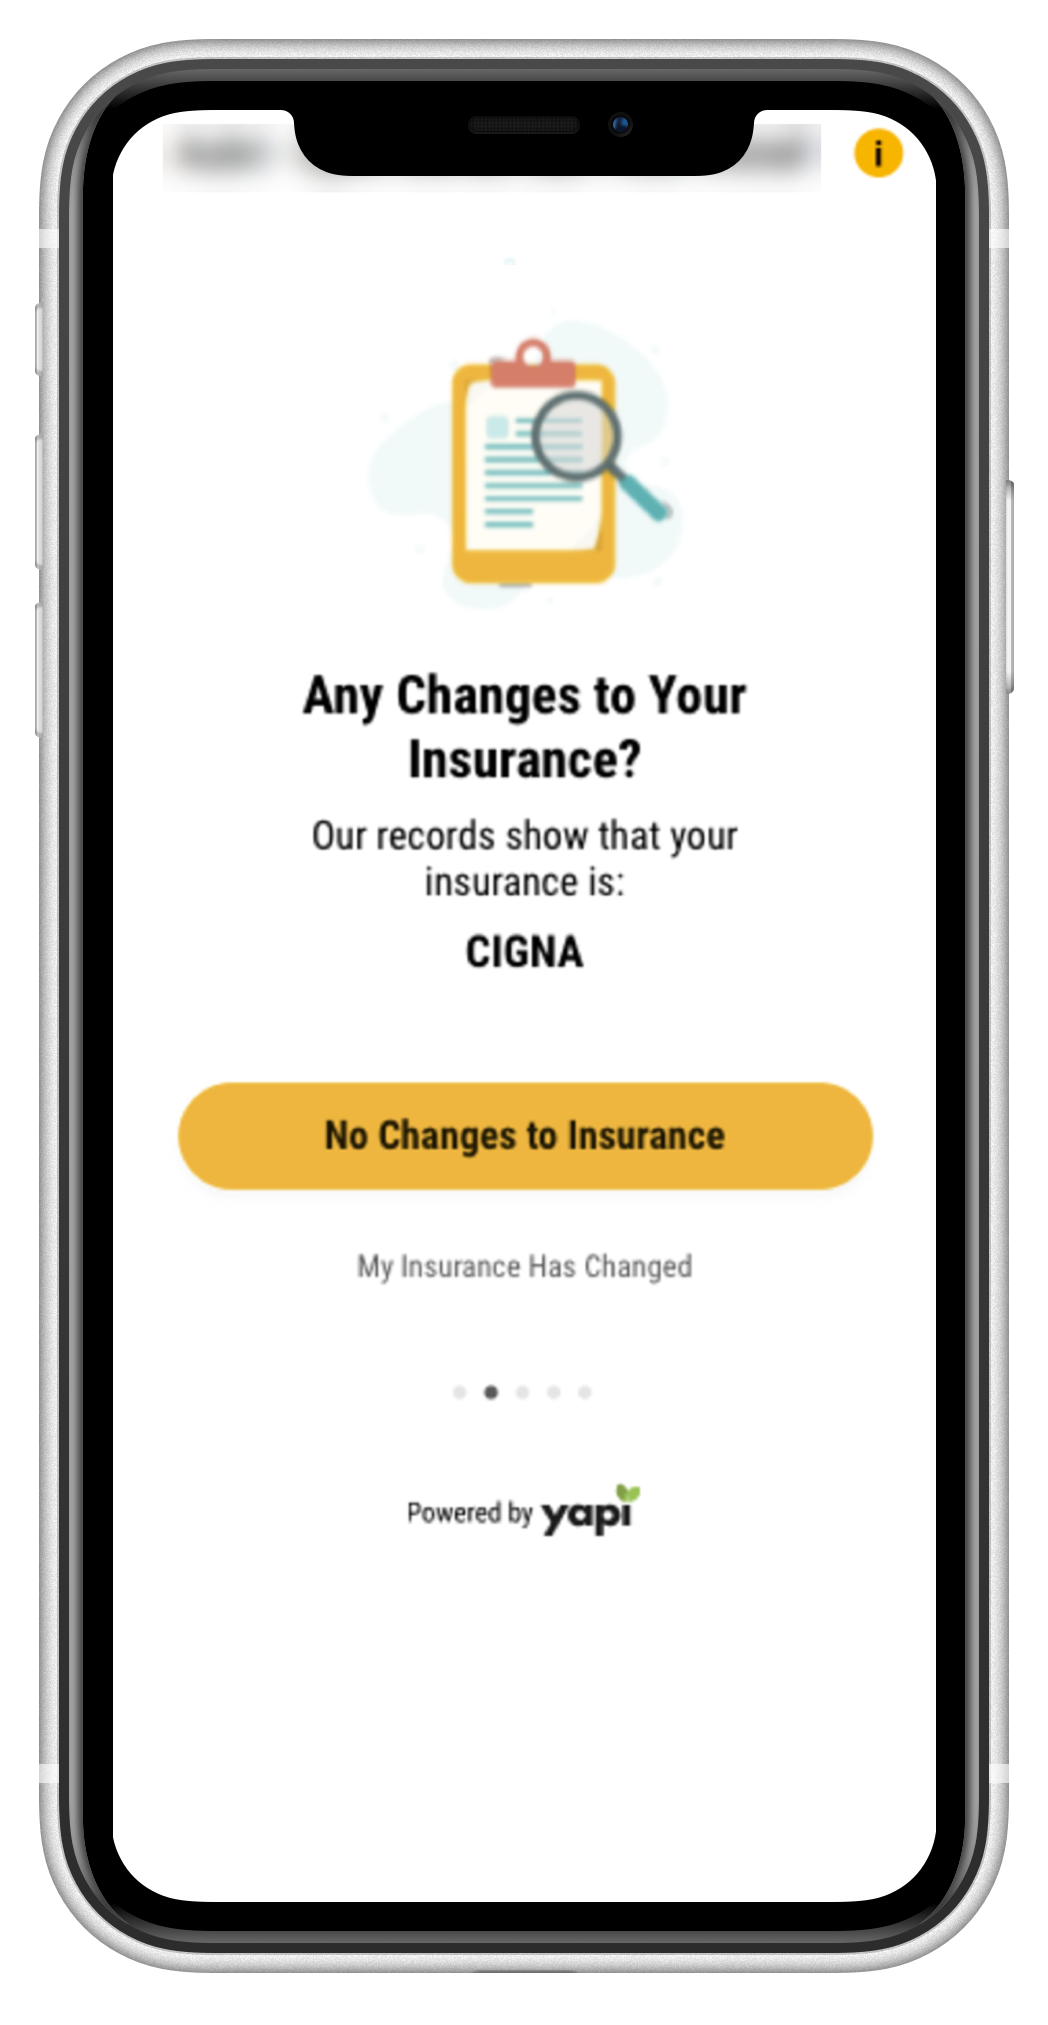 |
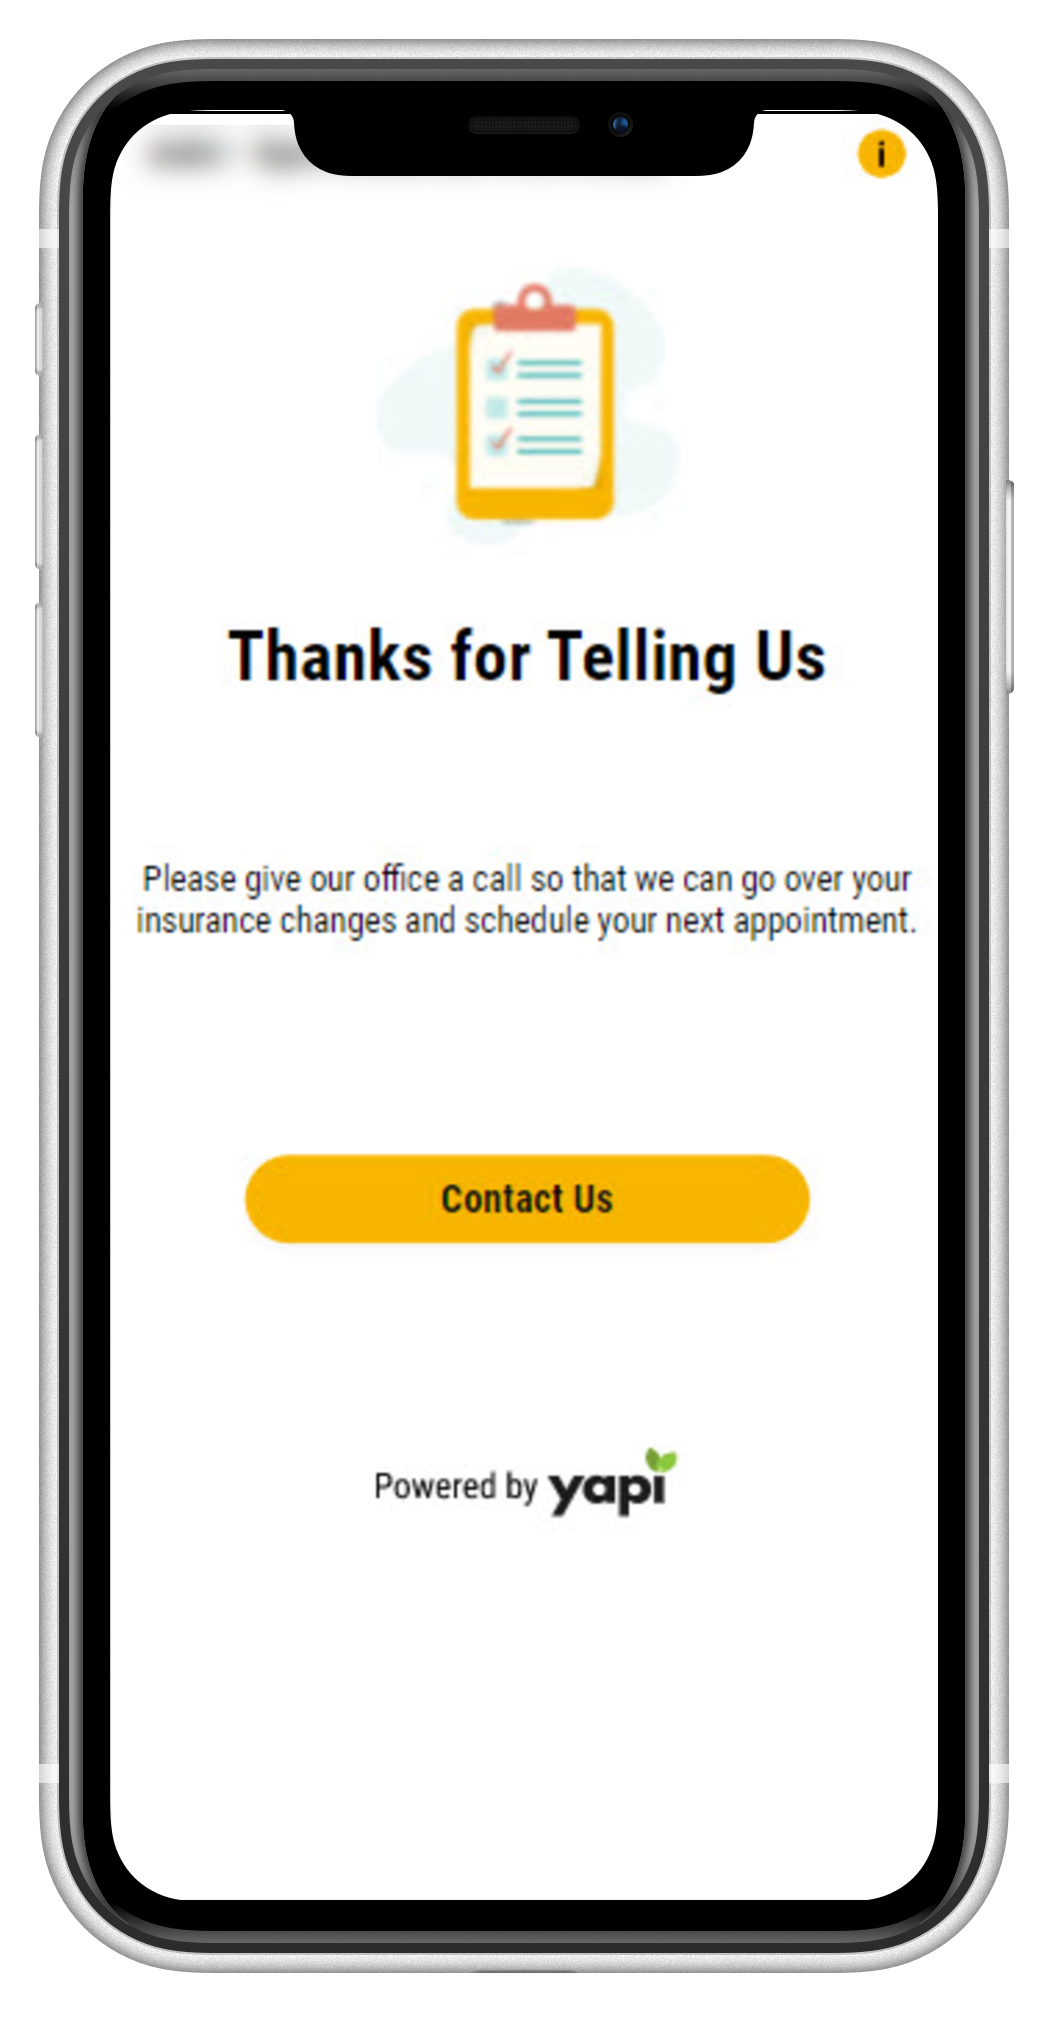
Thanks for Telling Us
If a patient clicks My Insurance Has Changed, they'll be directed to contact your office to provide the new insurance information. Your office can then schedule their appointment at that time.
 |
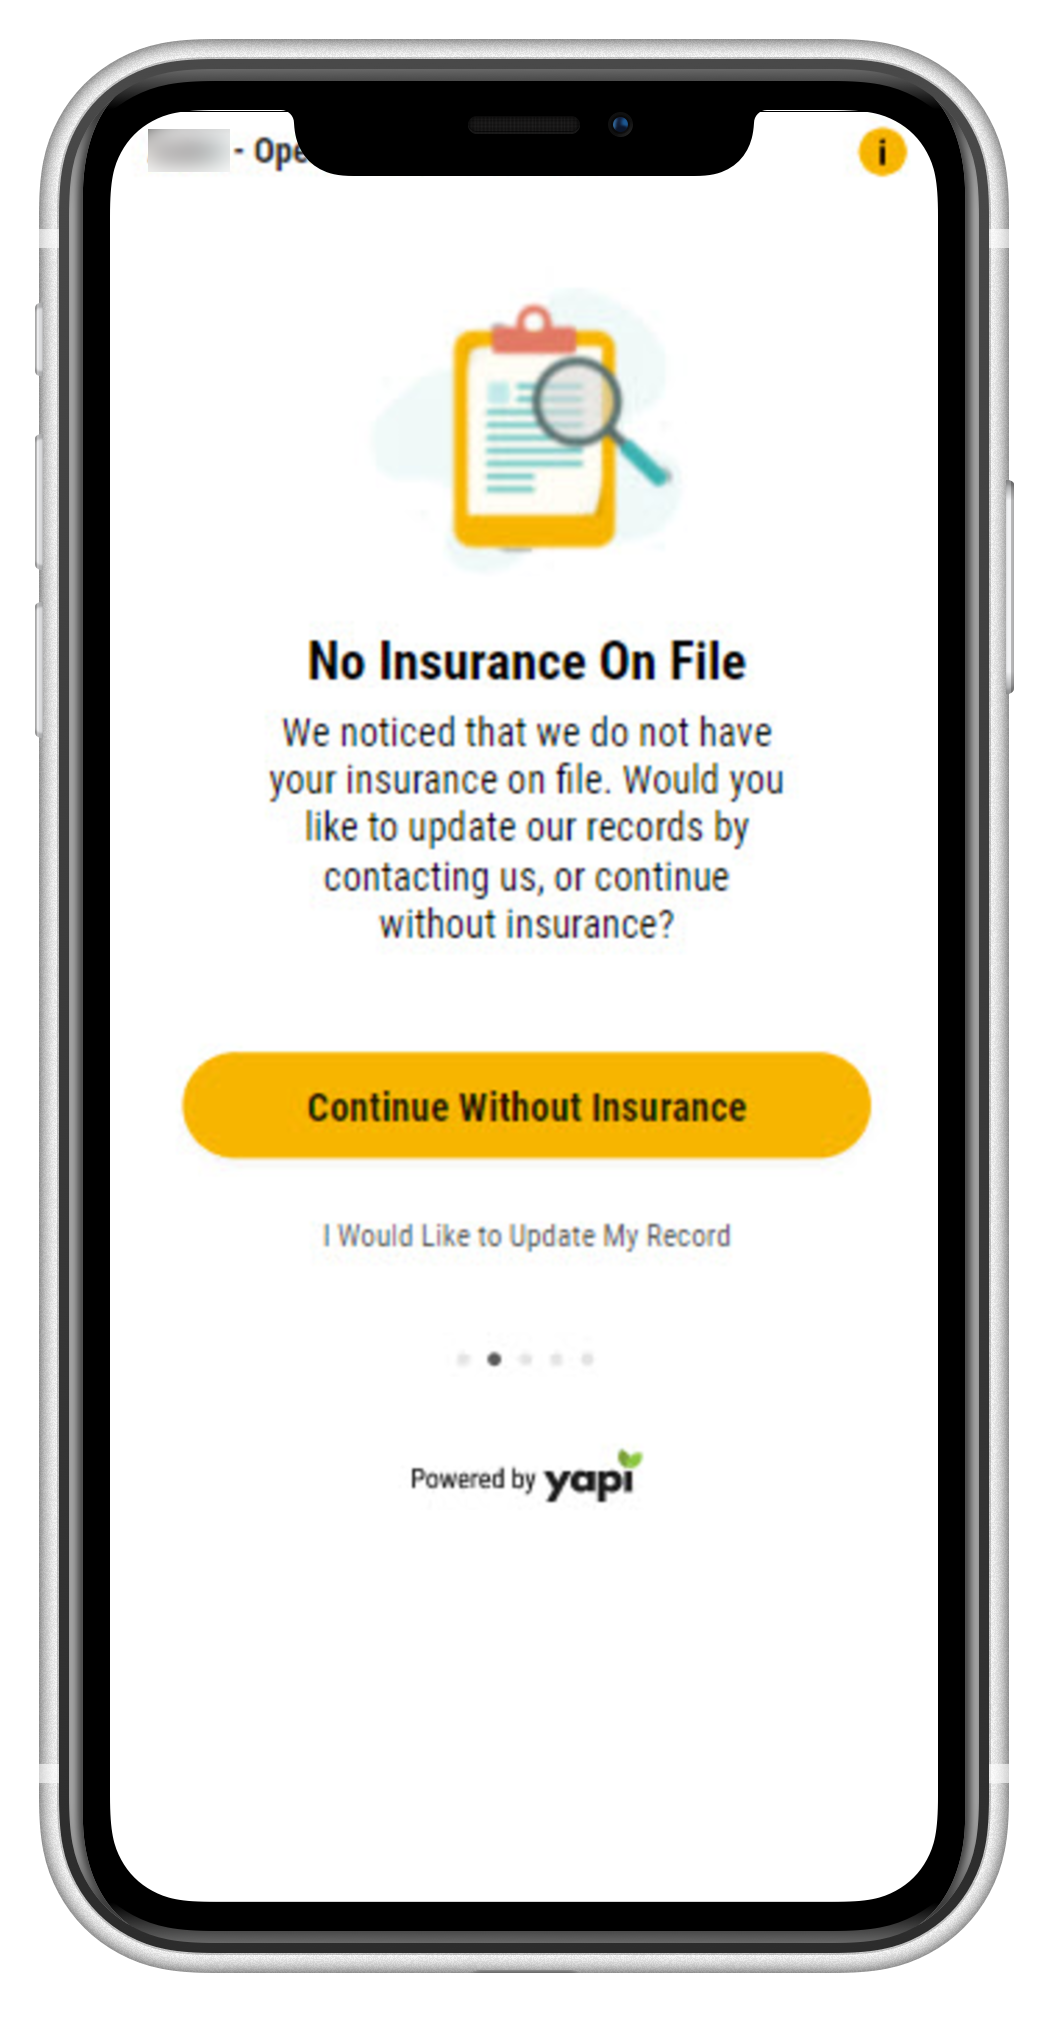
No Insurance On File
If an existing patient has no insurance information on file, the screen below displays. If they click I Would Like to Update My Record, they'll be directed to contact your office to provide the new insurance information (see the Thanks for Telling Us screen above). Your office can then schedule their appointment at that time.
 |
If the patient clicks Continue Without Insurance, what happens next depends on your Online Scheduling General Settings in Leap.
If you've made insurance information required to book an appointment: The patient won't be able to continue with booking the appointment and will need to contact your office.
If you've made insurance information optional: The patient can continue booking an appointment without providing insurance information.
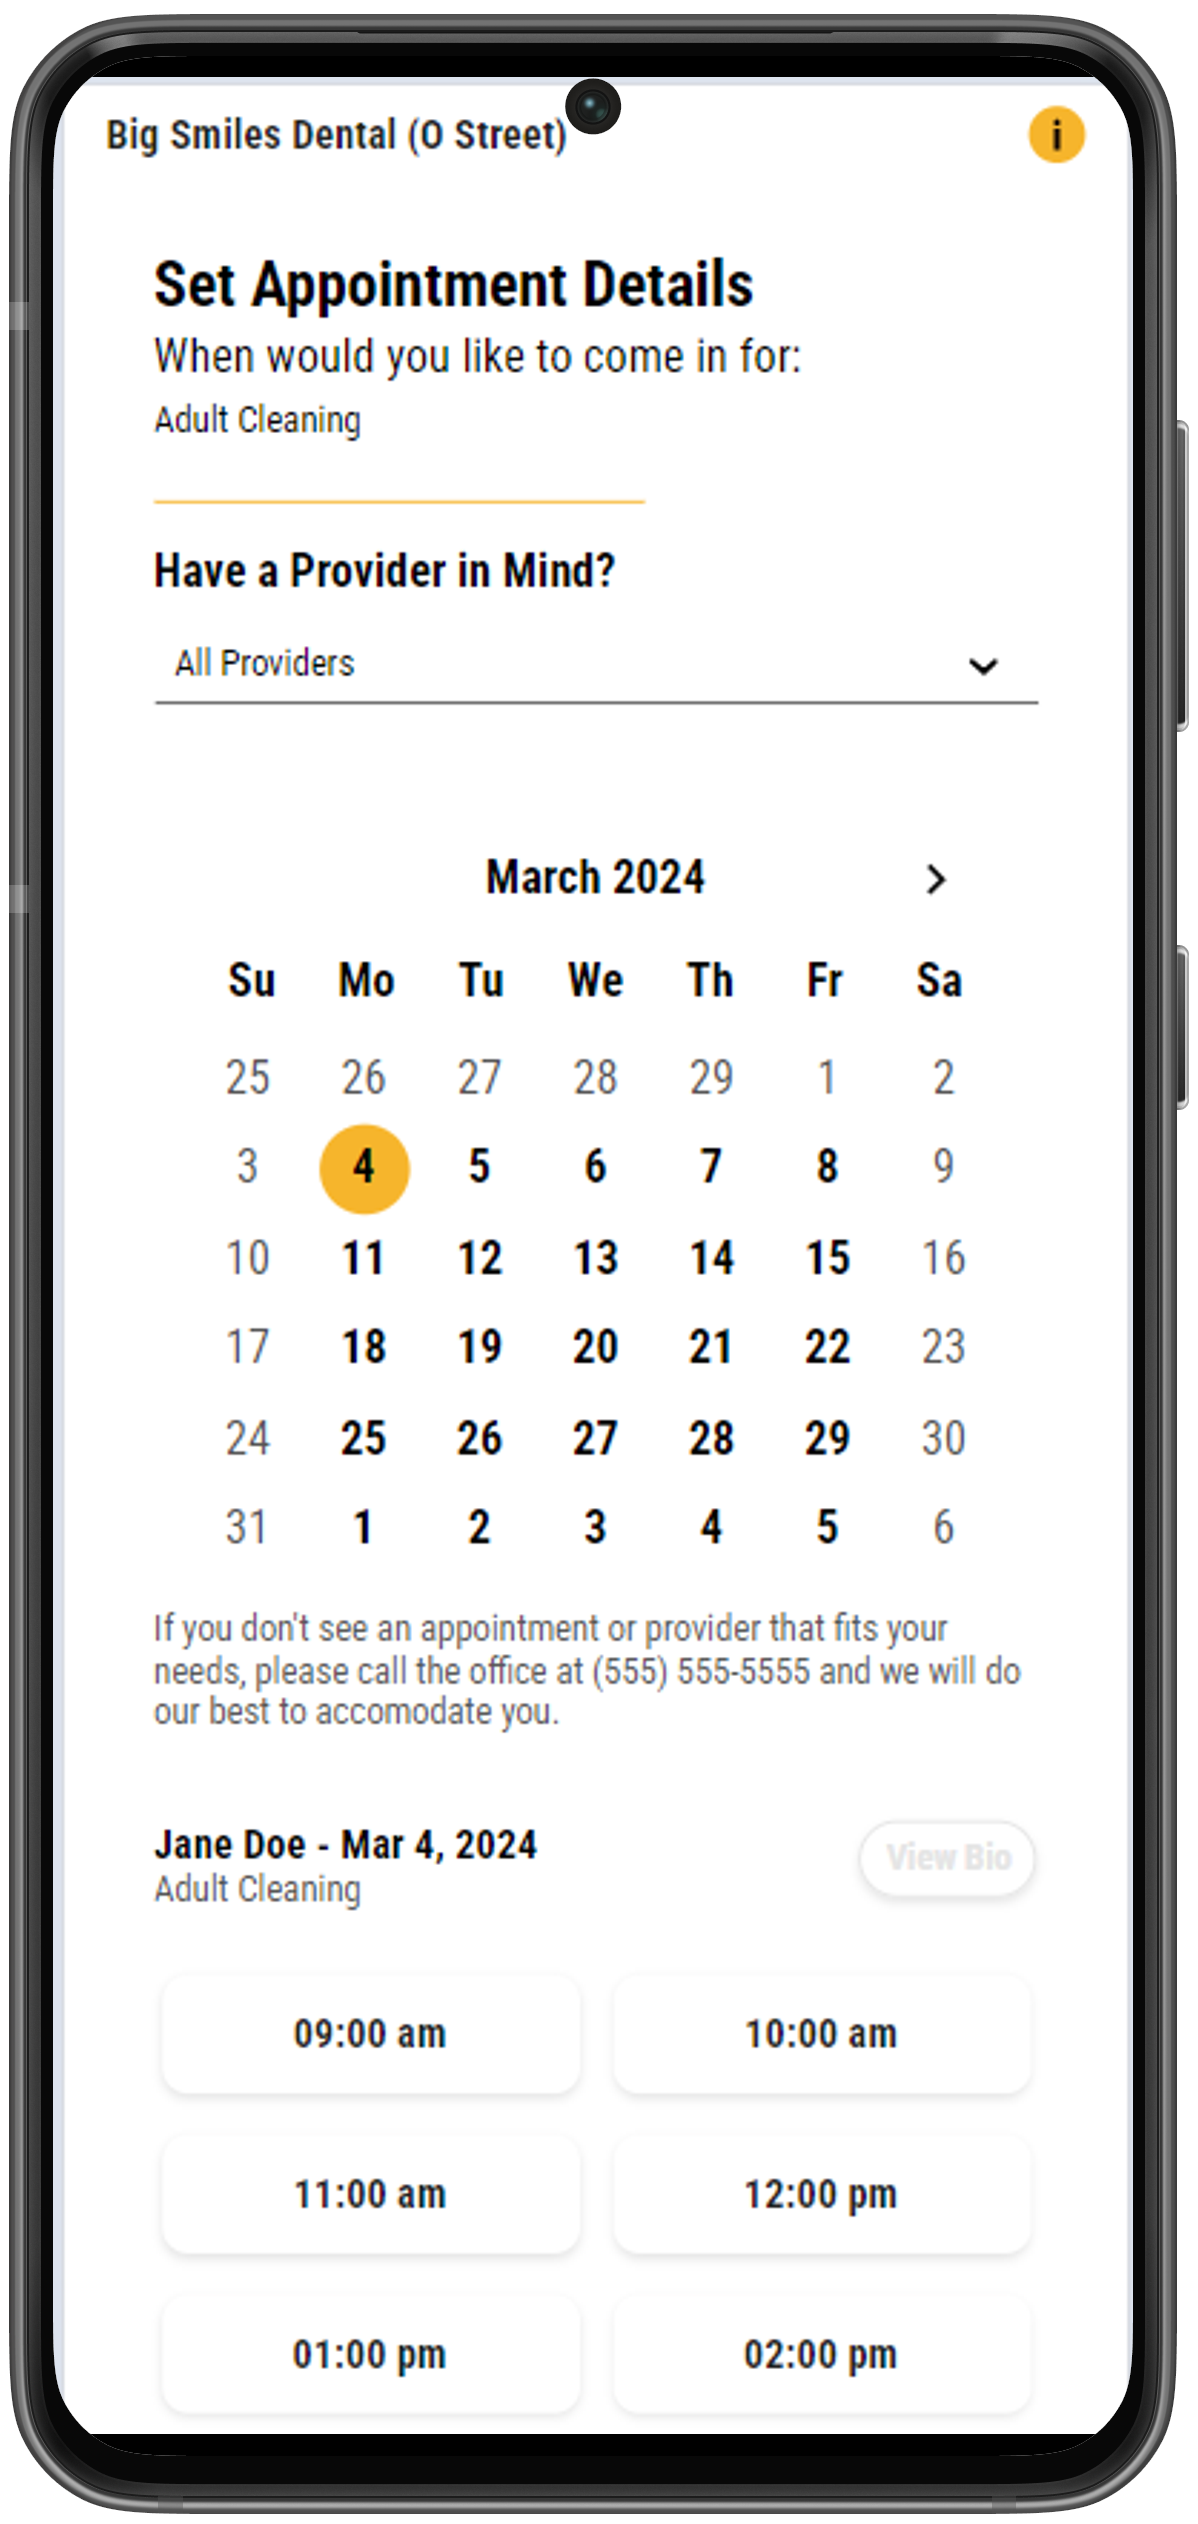
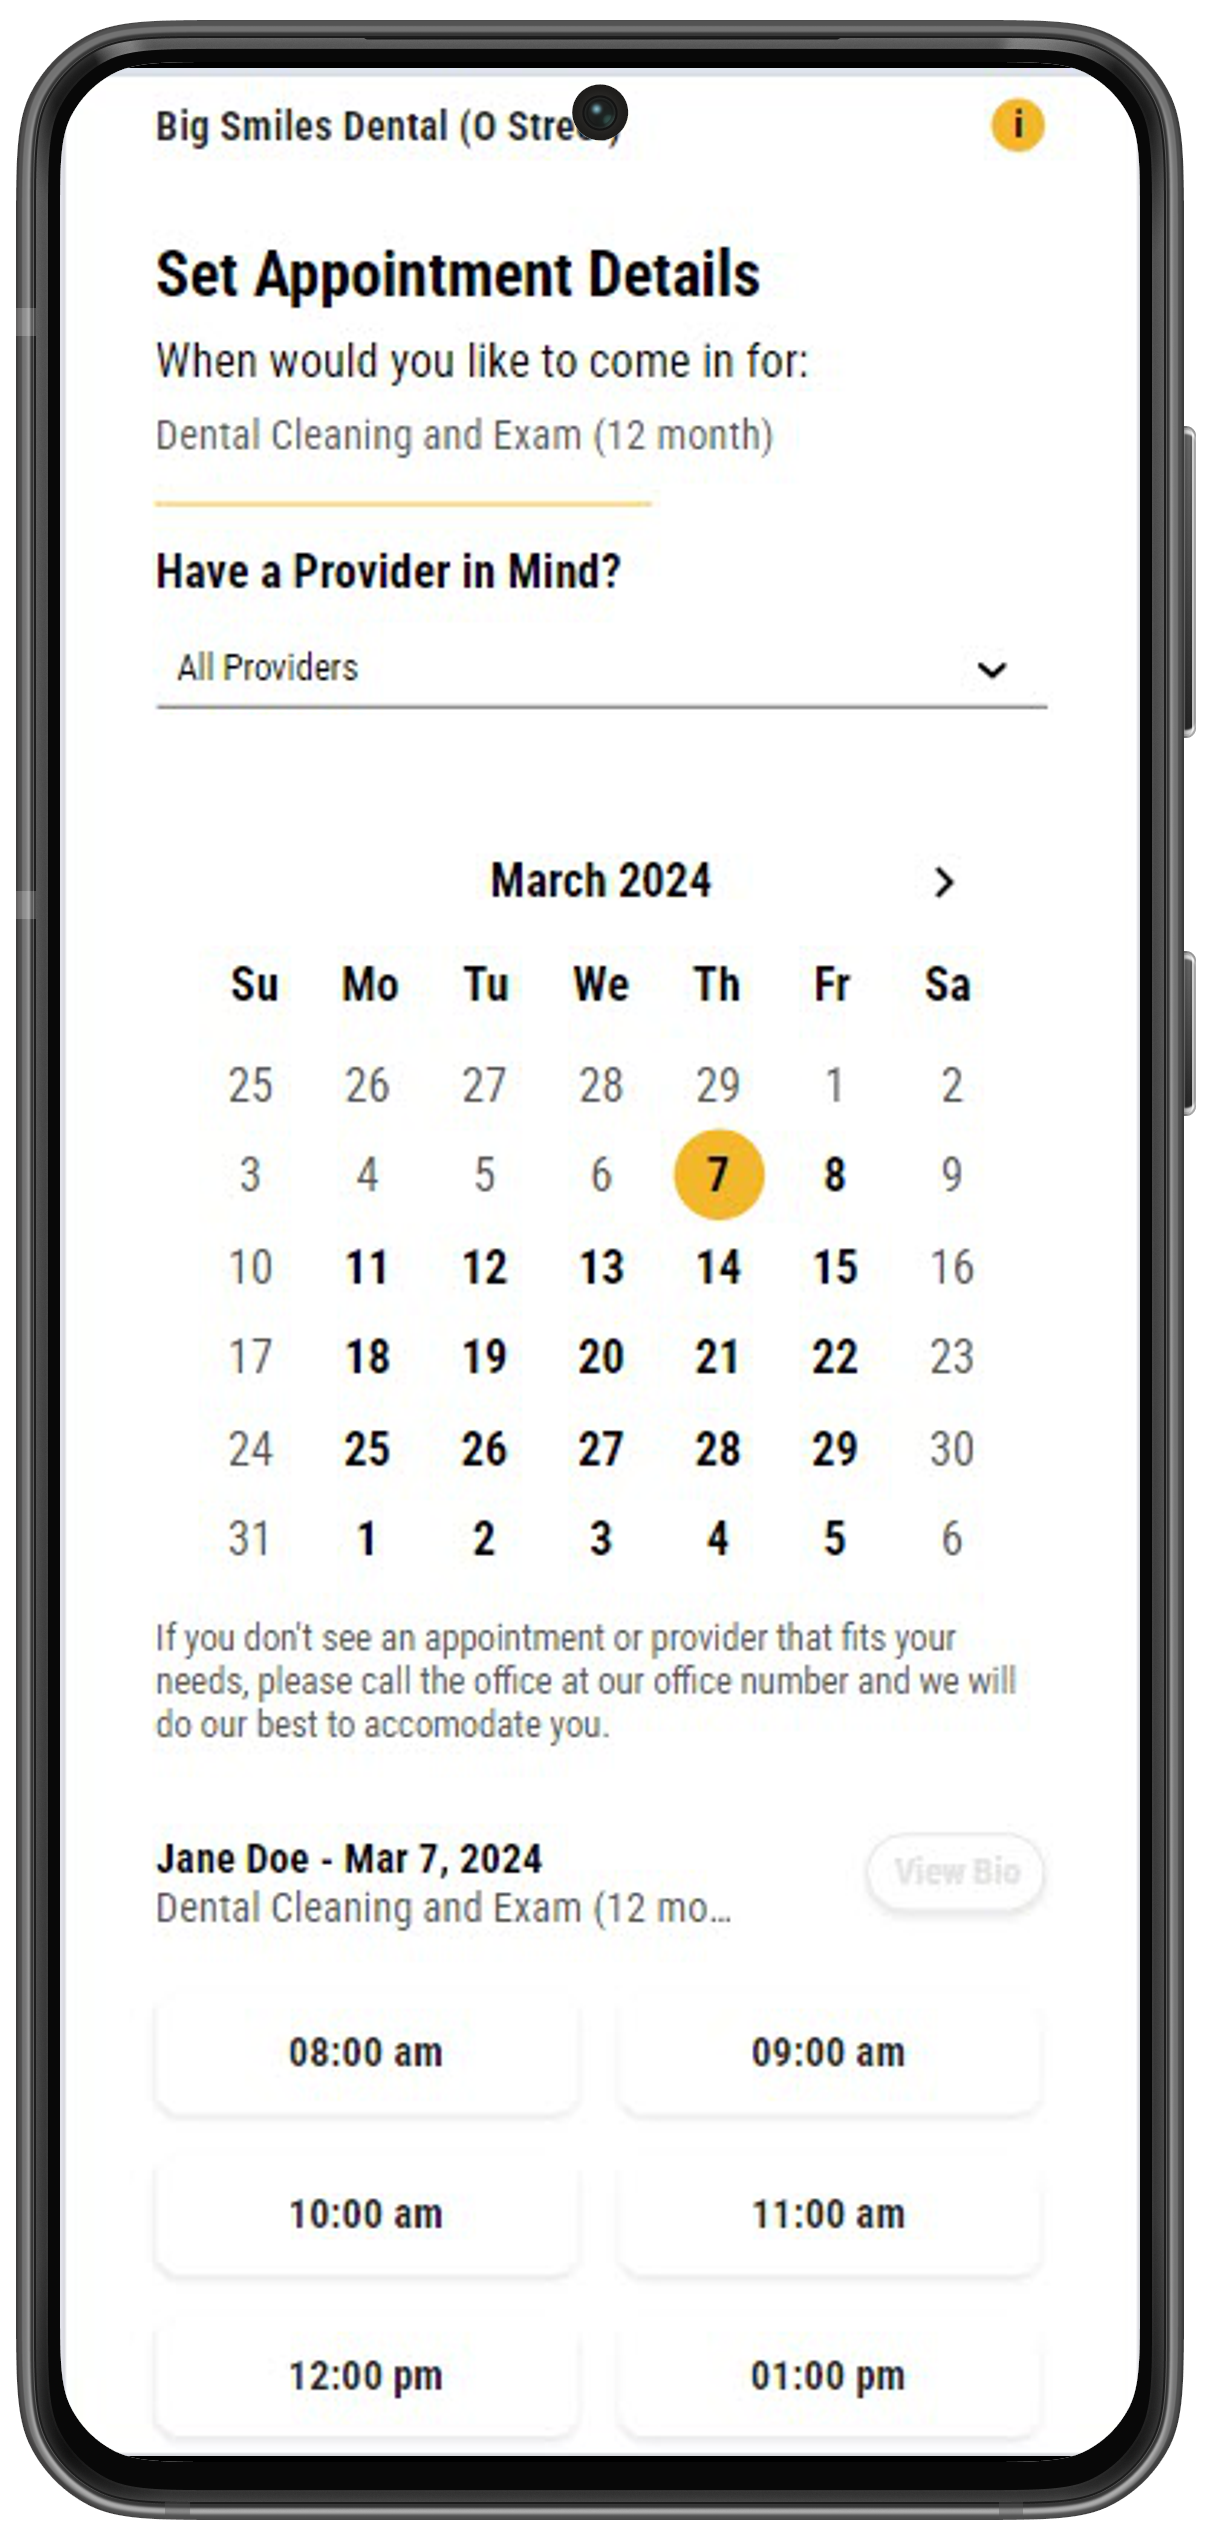
On the Set Appointment Details page, patients can select a date and time for their appointment and, if they want, a provider they want to see. If a patient chooses a specific provider, they'll see available appointments for that provider only.
 |
If you've added bios for your providers in Online Scheduling, patients can click View Bio next to each provider name to read a short summary about them.
|
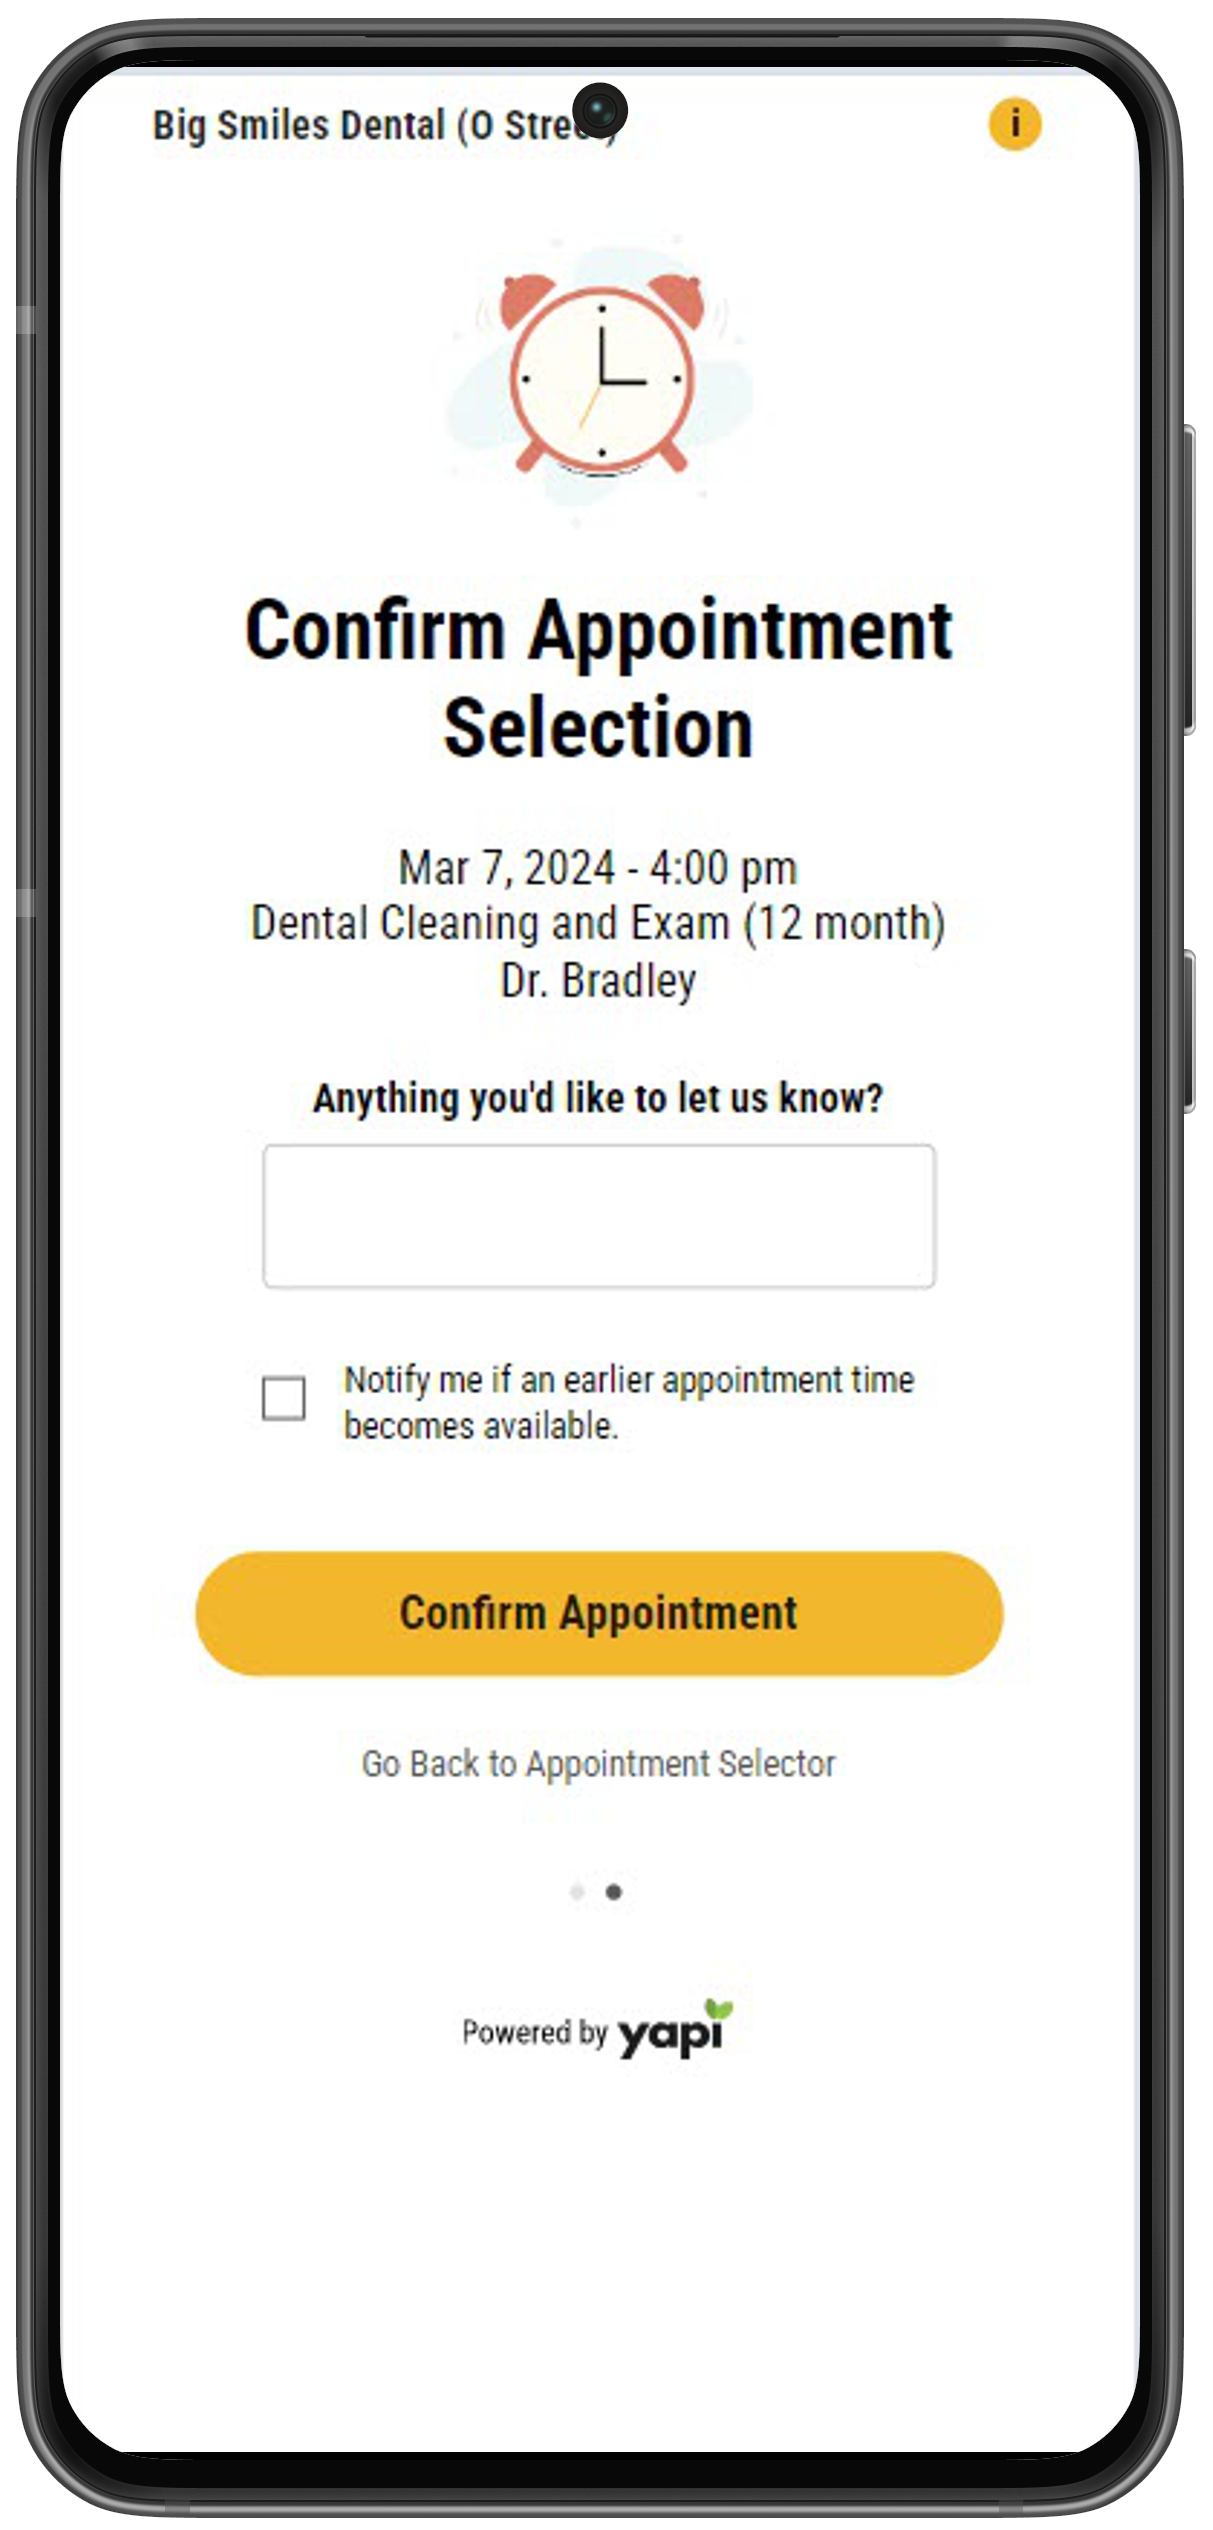
To officially book their appointment, patients must review the appointment details they've selected and click Confirm Selection at the bottom of the screen. When reviewing the appointment details, patients can also leave a message for your office by typing into the Anything you'd like us to know? field. This message then shows in the Appointment Note in Eaglesoft and will display in the patient's appointment details in Leap.
 |
Before confirming their selection, the patient can also select Notify me if an earlier appointment time becomes available. This automatically adds the appointment to your ASAP list in Yapi Classic and sets the appointment as Sooner if Possible in Eaglesoft.
When the patient clicks Confirm Selection, the system will attempt to book the appointment. If the booking is successful, the patient is taken to the Appointment Booked page.
Note
If the patient’s selected time and date have been booked before they were able to complete their booking, the system will display an error and send them back to the appointment selection screen to select a new date and time.
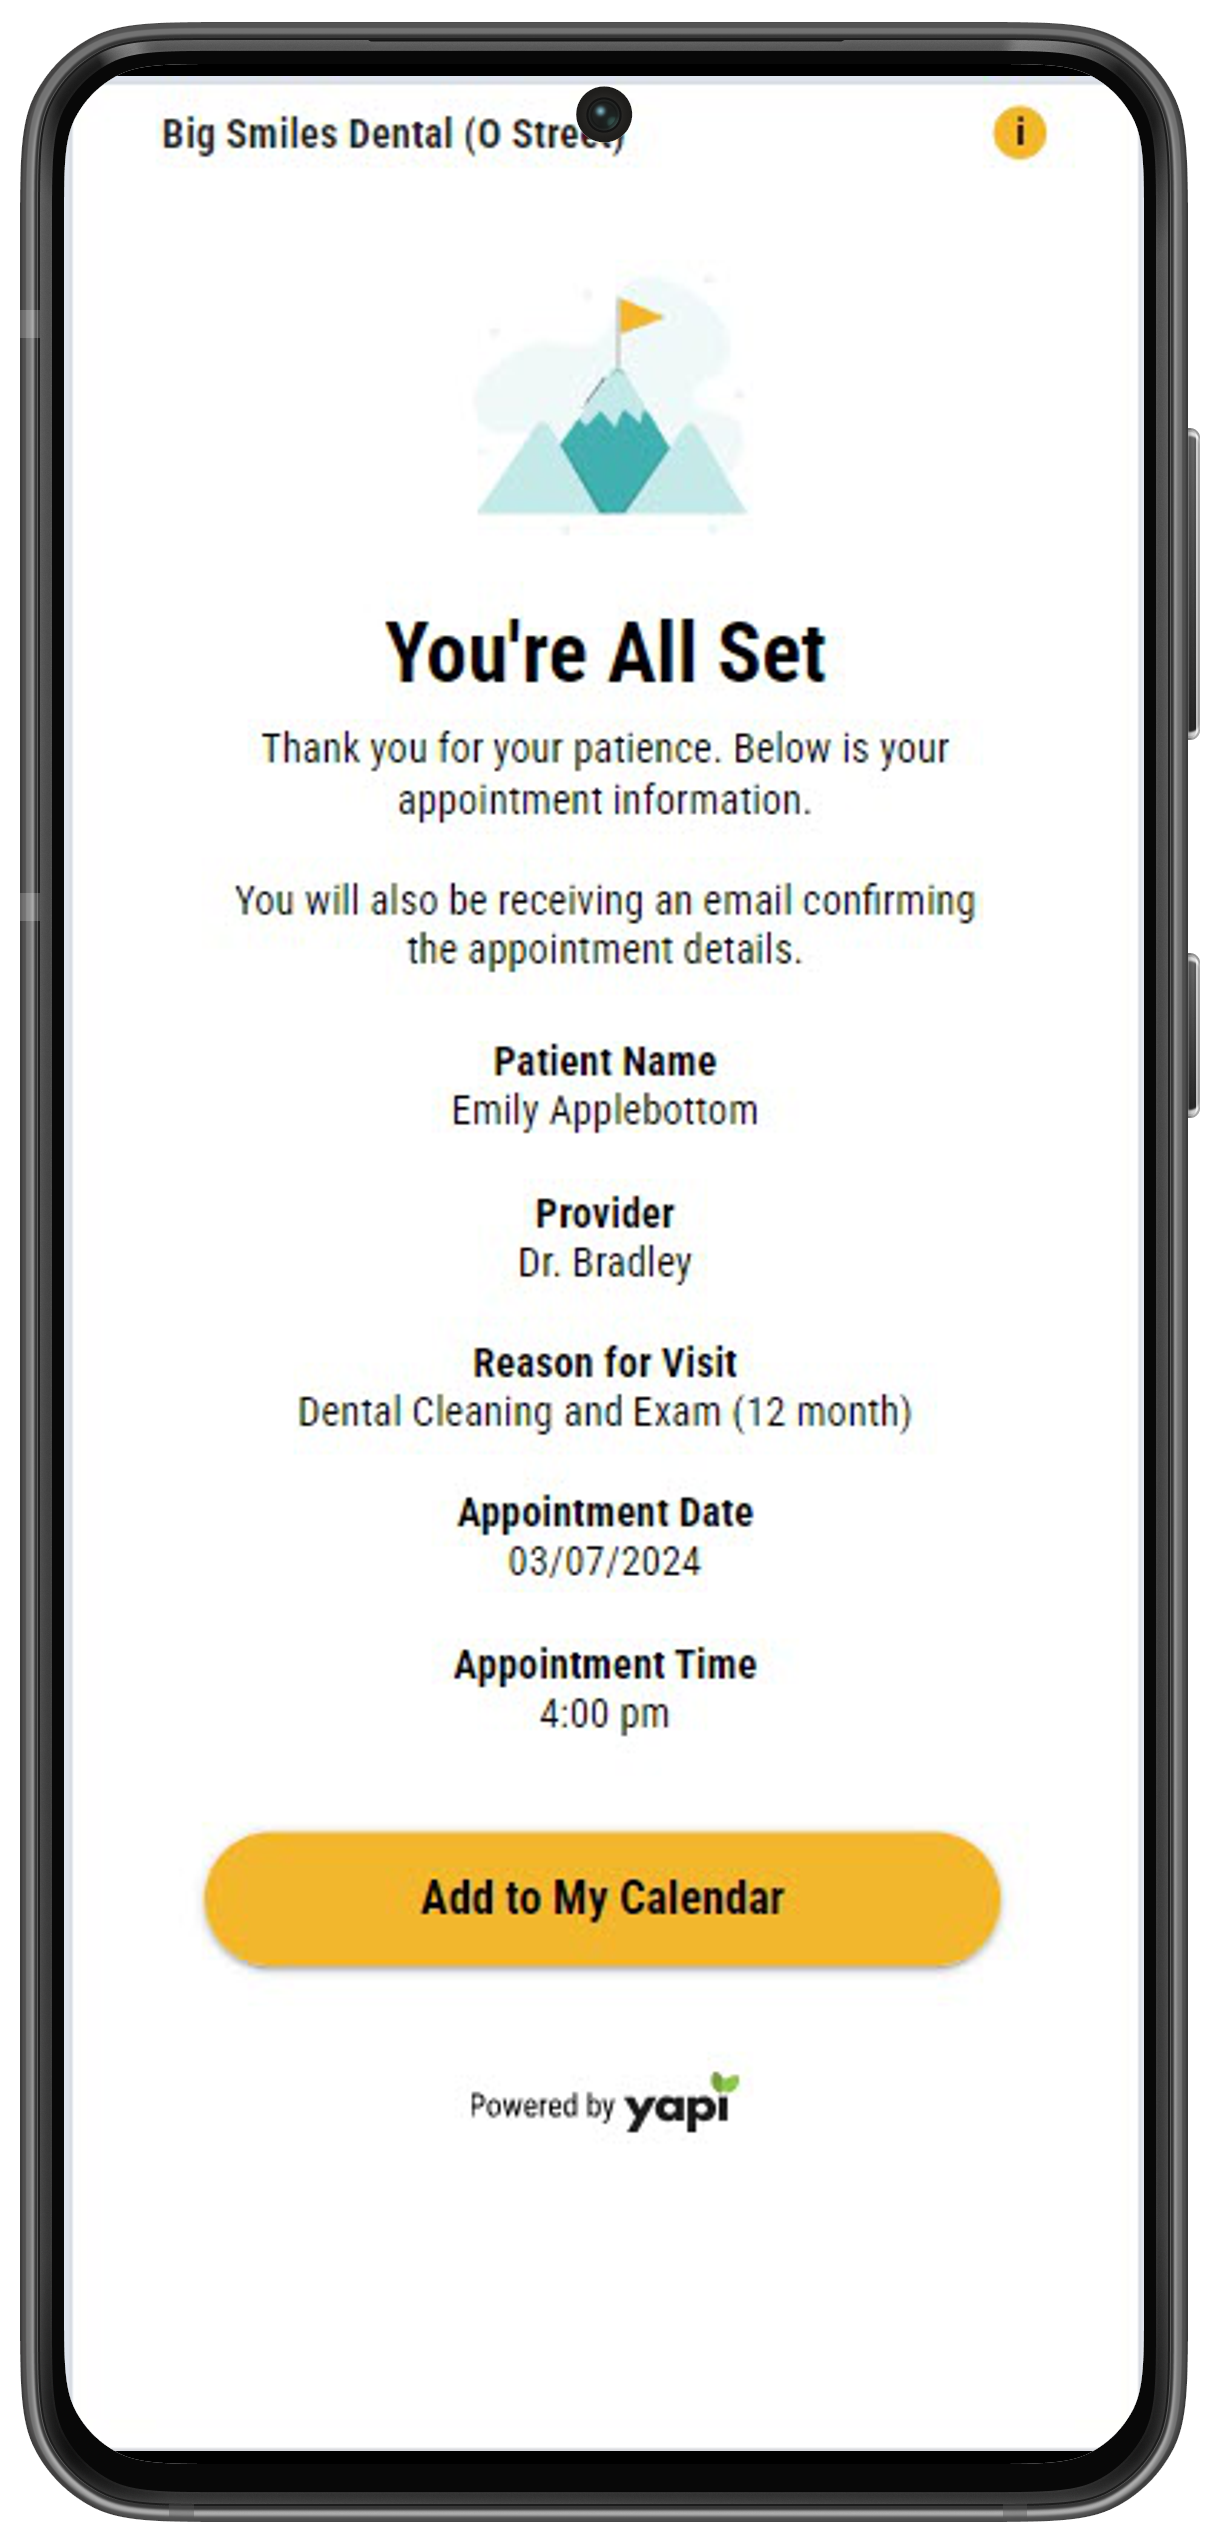
Once an appointment has been successfully booked in Eaglesoft the patient will see a You're All Set message along with their appointment details.
 |
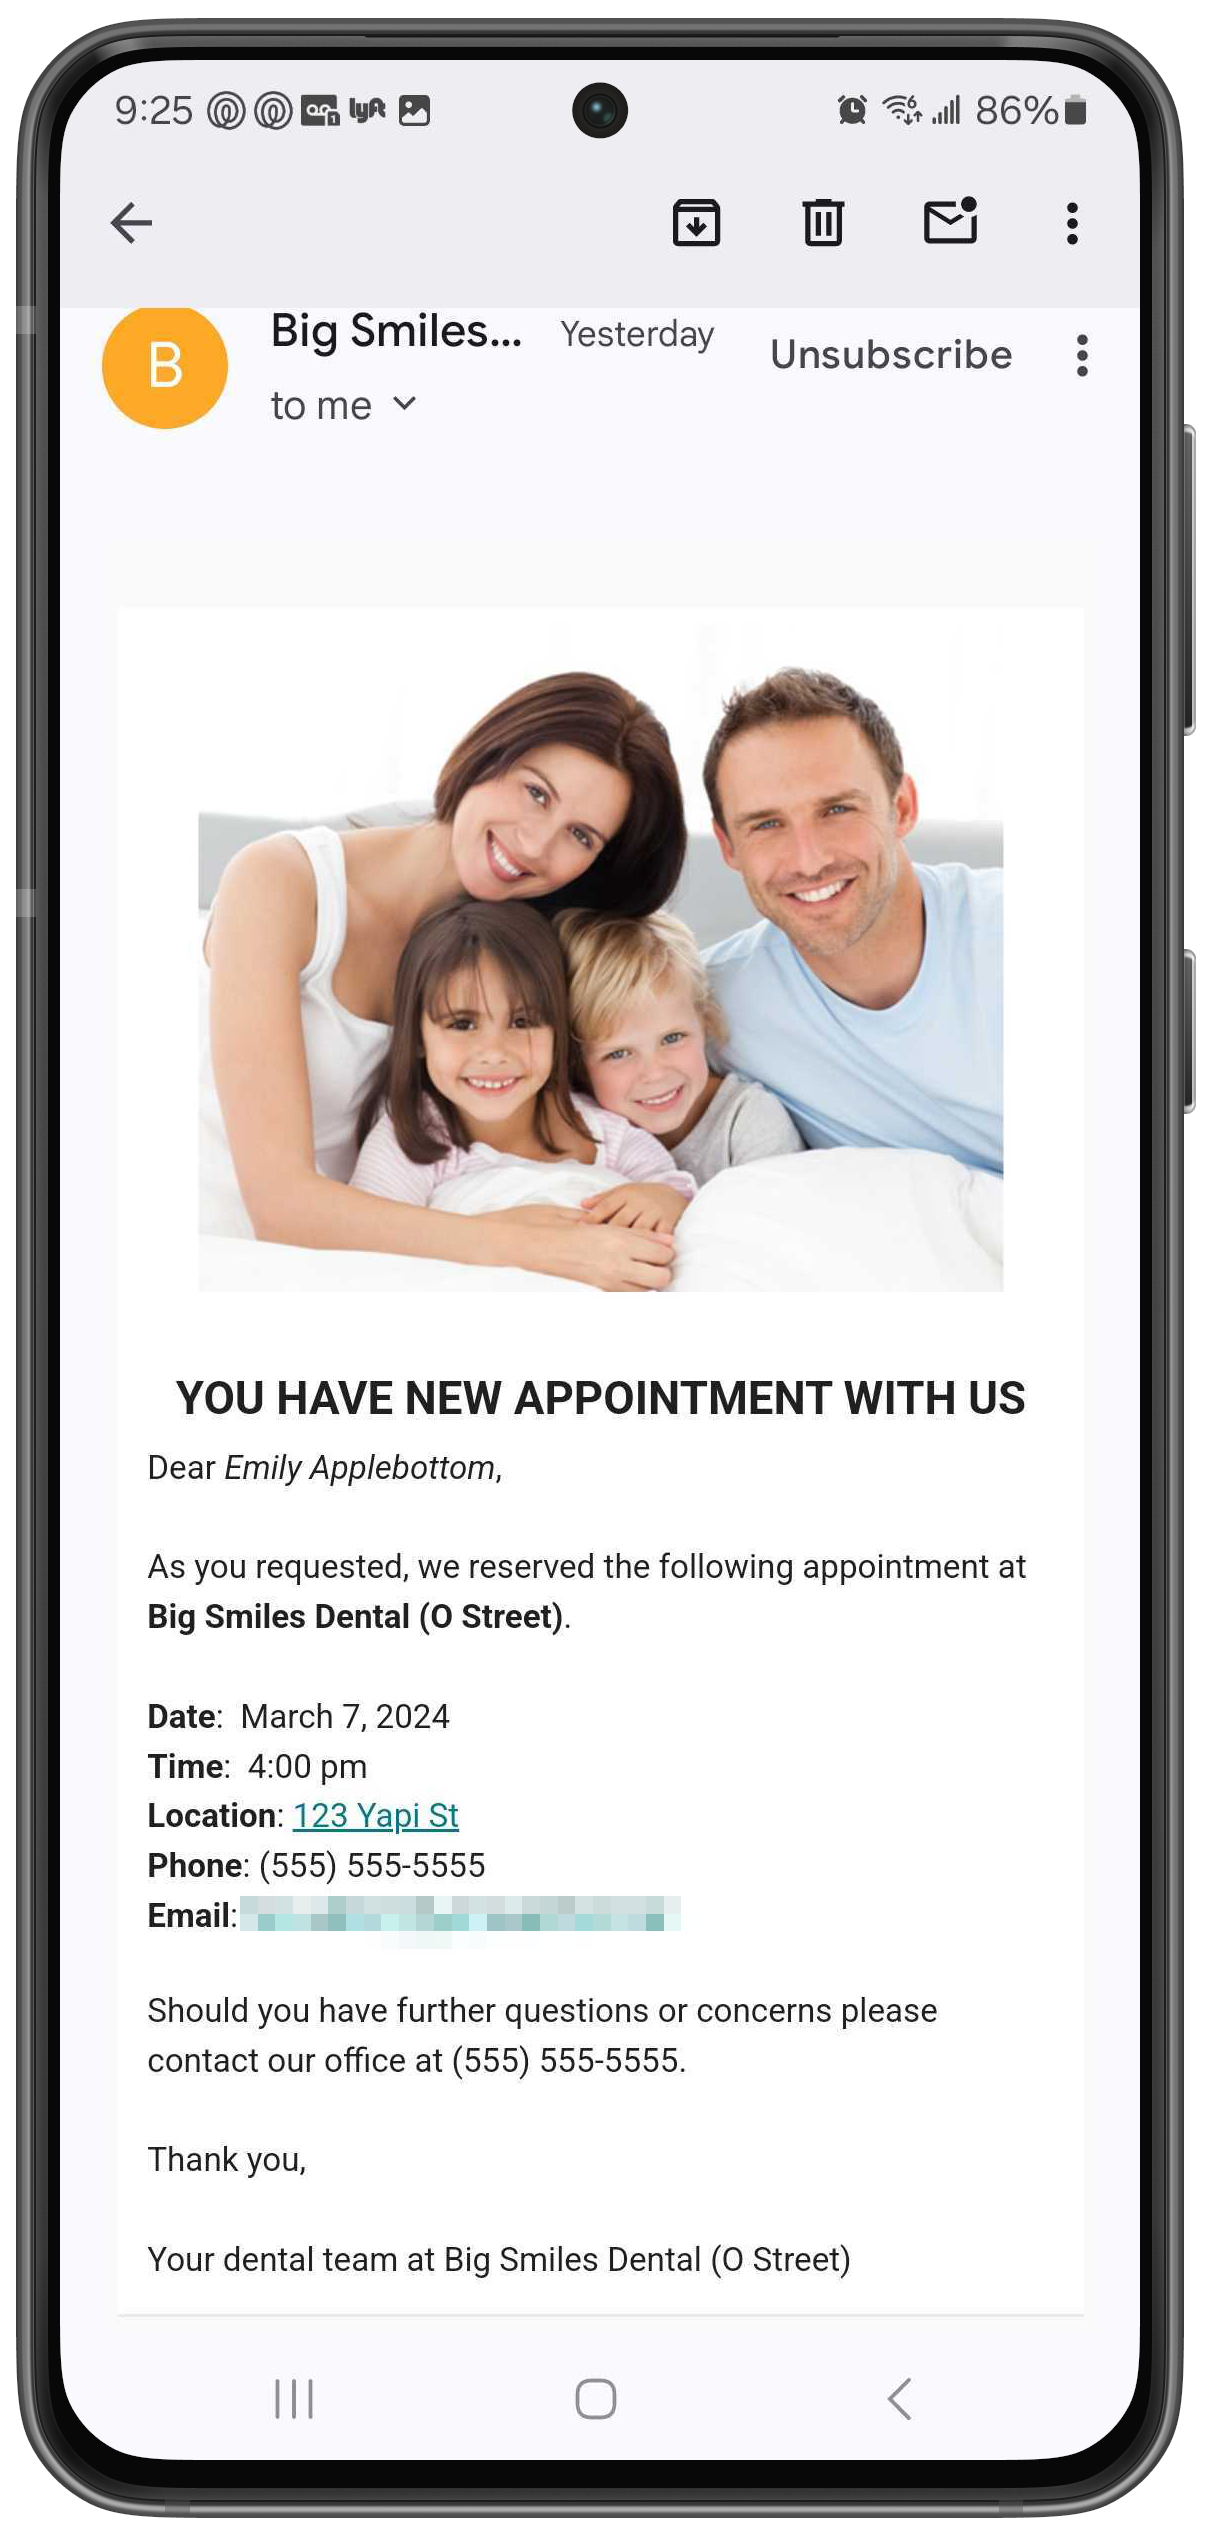
Email Confirmation
If you've set up an email confirmation in your Online Scheduling Settings, patients are automatically sent an email that has their appointment information:
 |
Add to Calendar
If the patient selects the add to calendar button, the screen below displays.
|
This section shows an existing patient's point of view when using Online Scheduling to schedule a recall appointment.
The first screen a patient sees when clicking on a Online Scheduling link in their Recall Reminder is a welcome message. This screen asks them to enter their date of birth to verify they're your patient:
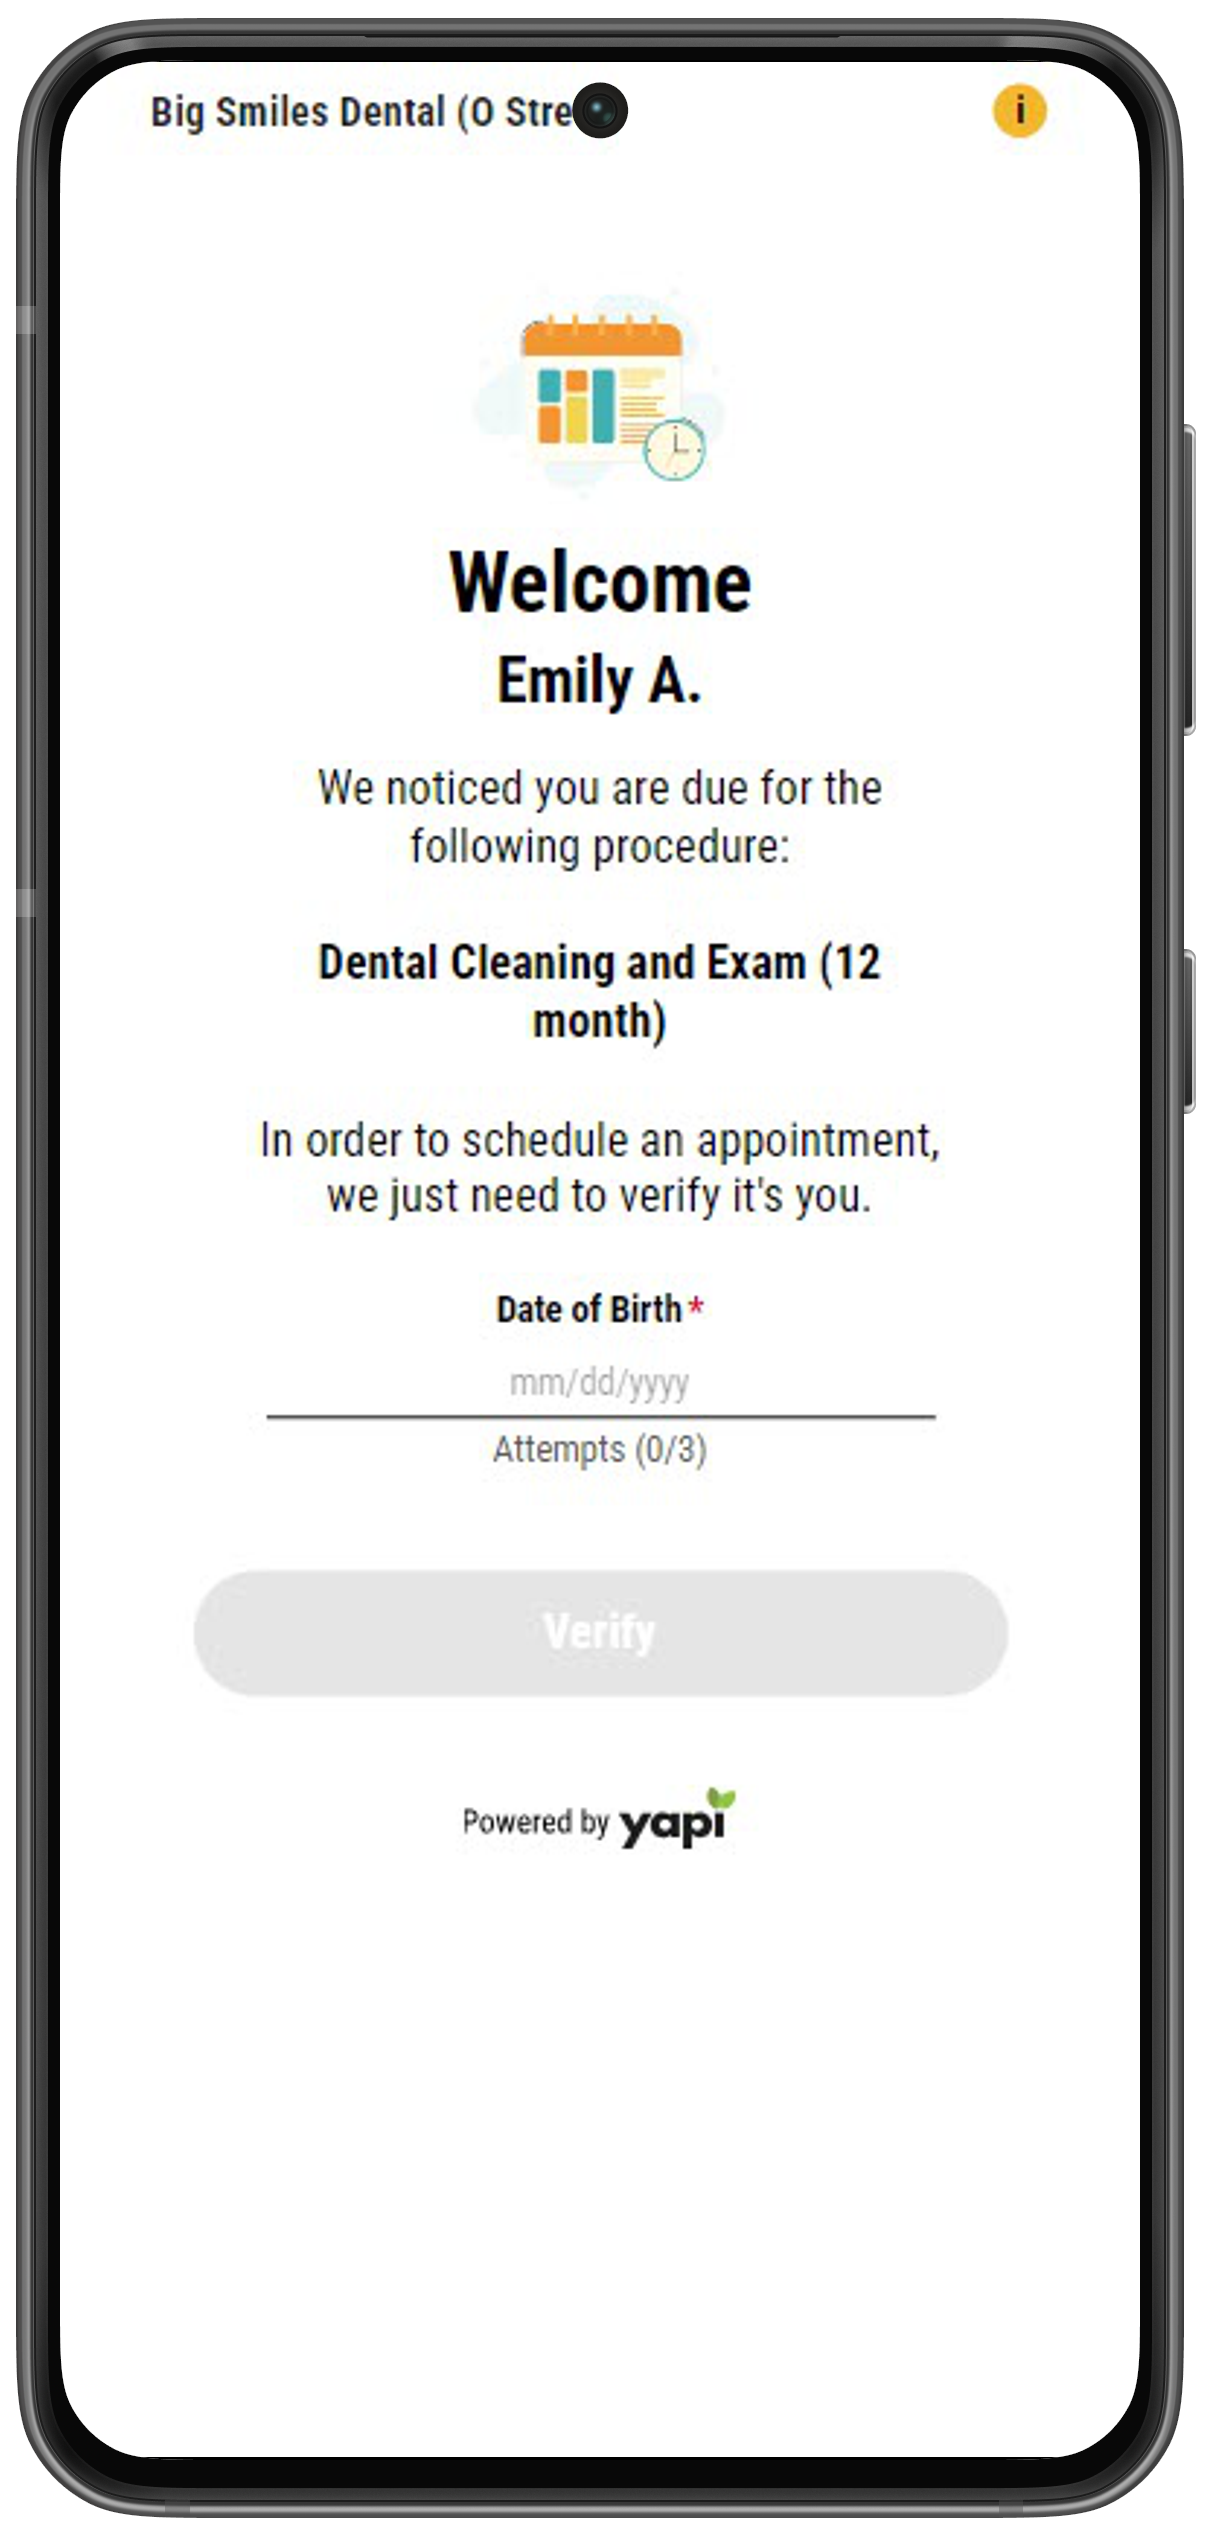 |
Example of Patient Verification
Note
The patient has 3 attempts to enter the correct birthdate. If they aren't able to do this after 3 tries, they'll see a message to contact your office.
Once the system verifies the patient's identity, they can select a date and time for their appointment and, if they want, a provider they want to see. If a patient chooses a specific provider, they'll see available appointments for that provider only.
 |
If you've added bios for your providers in Online Scheduling, patients can click View Bio next to each provider name to read a short summary about them.
|
To officially book their appointment, patients must review the appointment details they've selected and click Confirm Selection at the bottom of the screen. When reviewing the appointment details, patients can also leave a message for your office by typing into the Anything you'd like us to know? field. This message then shows in the Appointment Note in Eaglesoft and will display in the patient's appointment details in Leap.
 |
Before confirming their selection, the patient can also select Notify me if an earlier appointment time becomes available. This automatically adds the appointment to your ASAP list in YAPI and sets the appointment as Sooner if Possible in Eaglesoft.
When the patient clicks Confirm Selection, the system will attempt to book the appointment. If the booking is successful, the patient is taken to the Appointment Booked page.
Note
If the patient’s selected time and date have been booked before they were able to complete their booking, the system will display an error and send them back to the appointment selection screen to select a new date and time.
Once an appointment has been successfully booked in Eaglesoft the patient will see a You're All Set message along with their appointment details.
 |
If you've set up an email confirmation in your Online Scheduling settings, patients are automatically sent an email that has their appointment information:
 |
At the bottom of the confirmation page, patients also have the option of clicking Add to Calendar to add the appointment to their Google calendar:
|