
YAPI Help Center

Form Editor

Yapi Leap's Form Editor gives Leap Admins the freedom to easily create and edit forms any time you want! Here you can:

Form Editor Overview

Parts of the Form Editor Page in Leap

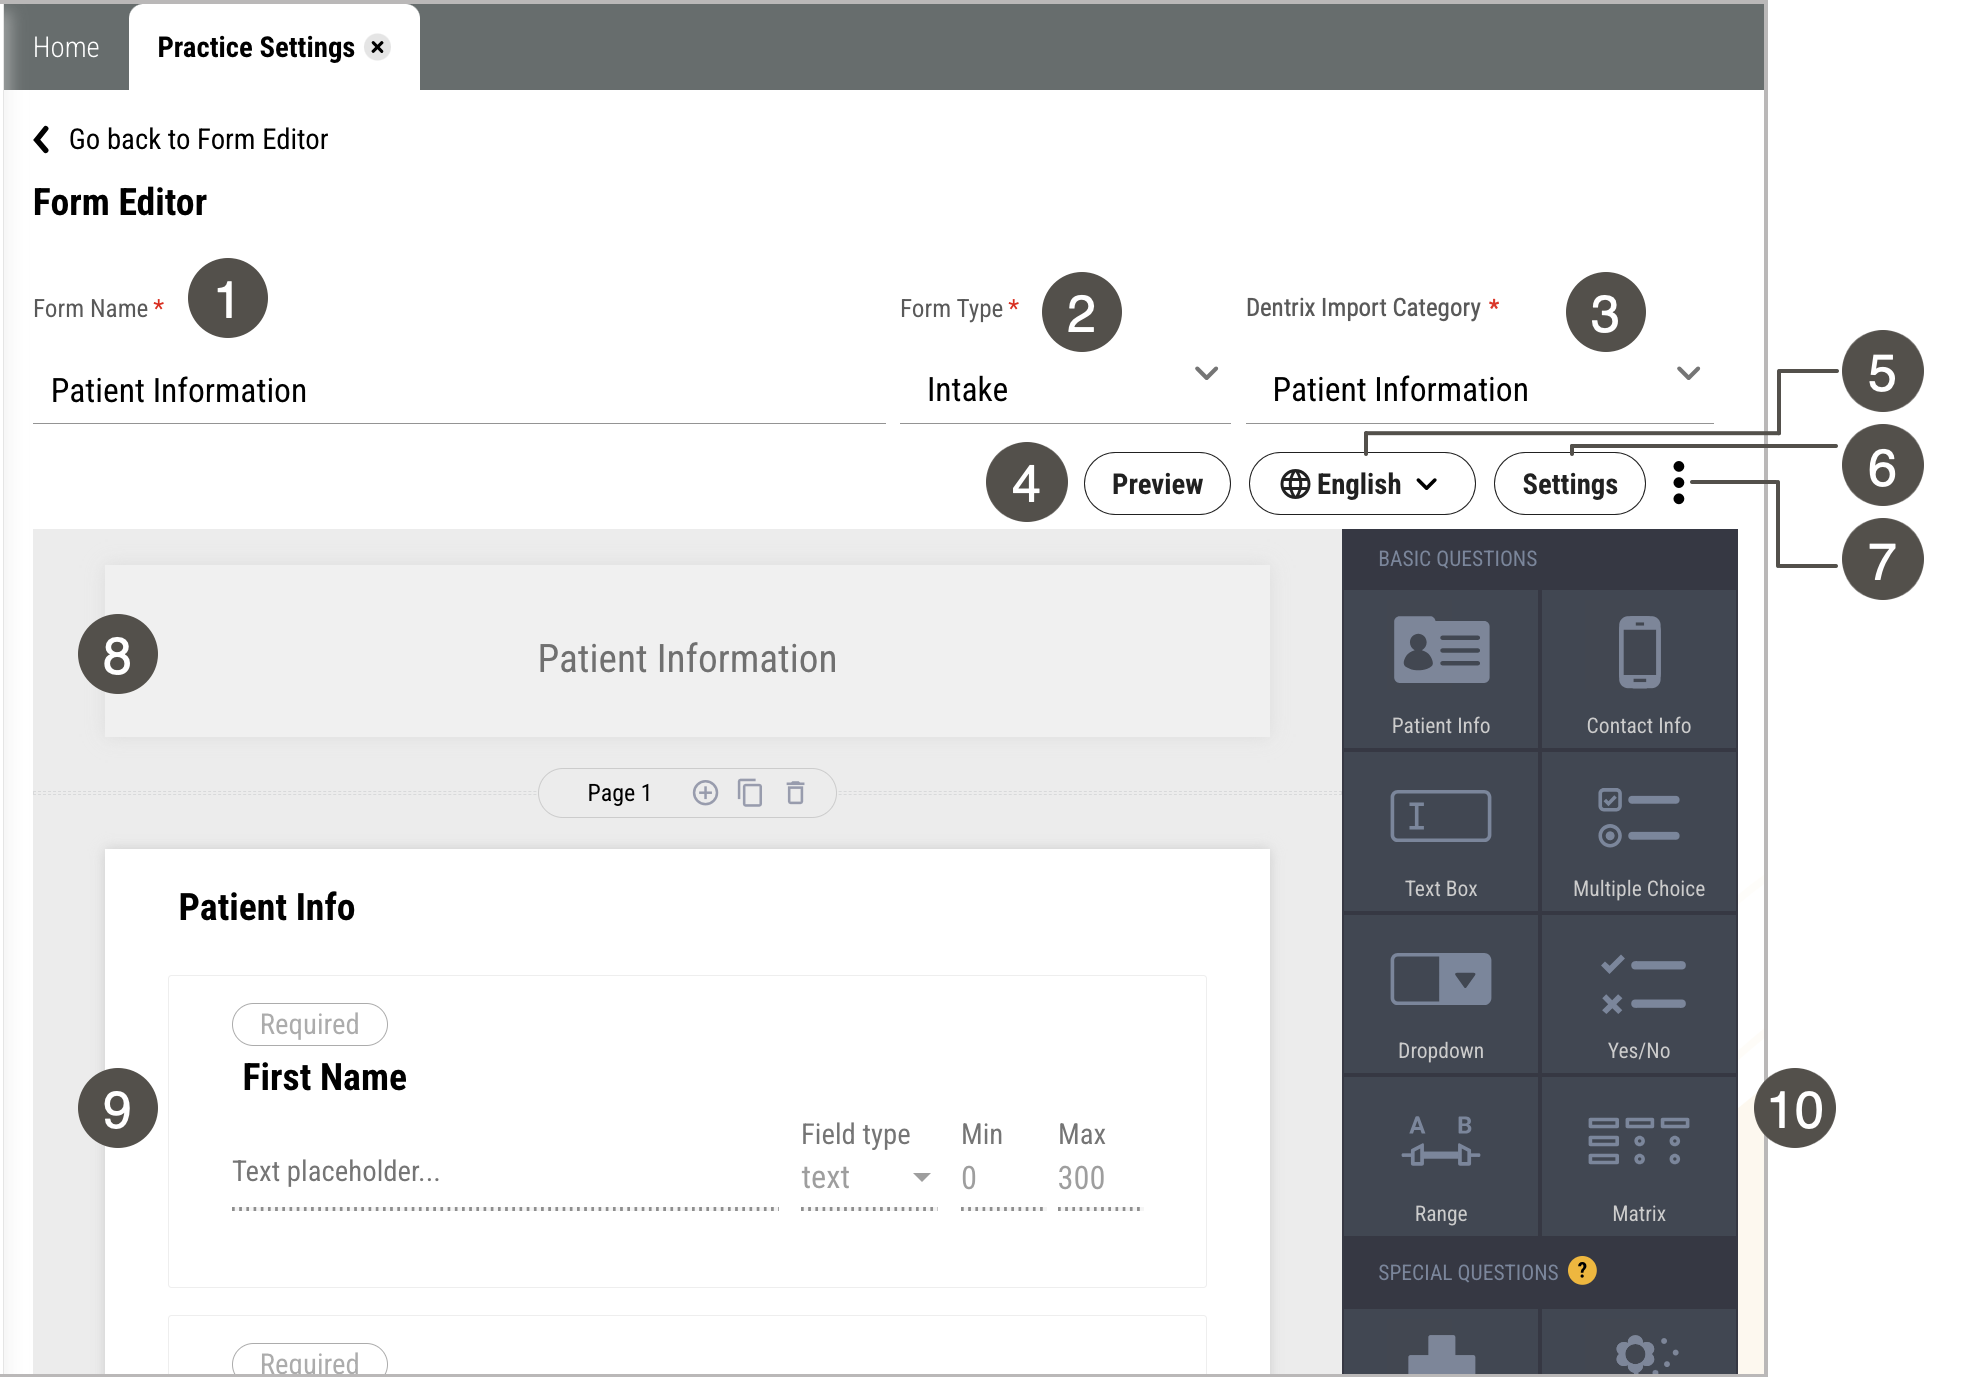
To create a new form in the Form Editor's edit mode, click Settings > Practice Settings > Forms Library and Editor > New Form > Create from Scratch. To view or change an existing form, click Settings > Practice Settings > Forms Library and Editor > click the name of any form, then click Edit.

Updated_FormEditor.png

One.

Form Name

The name of the form that you'll see in your Forms Library and that will be included at the top of the final filed form PDF.

Two.

Form Type

The type of form this is: Consent, Intake, Medical History, Patient Information, or Questionnaire. This helps organize the forms in your library so you can easily see what's what.

Three.

Eaglesoft Import Category

This is the folder in Eaglesoft where the form will file once a patient completes it.

Four.

Preview

Opens the form in Preview Mode so you can see what the form will look like for patients.

Five.

Language

Allows you to select a language to view and edit the form in so that patients can view the form in the language of their choice. This button only appears if you have Multi Language Form selected in Settings.

Six.

Settings

Opens the form's settings including:

  • Page navigation mode - Sets whether the form scrolls as one long page or is separate pages.

  • Languages - Allows you to select the languages you want to translate the form into.

  • Date/Time - Lets you set the date and time format for your form.

Seven.

3-Dot Icon

Lets you take additional actions with the form such as:

  • Duplicate & Edit

  • Delete

Eight.

Header

This is the editable header that appears at the top of your form. We recommend that you add the form's title, but you can also add your practice's logo or another image too! You can also add a footer at the bottom of your form (not shown).

Nine.

Form Body

This is the main content of your form. You can drag and drop questions and other elements here from the right panel, edit them, delete them, and move them around to create and customize your form.

Ten.

Basic Questions, Special Questions, & Other Elements

This panel contains all the question types and elements you can add to your form like multiple choice questions, lists of medical conditions, and signature boxes. For a full list, check out Drag-and-Drop Questions in the Form Editor.

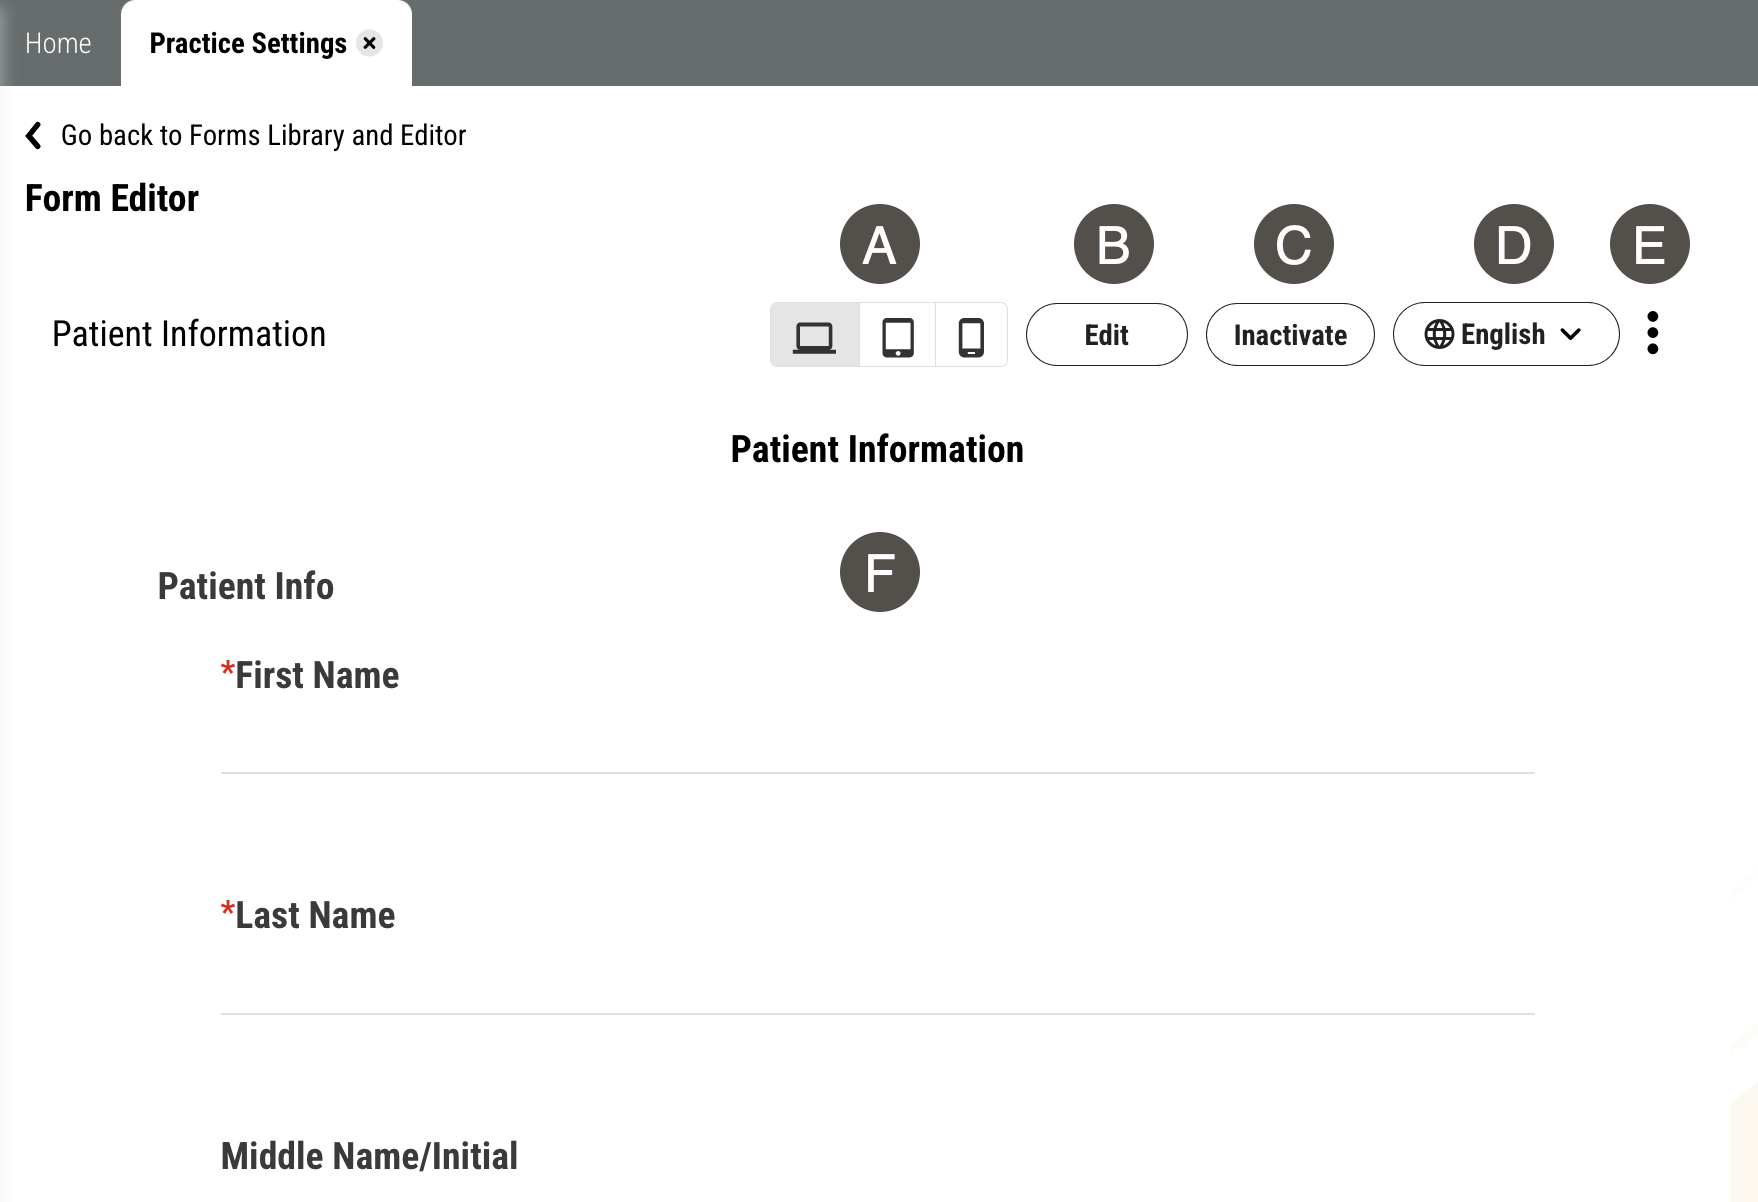
To view an existing form in the Form Editor's preview mode, click Settings > Practice Settings > Forms Library and Editor, then click the name of any form. If you're working on a new form and want to preview it, click Preview from the Form Editor in edit mode.

Updated_Preview_FormEditor.png

Letter A.

Device Size

Allows you to select a device size to view the form so you can see it as it would show on a computer, tablet, or phone.

Letter B.

Edit

Opens the form in Edit mode so you can make changes to the form.

Letter C.

Activate/Inactivate

Allows your to activate your form to used with patients or inactivate it so it can't be assigned to patients but stays in your library.

Letter D.

Language

Shows the language used for the form. If the form is available in another language, you can click the button to see a which other language(s) the form is available in.

Letter E.

3-Dot Icon

Lets you take additional actions with the form such as:

  • Duplicate & Edit

  • Delete

Letter F.

Form Body

This is the main content of your form as patients will see it.

Some Things You Should Know About the Form Editor

  • Each Leap form can have up to 4 signatures total (this includes Smart Signatures and Standard Signatures together) and only 1 can be a Smart Signature for a Provider.