Prepping Eaglesoft for Yapi Leap's Online Scheduling
This article provides an overview of the Eaglesoft settings you'll need to configure so your practice can use Leap's Online Scheduling feature. Follow the instructions in each section below to review these settings and make any necessary edits before you set up Online Scheduling.
In order for Yapi's Online Scheduling feature to work properly, auto patient numbering needs to be enabled in Eaglesoft. Use the instructions below to check this setting and make sure it's on.
Open Eaglesoft in Practice Management Mode (you should see an image of a waiting room).
Click File, then Preferences from the toolbar.
Click the Patient tab.
Make sure the Use Auto Patient Numbering - Start With: checkbox is selected.
Click OK.
Online Scheduling uses the provider availability you set in Eaglesoft to present patients with available times when they schedule online. It's important to set the schedule of any provider you want available for Online Scheduling and keep their schedule up to date in Eaglesoft so patients don't accidentally schedule on a time that the provider is unavailable.
Use the instructions below to set each provider's availability to the time frames you want patients to be able to schedule for online.
Tip
If your office doesn't want patients to book with a specific provider, we recommend creating a placeholder provider with a patient-friendly name like "Any Dentist" or "Any Hygienist". To learn more about how to add a provider, check out the instructions in Setup New or Edit Provider / Staff Member  on the Eaglesoft website.
Open Eaglesoft in Practice Management Mode (you should see an image of a waiting room).
In the toolbar, click Lists and select Providers/Staff:
Review the availability for your existing providers:
In the list, click on the name of a provider that you want to be able to take online-scheduled appointments. Then click Edit.
Click Hours. In the Provider Hours window, click on each item in the list to the left (including Default Provider Hours) and review the provider's availability on the right. Double-click a time to make any necessary edits.
Add any new providers along with their availability for each chair:
Click New. Complete all the fields in the New Provider/Staff window, then click Hours.
Review the provider's Default Provider Hours on the right and make any necessary edits.
Choose a chair or location from the Chair/Location pulldown menu, then click Assign Chair/Location. Click on the newly added chair on the left and make any necessary edits to the provider's availability for that chair on the right.
Click Save, then click OK.
Repeat for any additional providers that you want to be available for online scheduling.
Tip
For detailed instructions on editing provider schedules, see Provider Hours and Colors in OnSchedule on the Eaglesoft Website.
Online Scheduling uses your active Recall Types to help existing patients schedule their hygiene appointments, so you'll want to know which recalls you have set up in Eaglesoft before activating Online Scheduling. To view your set Recall Types:
Open Eaglesoft in Practice Management Mode (you should see an image of a waiting room).
In the toolbar, click Lists and select General Setup, then Recall Types.
If you see a message that reads "The Recall Types list is available only when using the 'Use Multiple Recalls' option in File/Preferences,' this means your practice is using Eaglesoft's default Next Recall Type for all your recalls. (This is common.)
If you want to be able to have patients schedule different types of recall appointments online (like Prophy and Perio), you need to set up these separate types in Eaglesoft. For instructions, proceed to the section below.
If you see the Recall Types List window, note the recall types listed here. Your recall types should reflect the recall appointment types you want recall patients to be able schedule online. If you want to make changes, proceed to the section below.
To enable Multiple Recall Types in Eaglesoft so you can set up separate recalls for Online Scheduling, follow the steps below:
Open Eaglesoft in Practice Management Mode (you should see an image of a waiting room).
In the toolbar, click File and select Preferences.
Check the Use Multiple Recalls box. Then click OK and OK again.
Proceed to Adding & Editing Recall Types below.
If you've just enabled Multiple Recall Types or you need to edit the multiple recall types you already have, follow the steps below.
In the toolbar, click Lists and select General Setup, then Recall Types.
To Add a Recall Type: Click New.
Description: Enter the name of the recall type and make sure it's patient-friendly like "Routine Cleaning & Exam" instead of "Prophy." If you use Recall Reminders, this is the name patients will see in their reminder.
Frequency: Enter how much time should pass before this recall type is due.
Click OK.
Tip
We recommend also marking the Use this type by default box for your Routine Cleaning & Exam (Prophy) recall type, since this is the most common.
Note
It may take a few months before you start seeing these recall appointments being scheduled via Online Scheduling. For example, if you add a new Recall Type today with a frequency of 3 months, patients will not start coming due for that recall or be able to schedule online for that appointment until 3 months from now.
To Edit a Recall Type: Select the existing Recall Type, click Edit, and make your edits in the Edit Recall Type window. Then click OK.
Tip
For detailed instructions, see Multiple Recalls on the Eaglesoft Website.
When setting up Online Scheduling, you'll be asked to select an Eaglesoft user as your practice's Automated Appointment Booking Staff in Online Scheduling's General Settings:
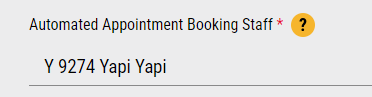
This user allows Online Scheduling to add appointments to your schedule and to a patient's Notes when they book online. Luckily, if you have the latest version of Leap, there is a separate user for you named Yapi Yapi. If you're happy with using this Yapi Yapi user as your Automated Appointment Booking Staff, you can skip this section and continue to the next section below.
If you want to select an existing member of your team as the Automated Appointment Booking Staff, you need to check their Eaglesoft settings prior to your Online Scheduling setup appointment to make sure their user profile meets the following requirements:
They are set as an Office Manager or Office Staff.
They are set as a Staff Member and not a Provider of Services.
To learn how to check this in Eaglesoft, proceed to Checking the Settings of an Existing Staff member below.
Checking the Settings of an Existing Staff Member
Open Eaglesoft in Practice Management Mode (you should see an image of a waiting room).
In the toolbar, click Lists and select Providers/Staff:
Scroll through the list and locate the staff member you want to use as your Automated Appointment Booking Staff. Then, double-click their name.
In the Edit Provider/Staff window that pops up, check that:
The staff member's Position is either Office Manager or Office Staff.
Next to This Person Is A, make sure that Staff Member is selected.
If your staff member meets these requirements, you're all set. If they don't, change the person's settings or select a different person as your Automated Appointment Booking Staff.
Eaglesoft's OnSchedule Templates can help you meet your production goals by setting up blocks of time to focus only on certain types of appointments. Leap integrates with Eaglesoft’s OnSchedule Templates by enforcing any time templates you’ve created. For example, if your office likes to only see recall patients during a specific window of time, you can create an OnSchedule Template in Eaglesoft and Leap can enforce this window for you when patients are scheduling online.
If your practice uses this feature, you'll need to check that your OnSchedule templates are set up the way that you want them to prepare for your Online Scheduling setup in Leap. This ensures that when patients schedule online, they're only scheduling treatments for the times you have blocked off for them in Eaglesoft.
Tip
To learn more about adding or editing OnSchedule Templates, see Design OnSchedule Templates to Manage your Day on Patterson’s website.
Open Eaglesoft in Practice Management Mode (you should see an image of a waiting room).
In the toolbar, click Lists and select OnSchedule, then Template Designer.
Select a template from the Template Designs window and click Edit:
Review the settings for the template.
Make sure the time blocks in your template are accurate for how your practice wants to schedule the treatments listed.
If you need to make changes, use Add Type and Clear Type to add and remove treatments to each time slot.
Repeat steps 3-4 for each template listed.
Exploding Codes are codes within Eaglesoft that group procedures together. If your practice uses Exploding Codes and wants to use them for online appointment booking, you need to note which ones you want to use for Online Scheduling:
Open Eaglesoft in Practice Management Mode (you should see an image of a waiting room).
In the toolbar, click Lists and select Exploding Codes:
Review your available Exploding Codes in the list and write down the ones you want to use for Online Scheduling (the most commonly used ones are whichever codes you use for new patient and hygiene appointments).
Optional: Add any new Exploding Codes by clicking New. In the New Exploding Code window, name the Exploding Code, add a Description, and click Add to add each ADA procedure code you want grouped under this Exploding Code. Then click OK.
Tip
For detailed instructions on adding and editing exploding codes, see Create or Edit Exploding Codes
on the Eaglesoft Website.Click Close.
Once you’ve checked and made any desired edits to the settings above, you’re ready to activate Online Scheduling! When you’re ready to get started, just reach out to your Customer Success Manager to schedule your feature activation.