Using Groups, Grids, and Logic for Forms
Yapi Leap's Form Editor makes it easy for you to build a powerful and patient friendly form for your patients, especially if you take advantage of adding a group, grid, or logic. Click the link below to see a few examples of how to use these features, then sky's the limit: you can create a form as simple or complex as you need!
Adding logic is a simple way to show or hide questions on your form based on a patient's previous answer. This way, patients don't waste time reviewing questions that aren't relevant to them. In the example below for pediatric patients, additional questions are hidden but will show show based on the answer to the question How old is your child?:

What the patient sees: A question asking how old their child is.
Once the patient's age is selected, age appropriate question appear below it. In this example, three logic rules have been applied to the How old is your child? question: one for 0-5 year olds, one for 6-12 year olds, and one for 13+. The logic pop-up is accessible from the Leap Form Editor by clicking on the How old is your child? question and clicking Add Logic Rule. This is how you can enable the form to show the relevant questions that appear depending on the age a parent selects on the form.
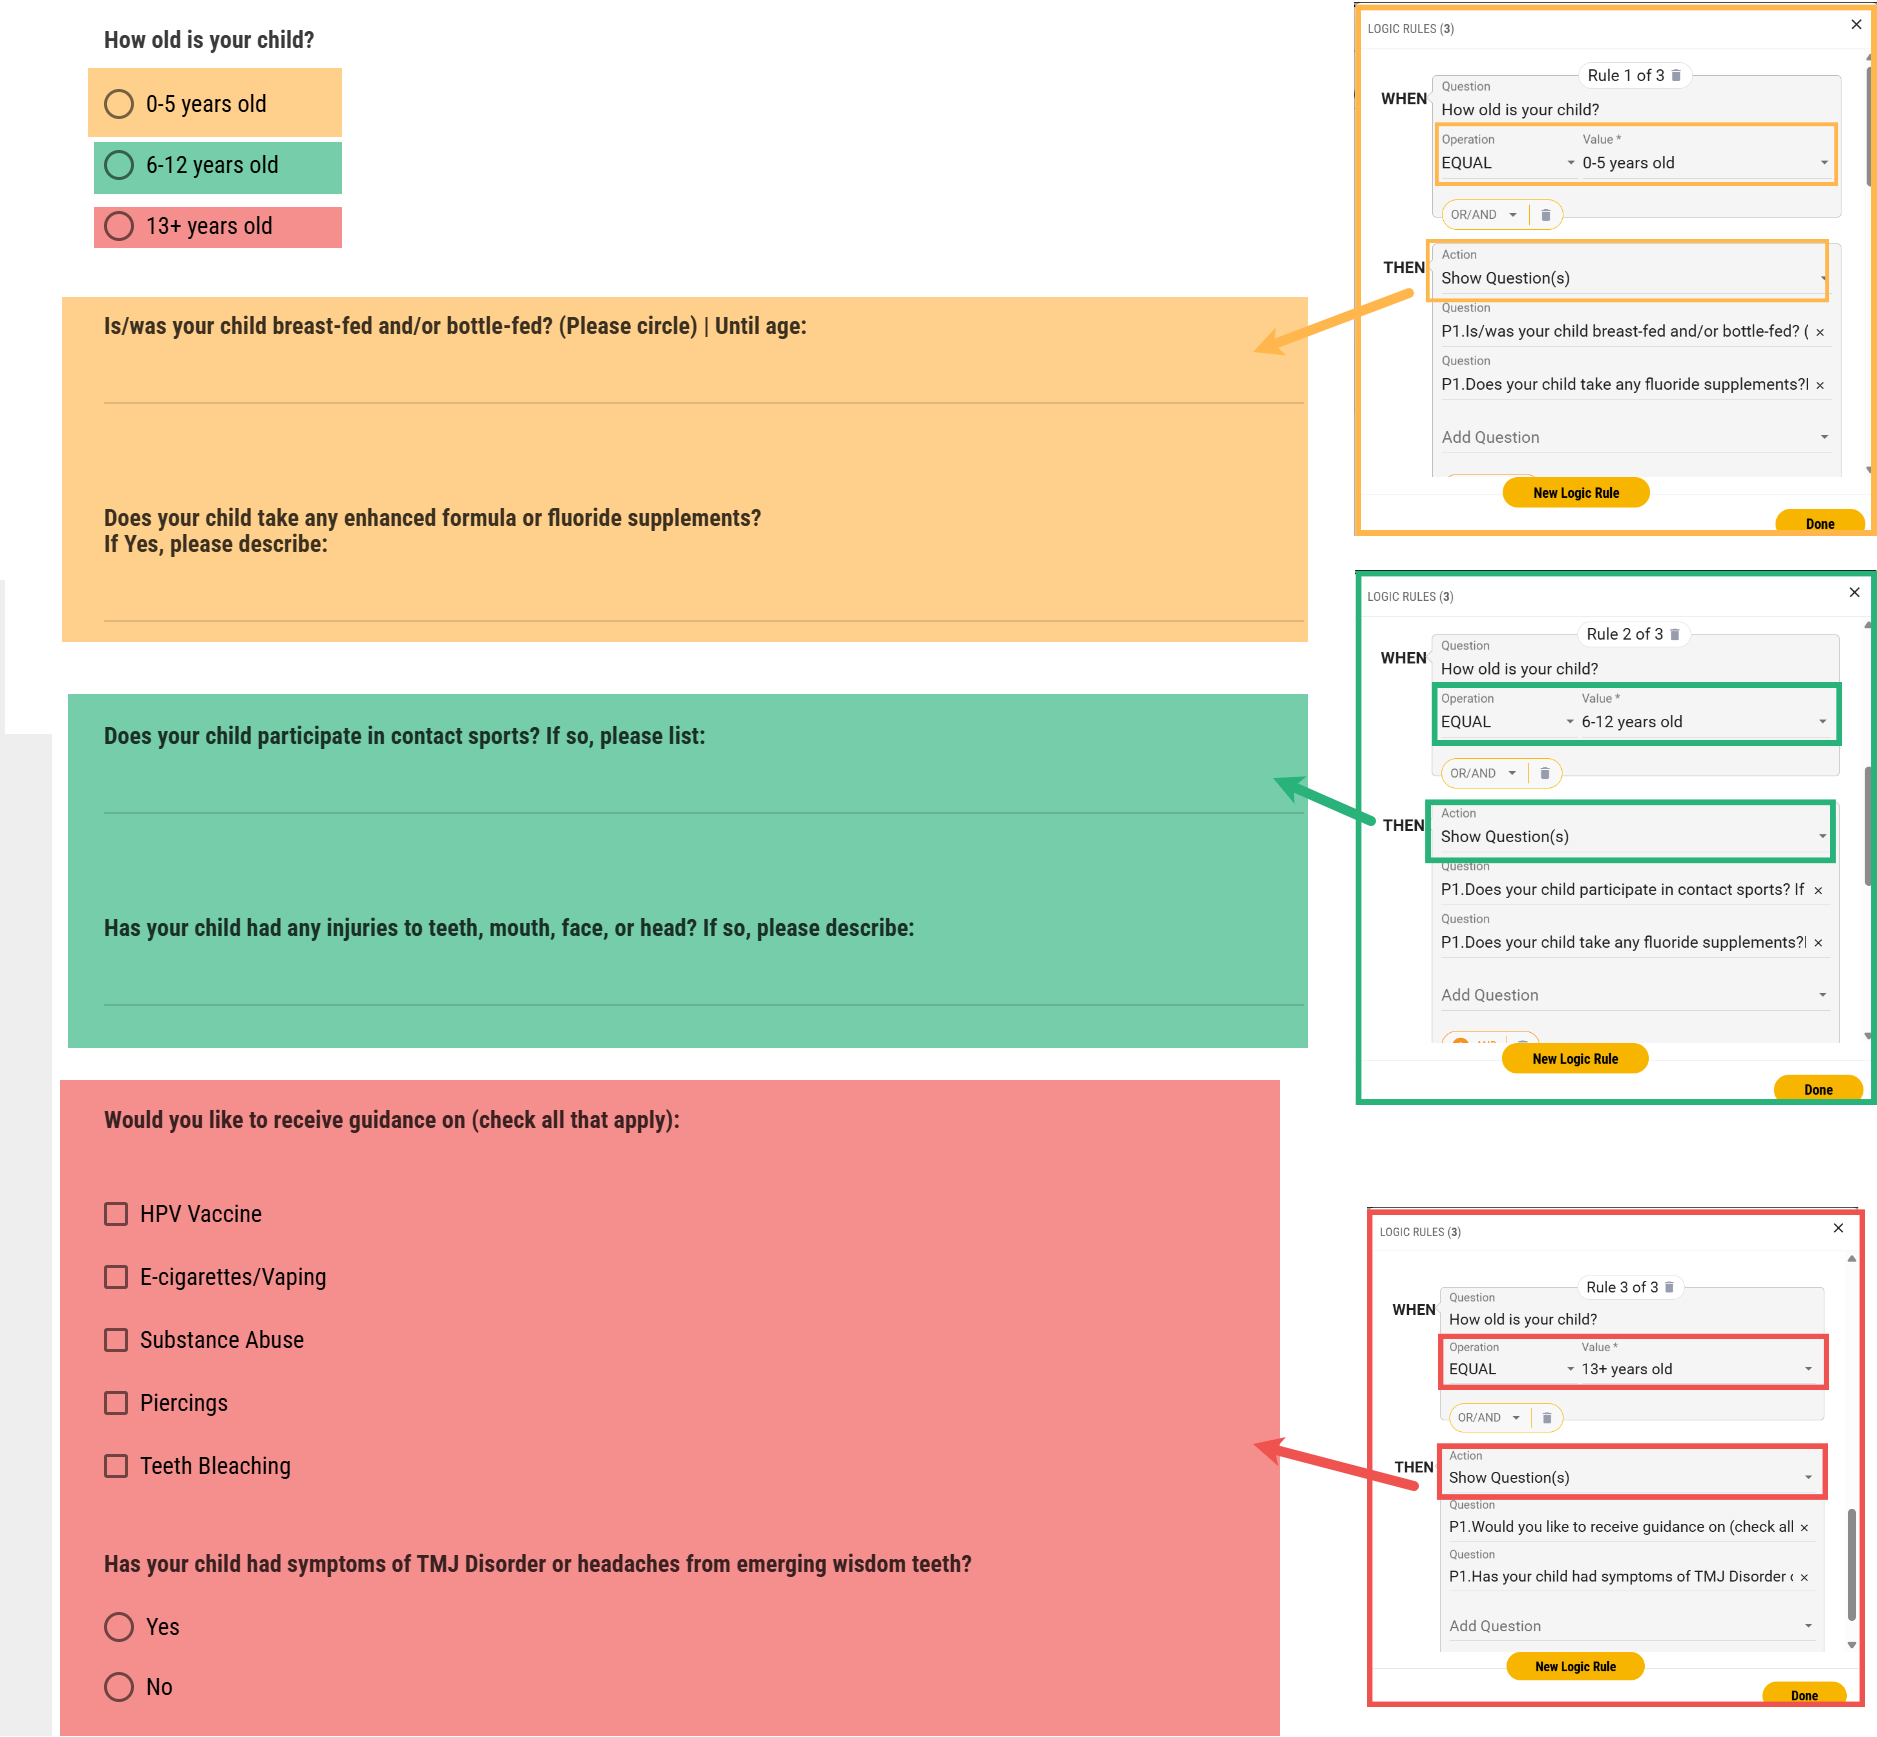
Example of the three age logic rules used to apply logic to the form.
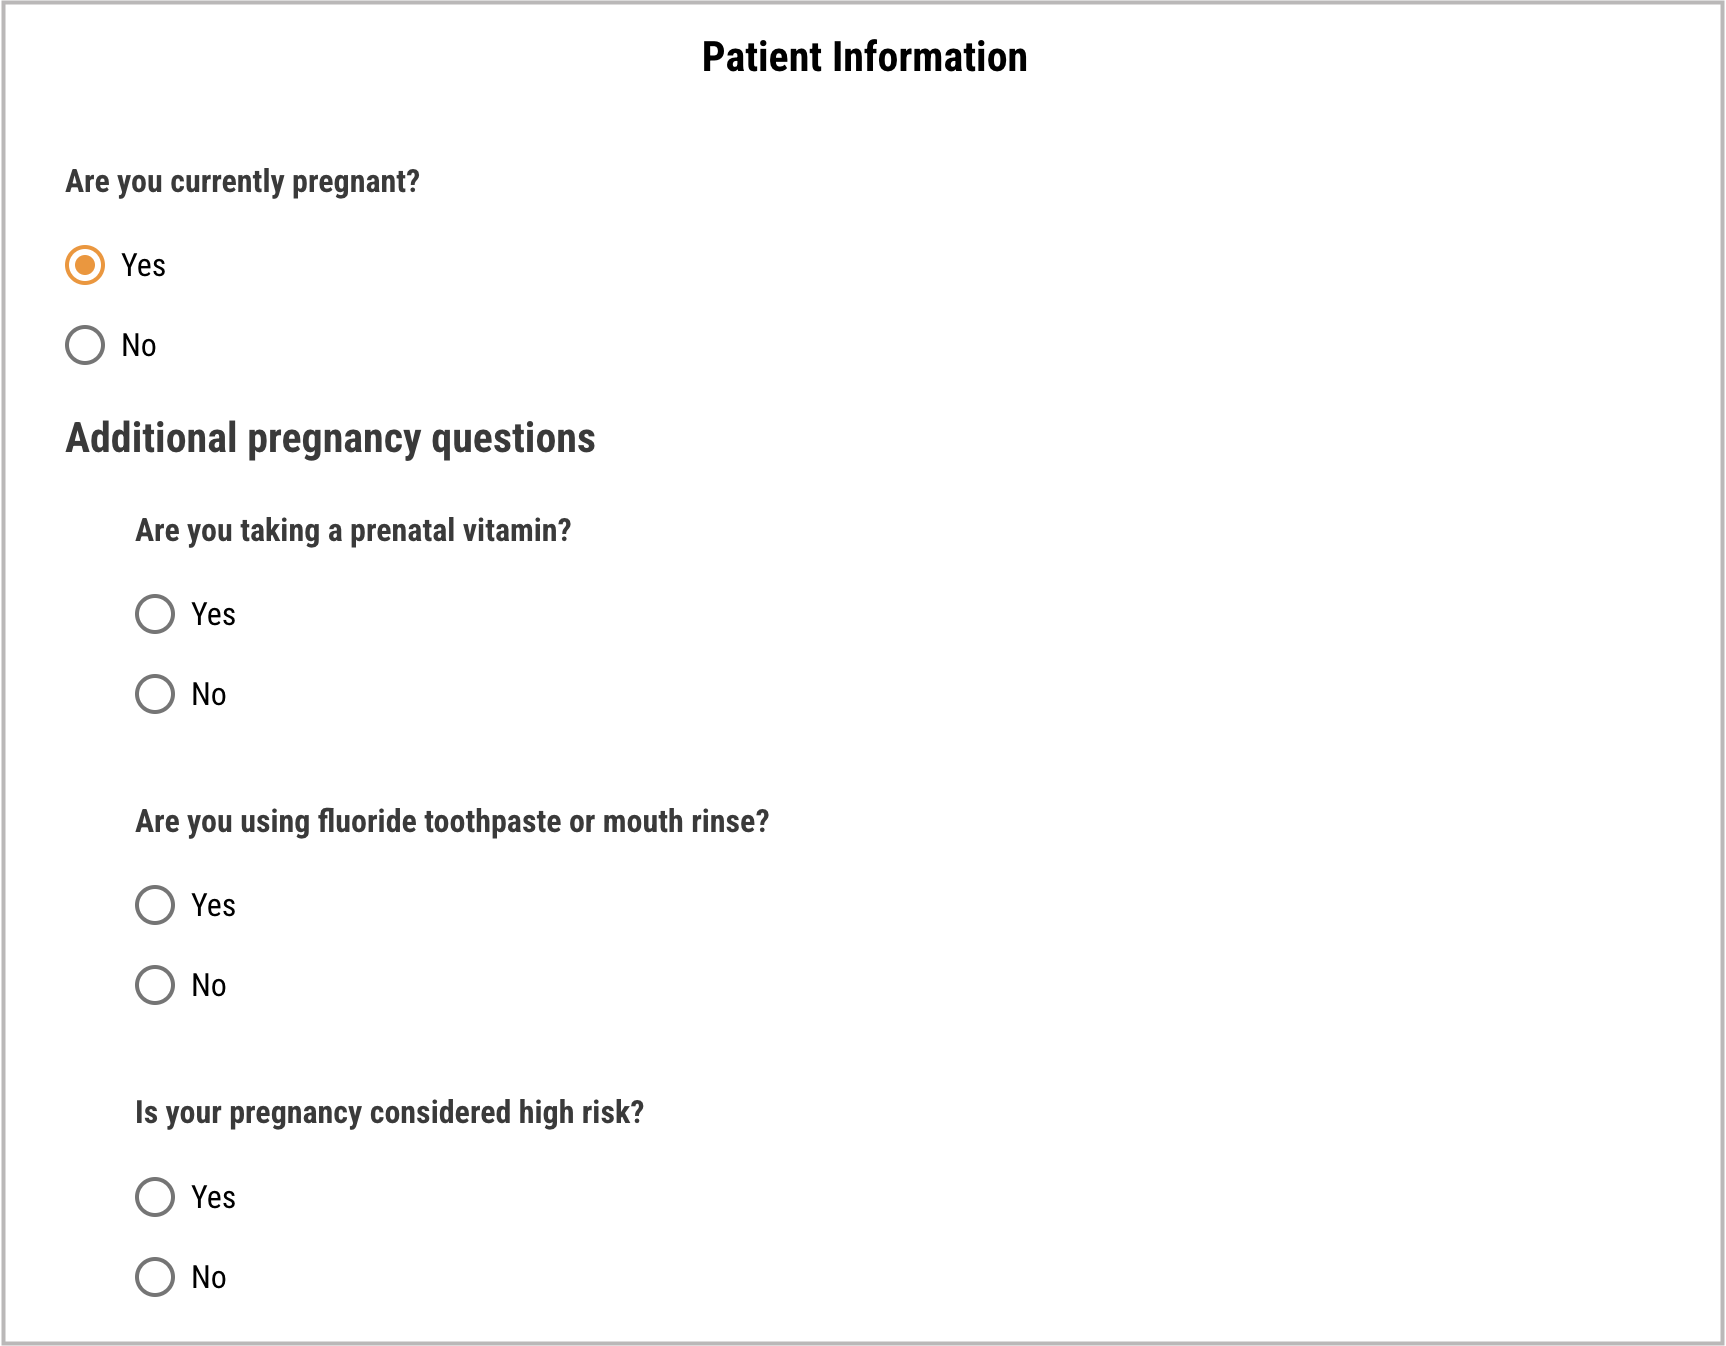
Adding questions into a Group makes it easy to hide or show all those questions based on a patient's answer with just one logic rule. For example, as shown below, there are several pregnancy-related questions in a Group that are hidden (and stay hidden) if a patient selects that No, they are not pregnant. But with logic, the questions appear when a patient selects Yes:

What the patient sees: a "No" answer keeps additional questions hidden
What the patient sees: a "Yes" answer makes additional questions show using logic
This is what that logic looks like in Leap's Form Editor. "Additional Pregnancy Questions" is a Group with questions added into. That group just happens to be marked as "Hidden" (you can see that at the top of the group). The "Are you currently pregnant?" question has logic added so the form shows the "Additional Pregnancy Questions" group when a patient selects Yes.
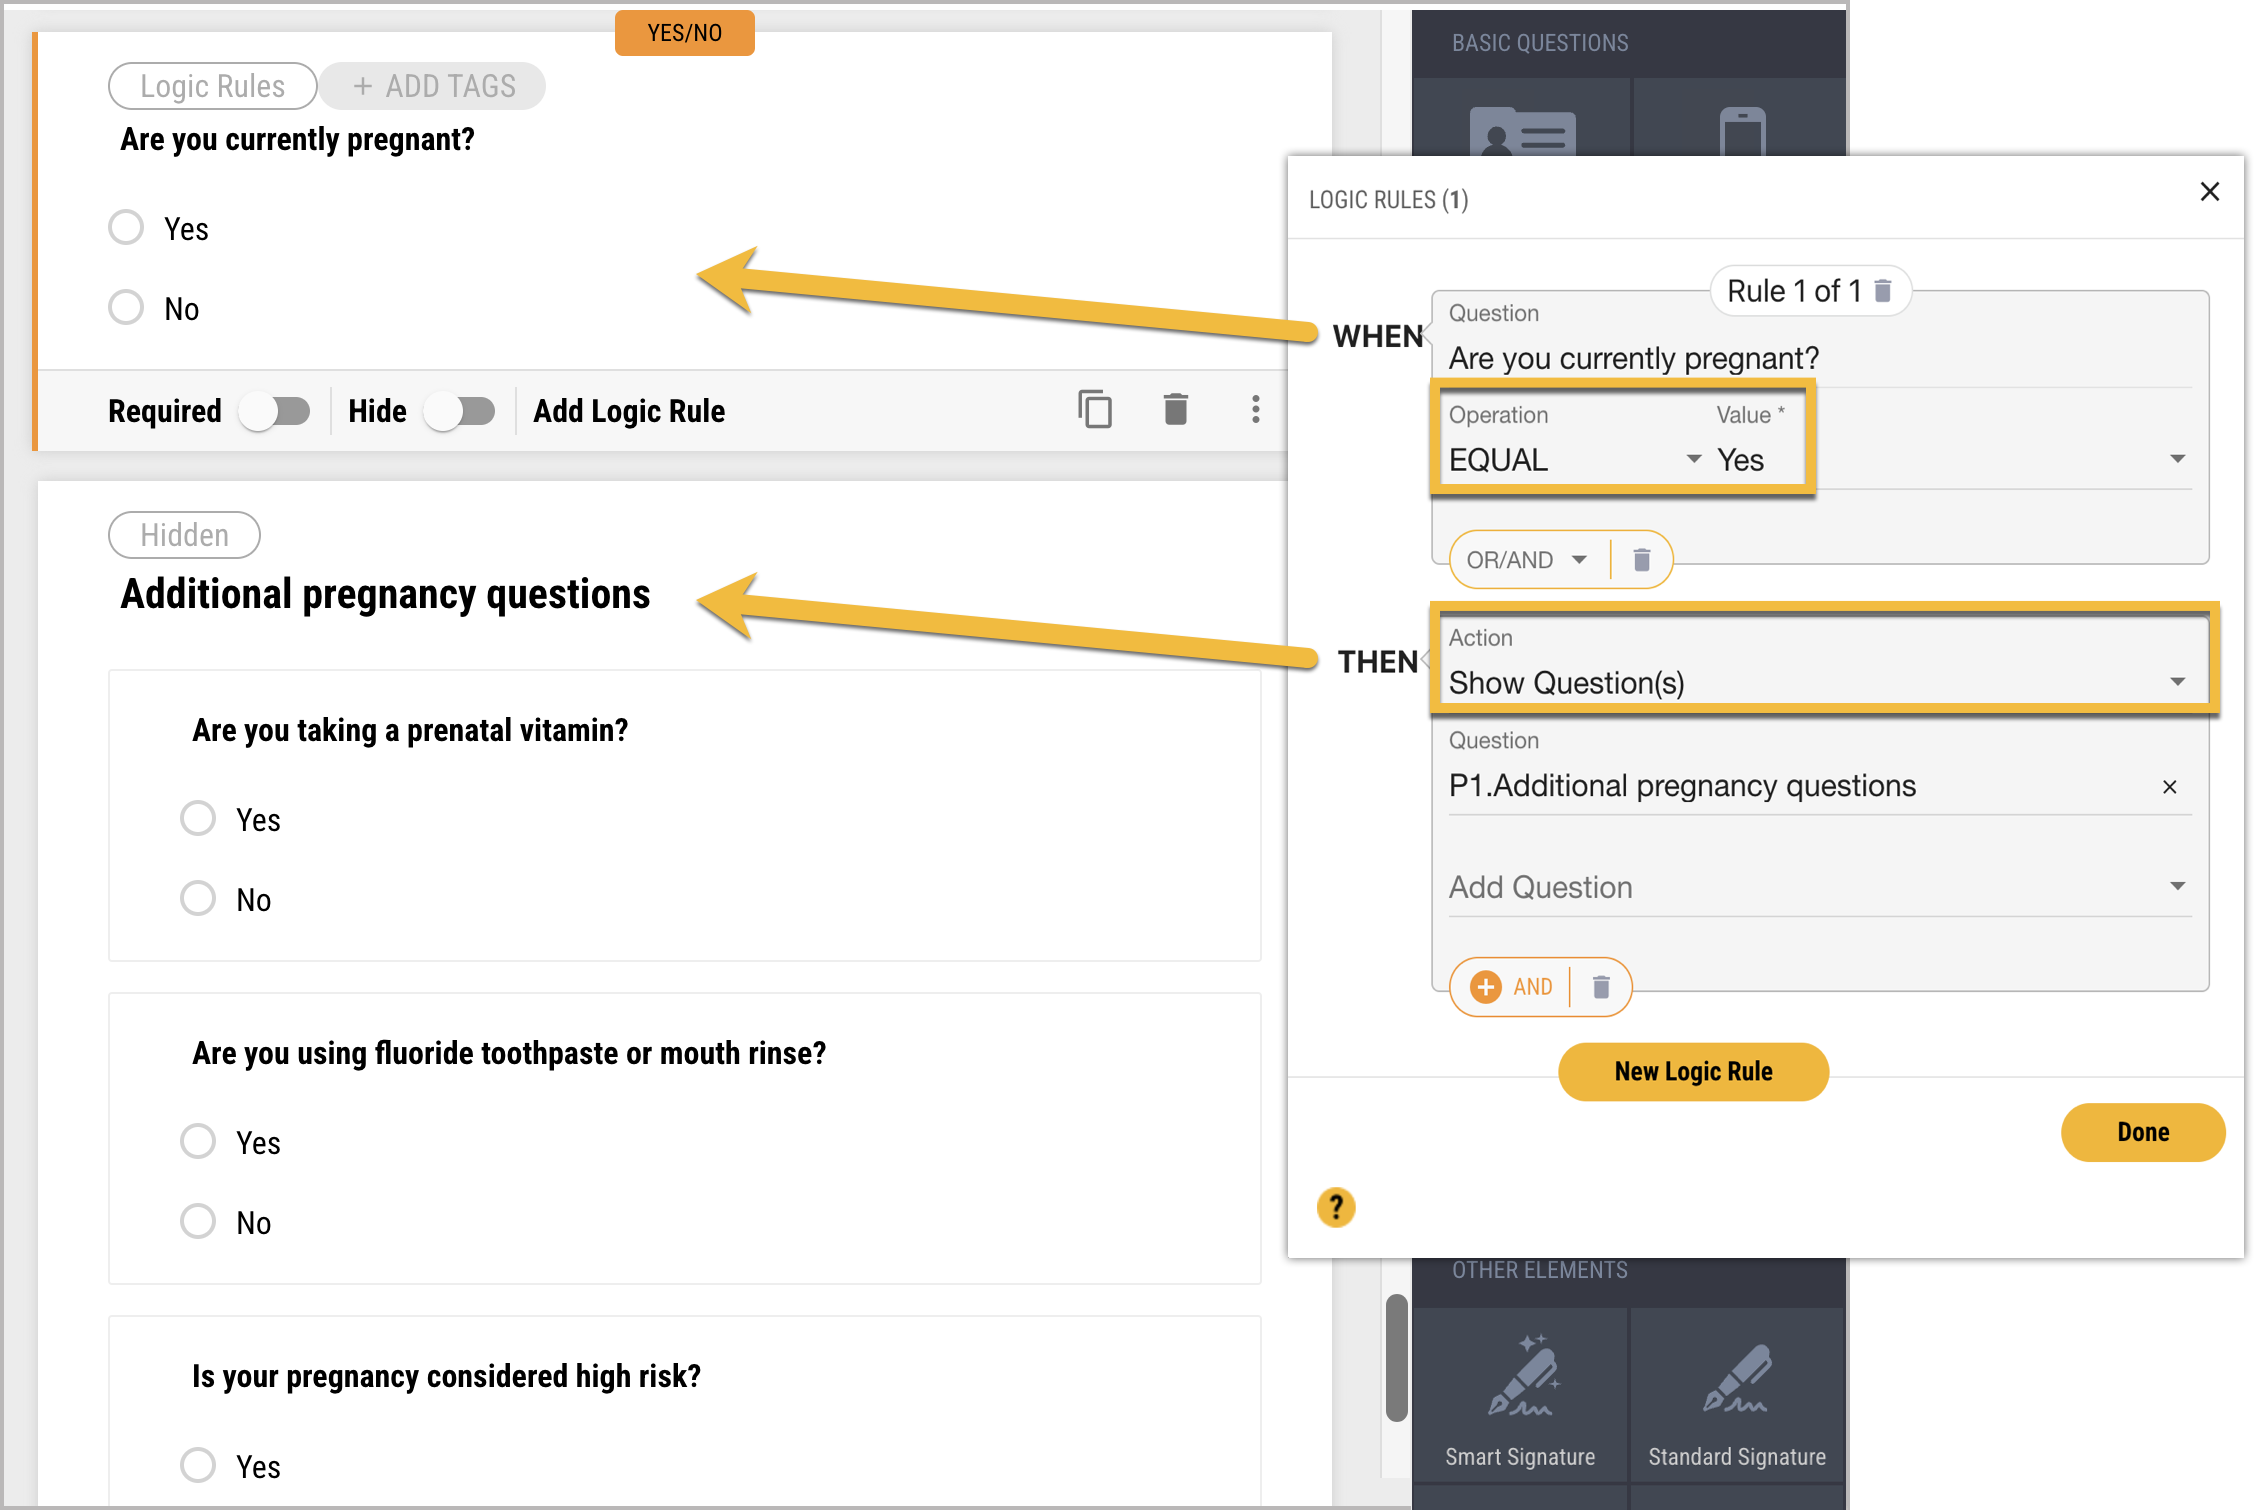
Example of group question and logic being used for pregnancy-related questions
Adding a Group
To add a Group of questions to your form, follow the steps below:
Drag and drop the Group element onto your form.
Add questions to your Group by dragging and dropping them onto the Group on your form. Then add the text of your questions and answers as you normally would.
Optional: To add logic for showing or hiding your Group, check out Adding Logic Rules to Questions (Optional).
Grids help save space on your form by having questions display side by side. For example, you can have a patient fill in their home address in one column and their mailing address in another:
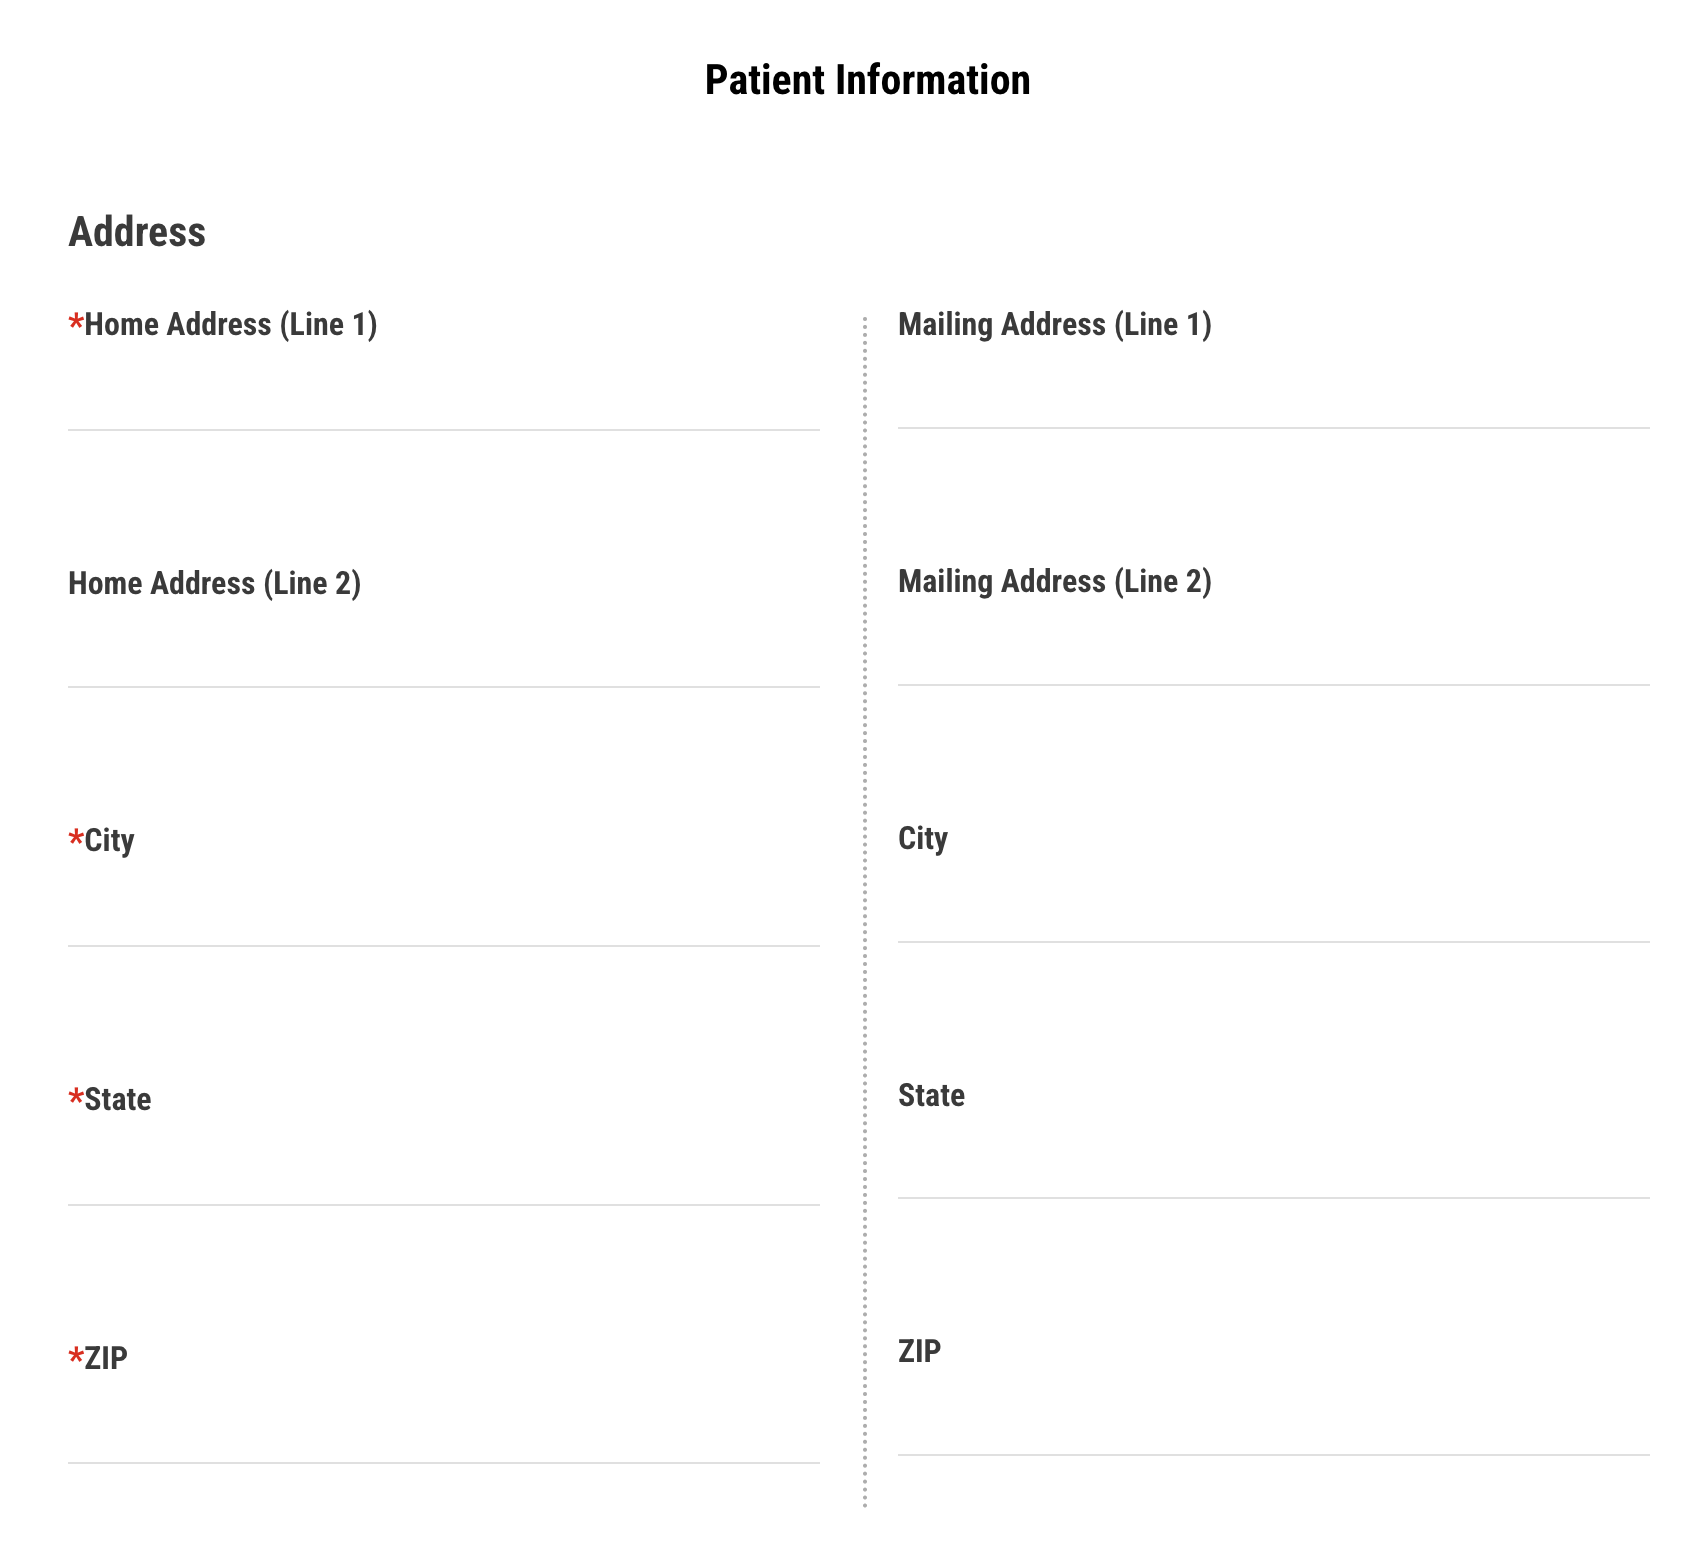
Example of a form using a Grid with two columns
This is what that Grid looks like in the Form Editor:
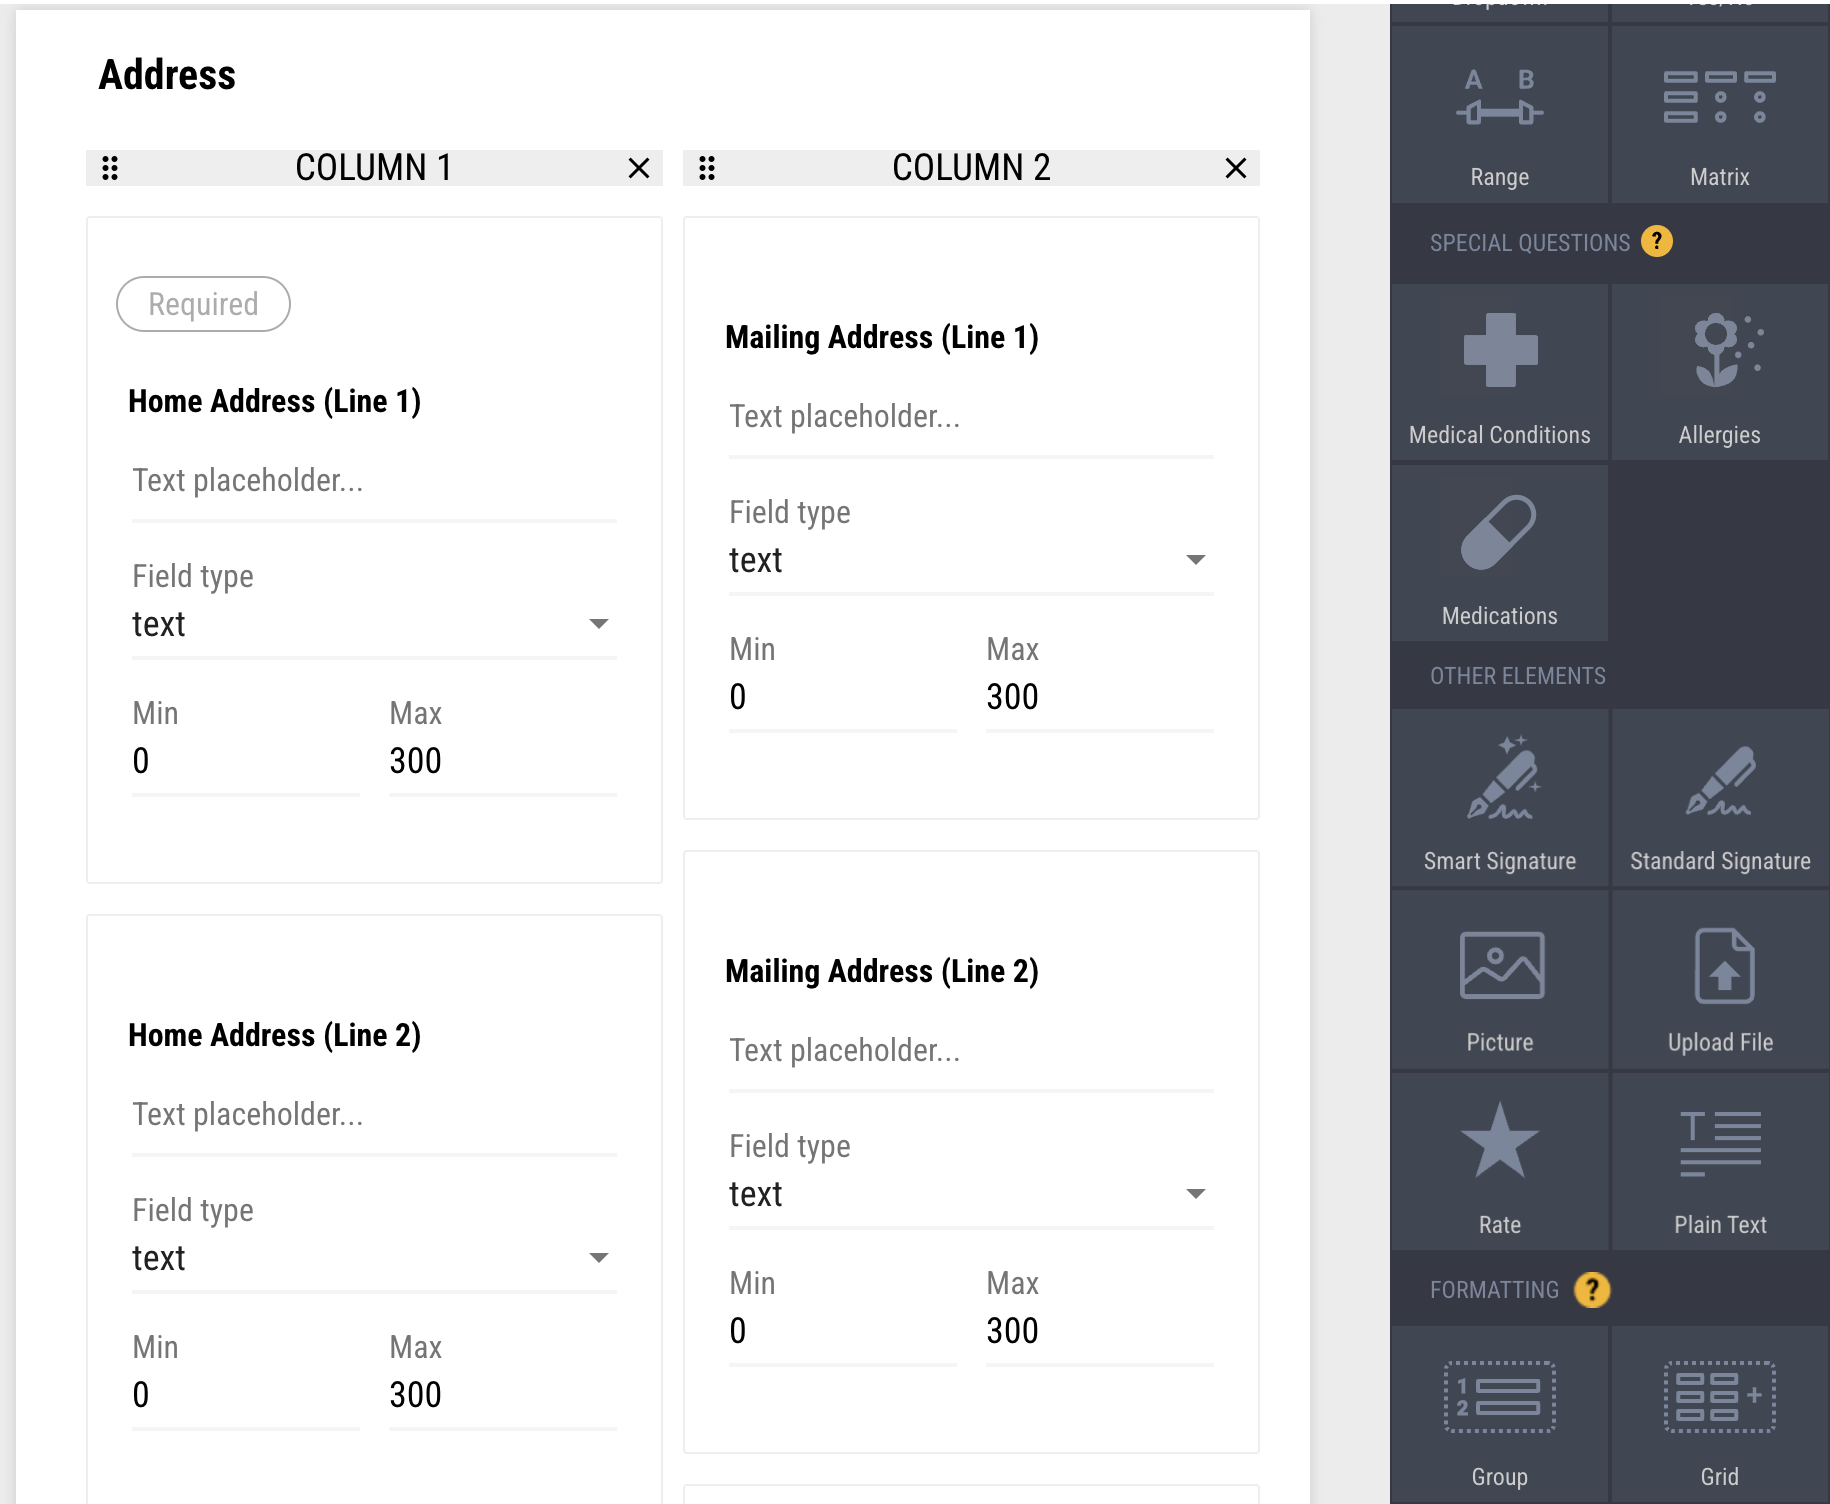
Example of a Grid in the Form Editor
Adding a Grid
To use add a Grid of questions to your form, follow the steps below:
Drag and drop the Grid element onto your form and then click on it.
Optional: Click Title to add a title to your Grid.
Click Add Column. Repeat this for as many columns as you want (we recommend no more than 3).
Drag and drop questions onto the Grid. Then add the text of your questions and answers as you normally would.
Optional: Click Preview to see what your Grid will look like when patients view it on the form.